We can't find the internet
Attempting to reconnect
Something went wrong!
Attempting to reconnect
Tech Notice · 6.0K views · 334 likes
Analysis Summary
Ask yourself: “Did I notice what this video wanted from me, and did I decide freely to say yes?”
Performed authenticity
The deliberate construction of "realness" — confessional tone, casual filming, strategic vulnerability — designed to lower your guard. When someone appears unpolished and honest, you evaluate their claims less critically. The spontaneity is rehearsed.
Goffman's dramaturgy (1959); Audrezet et al. (2020) on performed authenticity
Worth Noting
Positive elements
- The video provides a detailed look at the physical assembly and compatibility challenges of high-end components like the Ryzen 9950X3D and EATX motherboards.
Be Aware
Cautionary elements
- The 'revelation' that everyone else is 'wrong' about high prices is used to lower the viewer's price sensitivity before presenting a list of expensive affiliate-linked parts.
Influence Dimensions
How are these scored?About this analysis
Knowing about these techniques makes them visible, not powerless. The ones that work best on you are the ones that match beliefs you already hold.
This analysis is a tool for your own thinking — what you do with it is up to you.
Related content covering similar topics.

NEW Case Cooling Tech - Deepcool CL6600
Tech Notice

I WAS Wrong... RAM Speed Actually Matters!
Tech Notice

THIS Will change the 2026 PC MARKET - Deepcool CL6600
Tech Notice
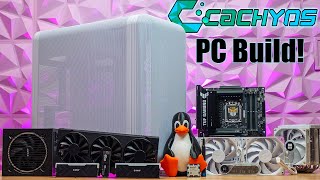
Smoothest Linux Gaming I’ve Ever Experienced – CachyOS Build!
Lifting Linux
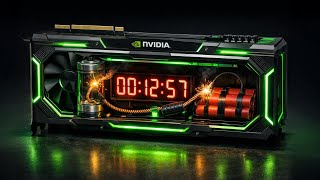
Nvidia GPU owners NEED To Check This NOW!
Gamer Meld
Transcript
You're doing a build now, but there's not enough RAM to go around. >> Give me a break. >> I'm doing what has to be done. >> You keep telling yourself that. >> Hate to break up the set. I am absolutely sick of using laptops. There's always something in my workflow that I need that I have to find some kind of fix because it's not really built in. For example, 10 GB Ethernet, more monitors or some kind of USB connectivity where I have to unconnect something else or connect the dock or something else to get the functionality that I actually need for my workflow. So, I thought, you know what, Sakid, I am going to build myself a PC. And I know what you're thinking. You're thinking RAM shortage, NVMEs prices up, GPUs prices up, and I thought the same thing, but everybody's still wrong. I didn't know this was actually going to be such a good idea because after doing some testing, I found some very interesting things. So, if you're mildly a creator that does any creative work, I spend way too much time figuring some things out and um now I can share them with you to hopefully help you with your workflow. This is not just any PC. This is a very unconventional case and layout. Plus, how nice does this look? And you might be wondering, why do you still have these laptops on this side? We'll get to that in a minute, but first, let's build it. Asus Expert Book Ultra. Expert Book means business and a lot more. Featuring up to Intel Core Ultra Series 3 X9 and up to 64 GB of RAM, Asus has engineered the very best performance into an incredibly thin and light business chassis, delivering serious power without the bulk. At just less than a kilo with up to 24 hours of battery life, it's built for professionals on the move. You also get a stunning 120 Hz variable refresh rate, 3K tandem display with matte coating to cut those annoying office reflections, and up to 1,400 nits brightness, and a precision haptic trackpad. Expert Cool Pro Thermal Mastery keeps performance consistent, cooling the chip at up to 50 W TDP, so you get sustained power when it matters most. It's not just powerful, it's tough. Built to militarygrade standards and backed by enhanced ASUS durability testing, this is a device designed to handle the realities of modern business life. For security, ASUS expert guardian protection ensures ultimate data integrity and a peace of mind. It also has all the connectivity one could want, including Wi-Fi 7, Bluetooth 5.4, and Thunderbolt 4 ports. Performance, design, security, and proven durability allinone ultras slim machine. Check out our full unsponsored overview in the description below. And thanks ASUS for sponsoring this part of the video. I'm actually going to start with the power supply because I have recently ruined quite a bit of tech on this channel because of the slippers and the carpet and the slippers I've been using must be like very rubbery. So when I'm walking around, I'm creating a lot of static and then when I'm picking stuff up, I've actually ruined a few things. For example, these M.2 two enclosures that I've been using. I've ruined three of them. They've just completely died. Interestingly, the SSD inside is alive, but the enclosure just dead, which is interesting. So, the way we're going to solve this is our power supply 850 W. I'm hoping it's going to be enough for this build. So, plugged in in the back. And when I'm turning it on now, I've been earthed and everything should be fine. Okay, this motherboard is giving it away. What type of platform we're going for, but I needed a beast of a platform because uh I need 10 GB Ethernet is one of the main reasons. Oh my goodness. Ooh, can we even fit this in? Oh no, this is bad. I should have checked it before, but it doesn't fit into there. No, like this. This screw is in the way. So, basically, the trouble is in this corner right here. Like there's a standoff right over there. And technically it could go past it over here, but this is just an ATX case. So basically what I need to know is do I have another ATX motherboard with 10 GB Ethernet? But I really wanted this motherboard. This is E8X though. Okay, change of plan. And I suppose maybe that's uh a bit of a good point to make about the creator motherboards on Asus ProArt. They are all ATX motherboards, but I really wanted this one. Look at this. You've got this mint like display and everything that would absolutely amazing in there. Ah, okay. I guess we're going to have to make another PC build then for this one. If you haven't seen this motherboard video, I was quite proud of that motherboard video. Now this is X670E and if you know there's already X870E but X670 is completely fine in this case because it still supports all the same things. I've got 10 GB Ethernet. I've got USB 4s. We might have to update the BIOS. But if you want motherboards for AM5 socket, actually X670, there's not that big of a difference and you might find them even cheaper. Now, the nicer thing about the newer motherboards would be that it would be a bit more easier DIY. We're going to have to do some screwing in here, but regardless, I think it's going to be good. So, the CPU I'm going to be using is their AMD Ryzen 9 9950X 3D. So, this is the first time I'm building my personal rig on AM5 platform. I've done tried the Thread Ripper before, but now I'm going to go AM5. And this is the full-on gaming CPU. So, I'm not going to be doing any gaming on it, but I just want to know what it's going to be like and if that's going to be any good. Okay, that's installed. Now, next up, what we're going to be doing is M.2 SSD. And I'm going to go PCA Gen 5 cuz I want the absolute best. What I have here is the Samsung 9100 Pro 4 TB NVME. Pl that down, swap it, and then screw it in. Then next off, we've got some RAM. And uh as a creator, I need quite a bit for this. So, we're going to go with 128 GB of DDR56,000. I understand that this is super expensive right now. And I if I was actually buying the RAM right now, I probably wouldn't do it. But since I've already bought it before it was mental, then it's justified, right? I'm going to install this a little bit differently this time. Now you have heard what I have said in my videos that AMD is not as good with the memory controller. So this is definitely out of AMD spec and I really want to know if we can actually run this spec or not. Can we get the 6000 speed out of these RAMs or not? Well, you might already know that, but we're going to find out. Look at these black boys. If you do want to check out any of these things that I'm using, any of the parts, I'm going to leave the link in the description below where you can also find our mailing list. So, if you're a creator and you want to know the latest news about your hardware workflow, if there is any hardware that is new in the workflow, then I highly recommend signing up for that mailing list. Okay, I think we're going to have to take this side panel off. which is this screw in here. So, as you can see, there are MATX boards here. So, EATX does not fit into here. This hole in here is going to be in the way. See, we even have to do these. Get these fans out of the way. Okay, now this just slides off. Just going to take Oh, proprietary fan connectors, RGB and PWM all together. Okay, motherboard is in. And while we're in here, what I'll do is I'm going to put some of these cables in from the back already because that might be a little bit difficult later on. So, what we want is front panel audio. This is these fans headers. That's the front panel. These other ones we can do later. So, front panel into there. So, these fan cables that came propri prop proprietary connectors. On the other side, there's PWM and ARGB. So, these we can nicely put on the bottom here. Now, we can even put this back. The next thing we can do is actually the power supply. So, the way this power supply goes in is actually fascinating. You're just going to slide it into there. But before we do that, I believe this bracket here is going to come out. Yes. Four screws for the power supply. Okay. Now, when the bracket's on into the back, then screw that back. Very different power supply building experience. Interestingly, the way I actually I could put it the other way as well. Let me think. Oh, yeah. This is going to be difficult to plug that cable in. So, I'm going to put it intake from the bottom and exhaust from the top. So, I can easily flip it. And now, they haven't thought about this very well. I wonder if this plugs in or not. Huh. Look, this is a bit of a design fault because this does not properly plug in to the power supply. Let me see if that is true. If I pull this out. Yeah. See, even with the bracket, this bracket is in the way. The way you put the power supply in there. But I think it's still going to work. But when I put this screw in there, that screw hole is going to be in the even more in the way. Yeah, the power supply is not going to move anywhere. But maybe I'd be able to plug it in. This is nice though, isn't it? Look, all of our power supply cables in there without having a special like sidemounted power supply. I think when it comes to PSUs, they're often one of the most overlooked parts of the PC build. You don't put supermarket fuel into Ferrari. Neither should you have a lowquality PSU for your high-end PC build. Perhaps you've never heard about the FSB Vita GM lineup. Well, they're producing very high quality PSUs. It's got all the flashy standards you want. In fact, it's sold as 80 plus gold tier product while achieving platinum level efficiency. And they offer 10 years warranty. So, that ticks all the boxes for me. Motherboard. I could even do it this way. CPU. I need one extra PCIe cable. The included cable for the 12vt high power is actually very nicely sleeved. So sometimes you get them all these like cables separately, but I like that they've put this shrink around it. Make sure you fully seat that in. Now back on this side. CPU to the top. And just bear in mind when you don't have the top panel installed in this case, the case is a little bit more fragile and a bit more bendy because the top panel gives it rigidity. Starting to look good. Now, I'm going to install some extra fans because these bottom ones are going to feed the GPU. I want the rest of the system to get good air flow as well from the front. And I've got nothing better than these Noctua Chromeax. So, this is new 140 mm fans. There is no 120 mm at the time of me making them yet in terms of black versions, but these are going to go very, very well. And this dual system here on the back, what you can see is PPB and then PPA, which means that they are slightly going to run at different speeds. So when they're in the front, they're going to be extra quiet. If you've seen this before and you are subscribed, double tap the screen right now. But if you haven't subscribed it, then you're part of the 80% that are watching the videos but are not subscribed. Consider subscribing so you don't miss the future uploads. You can already make these fans run at different speeds in BIOS if you run them into a different PWM headers on the motherboard. So the tip here is that if you've already got the system, just separate those fans out a little bit and make them run different speeds. But because these are already at different speeds, what I can do is literally have a Y adapter, which means one cable into two. In terms of cable management wise, it's just going to be so much easier pushing that into there. And I've got one extra one here. And this is going to go in the back. Oh, the nice thing is that if I do it this way, I can literally plug it into that place over there. Look, this is so cool. Can put the cable into there. or I'll run the cable somewhere from the top here into the back, but I think this is a much nicer way. This is um a cable extension from Noct as well, which I'm probably going to need to plug in, but I'm going to put this back. This goes into there. That keeps all of our cables nice and clean from here. Look at that. That is actually very nice. This here can actually be moved up and down. And I'm looking from here. I might need to move it slightly up. Now, when this is loose, look, this can move up and down. So, we want to put our GPU in first here. And then I know this is not ideal for all the cables underneath, but honestly, for now, it's fine. Where's our GPU? Cuz that is going to be a beast. I do have one downside about this GPU and you can find that out in the dedicated video. I mentioned that over there when I tested it, but it's so beautiful and it's just going to fit into there perfectly well. Look at this. Oh yeah. See how this GPU bracket can move? I'm just going to move the GPU bracket up so it would hold it and then tighten it down from this side. So, this is not going to move. Then I'll put these screws back on this side. And then now this is quite a backwards build cuz at this point usually you already have a cooler installed but I'm going to do it very much backwards and then install the cooler like the last thing which actually puts the whole case together which is interesting. And then now we can move this all the way down back there and then tighten this up. You could move it all the way up if you wanted to but I think this is really nice. It just kind of finishes the PC off really nicely in this and keeps it nice and clean. On this side, there's a front panel here as well. Oh, this is an interesting one though. There is a mesh filter in the back over here and that's to actually filter out the power supply, you know, exhaust. But the thing is, I'm going to just move the mesh on this side because I don't need to filter the air that's coming out because that's just going to restrict the air flow out cuz I want this to get out as fast as possible. I'm going to leave the actual mesh in this side. The other thing I need to figure out is where are we going to put the the power cable for this? I wonder if there's some cases online where they show this. Okay, they moved this right down from here. So, from the middle down. So, I guess we're going to have to do the same thing. We'll take this off. There we go. Perfect. Perfectly right way as well. Make sure your power supply is turned on. This is as in as possible. Look how clean this now looks from the front. Now we need to install the cooler or the whole top of the case. Ooh la la. Which is this guy. This guy here. So the way this will work is okay. And then now the cooler gets How does the cooler get attached? Okay, the good thing is this can go whichever way on, but I'm probably going to have it this way. Look how good of a color match almost is between these GPUs and this here. I know this is more silver and this is a bit more like bronzy color, but to me it kind of looks very similar. So, this case actually comes with the case accessories and the cooler accessories because that cooler comes with the case. So, where are my AMD standoffs? Comes with included thermal paste. When in doubt, put a bit more than you think. made this a bit more difficult to myself than I thought in terms of the way the cables go. This just looks so clean. So so clean. I mean, look at it. It's very nice. Okay, this is AIO pump. Still got so much space on the top here. Usually you've got like fans and radiator. Now, this is so easy to build on the top when there's no none of that because this is all up there. It's already pre-installed. No screws, no fans on the AIO, which usually takes the most time. So, that's cool. Okay, this is the fan headers on the top are coming in from there. CPU fan. Oh, look at this. Like, they've really thought about the cable management. I could like make it go down there, but this really just hides the cables for me, which is so nice. I've got everything plugged in apart from these fans in the front and I'm going to take them from the top. Actually, I don't need CPU fans. So, this is going to be just chassis fans, which I can easily take from there. No, this is going to be too much in the way ideally now because these are all separate chambers. What you want is these two fans actually affect the GPU temperature. So you want these fans to kind of run from the system temperature, not the CPU temperature because that is completely def different and these fans in there handle that. None of these what happens inside do that which is a little bit of a different thinking that I have done before. So I'll have to think about that. Yeah, I probably will have to put this into there. Perfect. Such a good fit. Look at this. Again, you don't see that cable anywhere, but this goes on the back over there. And then we'll adjust it in here. I'm just going to plug it in. Okay, now it's testing time. The way I do things is once all of this is built, I'm not going to do the cable management because I want to test this first. So, let me get a monitor so we can actually see what's happening. Okay, power goes in. Hey, why is it already turning the PC on? That should not have happened. Well, I guess we're going to see the RGB for that one. I forgot to turn that one on. So, this RGB cable there, look at that. I don't particularly like this. We're going to turn the color probably white. Since that's working, what we can do is put the beautiful front panel on. Boot. There we go. New CPU installed. So, we're going to click yes. Look at that. It's running the memory at 3600. This is like DDR4 speeds. Let me just install the Windows BIOS, update everything, and then we'll come back to you. Okay, I've actually been using this PC now for about a week or so, and I am so happy to be back on a desktop, especially with this ultrawide 34 in from MSI OLED 300Hz display. Oh, it's absolutely amazing. But one of the biggest things that I think people miss in videos is how much better the desktop is from a laptop. I test a lot of laptops on the channel. The desktop is just on a whole other level. it it's just so much better, especially when it comes to docking and making a workstation. I try to run the 10 GB Ethernet whether on the MacBook Pro or on the ProArt P16 with the 10 GB QAP adapter USB 4 to 10 GB, but it's just it's not the same. 10 gigabit Ethernet is on and everything is just really really nice because now I can unload all the footage and stuff that we're doing here all the time onto the NAS super super fast. So I've left this hardware monitor on for the last 16 hours. So that's like yesterday at some point I put it on and then during that time I've exported a few videos and it's gone to 197 watts maximum power draw from this 9950X 3D. I've got the iGPU on as well which we're going to have to turn off because I don't think this is helpful here because sometimes it uses iGPU instead of dGPU and because the AMD Radeon iGPU just doesn't give us anything. It just just get rid of it. is there's no point having this on really. Now, interestingly, during what I have been doing here, I've used 74 GB of RAM, which also shows that 64 GB in my workflow is not enough. And at the moment, I'm using the four sticks and these are going 3,600 mega transfers per second. And here's the thing, unfortunately, these memory sticks are not in the QVL list for this motherboard. I don't know why this is. Sometimes you get these odd pieces of RAM kits that just aren't supported as much, and this is one of those. What I want to do is swap it out to 96 GB cuz I now know that should still be enough RAM in what I'm doing, but we'll get a lot faster memory cuz right now we're basically running them still at DDR4 speeds, which we're not getting any benefit of going with DDR5. At the moment in this room, there's 23° C. And let's try some cooling performance. Then, as you can see, we've maxed out at 75°, which is very, very good. But I really want to push this synthetically now and then see how far we can get with this 200 W. I'm not really hearing the CPU, to be honest. It's just so quiet. 72° and we're pulling 200 watts. Our core clock speeds are roughly around 5.1. The maximum we've had is 5.7 on this, which is amazing. Bear in mind, this CPU is overclockable. So, wonder if you can just make it run 6 GHz and then say, you know, off you go. We'll see. It's just constantly pulling 200 W and we're not getting past the 75°. It just really that's that's where it it sits. And that is very good temperature. 270 points in Cinebench R24. I was downloading the Ryzen Master in the background. So, we are a couple of hundred points off. It should be 2,358 points. So, we are a couple of hundred points off, but I think this is because I'm doing lots of things in the background. So, let me try to close some more things. It's changed. It's been a while since I've uh Okay. Oh, the memory clock is not going to work. Export. We're going to have to have it off. So, we'll try PBO advanced override CPU. It goes only 100 MHz, but let's see. Let's see if this pulls anymore now. Pushing 215 W, something like that. Our temperature hasn't really changed. I can see that the clock speeds have gone a little bit higher to 5.2. I can see the clock speeds have gone roughly around 100 MHz higher in all of them. Interestingly, again, we're not getting the full utilization of full score here. I wonder if I stop that. Okay, all should run now at 5.5 GHz. Yep, we've crashed. Okay, there we go. Integrated graphics disabled. Okay, let's try this again. PBO advanced. I'm going to see if I can override the CPU by 200. So, I'm maxing that one out. 22112. Um, that's u that's better than before or 10% better than what we got. Well, roughly about 10% better what we had before. So, I'm going to do a real world test of does the PBO actually matter and then does the RAM speed actually matter. So, what we can see now is how much actual CPU usage we use and then how much GPU we're using. Okay, the first test is done now. We did it in 14 minutes and 3 seconds. Now, here's the thing. We're going to reset the status. And I'm going to go back to default settings. So, this is completely stock of everything. And then we're going to do exactly the same test again. Reset. We're going to go again. Now that is fascinating. I just completed it without the OC and we did it in 13 minutes and 33 seconds. So literally by not OCing it as you can see we are shaving 30 seconds of our 14 minutes export which is pretty crazy. Another thing interestingly that I noticed is that whenever we're exporting picture in picture or there's extra things on top of each other in Premiere Pro the Nvidia card suddenly kicks in and starts doing a lot of the heavy work. But now I want to get this 96 GB of RAM installed with higher speeds and I want to see if that makes any difference. So already the base speed of this RAM is 48 megat transfers per second. extra 1,200 megat transfers per second, but that is not the XMPP. So, we're going to restart this. Go into the BIOS and put XMPP on. Okay, we've put on the tweaked one. So, let's see if we can get 6400 megat trans. We've literally more than doubled the memory speed now compared to the previous one, but we only have only have 96 GB. Okay, would you look at that? 6400 megatons per second, 96 GB. Exactly the same test. Let's go. Okay, now it's done with the XMPP enabled. And what is our result? 1209. We shaved another 30 seconds. No, wait a second. That is huge performance improvement. So now we just shaved off a minute and a half pretty much. So on the right I've got stock settings and then now with XMPP literally a minute and a half less. That is massive. But now I want to see if the XMP will also give our CPU some extra boost. How and what it can do. So we're going to go BBO advanced. And I'm just going to put the same uh settings on there. Boost override CPU 200 everything maximum. We're going to just press apply. So basically now we've got XMPP but then now CPU boost as well. So let's let's take a look what it would be. Now another thing I want to show here is our Ethernet speed. So we're reading at 1.3 GBs per second. So I wonder if our internet speed or the Ethernet speed is also a bottleneck in this setup. So the next test what I will be doing is if I'm going to move all the files locally to see if our NAS or Ethernet connection is going to be the bottleneck. So stick around. Okay. Now it completed the test again. What we have is XMPP on and PBO manual is on as well. So, wow. Another 20 something seconds. 1138. Okay, take a look at this. We've got stock RAM speed 3600 128 GB gigabytes. Then we've got the PBO enabled on the stock manual RAM 3600 speed. Then we've got stock 3600 speed and then PBO enabled enabled in there. So basically overclocking when your RAM speed is just standard doesn't really matter whatsoever. Then if you've got a faster RAM speed that shaves huge amounts off. We're basically 2 minutes faster from 14 to 12 minutes or a minute and a half faster compared to just everything stock. And if we've got the manual PBO enabled, overclocked and the XMPP is on 6400 as well, we've shaved extra 31 seconds we have got off which is just huge difference in terms of all the encoding. So this is absolutely fascinating. So if you're looking at the stock RAM bandwidth or the DRAM bandwidth, we're about 28 29 GB per second. If we overclock the CPU, obviously RAM doesn't change at all. But then going with a faster RAM speed, 6,400 RAM speed, we are at 42 GB and which is the same in there on the PBO manual with 42. We're almost doubling the bandwidth by actually going double the speed, which is interesting. It's quite linear what we're seeing here. Also, when enabling PBO with the XMPP, what I saw was the actual power draw of the CPU was higher. What I see over there is 236 W compared to just 210 W when it's overclocked, but RAM speed is not different. So, when we've got an XMP enabled, the CPU can do extra stuff and we're pulling extra 26 watts in there. But, we're seeing the same things actually different in there. So maximum CPU power draw if we just got the XMPP enabled is 200 watts whereas on there we've got 196. So only a couple of watts difference which we basically say it's the same. But PBO can now suddenly enable extra power when we have XMPP enabled which is fascinating. Another thing I'd like to mention is that probably my VRAM is the bottleneck. 5080 from MSI. It has 16 GB of VRAM and I have used all of it as you can see 15.5 15.4. This is just 15 15.4 which means that we're probably VRAMm bottlenecked as well. Now the last test that I'm about to do is I'm going to copy all of these files from all over the different NASA and everything that I have and I'm going to put them locally on desktop. That's what I'm doing right now. And then we're going to do the export again to see if the storage having locally on the Gen 5 NVME, remember what we installed, is that going to be any different and are we going to get faster speeds? So now what I'm opening is this is actually located on the C drive. So on the desktop, everything should be in there, which means that we shouldn't be bottlenecked with any of the network drives or NAS or any of the other storage. Well, allegedly. So, we're going to do that test now. Okay, there it is. As you can see, different location. Let's do exactly the same test, but now we should be able to see this SSD massively in use. Okay, this just finished. So, let me just take a look at this. Oh, wow. That is a huge difference, guys. So, the best time so far was 11 minutes and 38 seconds, and now it's 10 minutes and 26 seconds. We've shaved extra minutes and 12 seconds off, which is ridiculous. So, we went from 14 minutes something to 10 minutes and 26 seconds. That is a massive difference. Okay, I didn't expect the NAS to be that big of a difference. Apparently, this is if I had everything locally, it would be faster. But the thing is, I just can't fit all 50 terabytes locally. So, I'm going to have to be somewhat storage bottlenecked. But these tests are absolutely fascinating, and I did not expect that. One thing for certain, I'm going to keep the PBO manual on at maximum speed because 82° and we are 24 something° in this room right now. So, the temperatures are going to be completely fine on this. Even when I'm pulling 240 W, this cooling on that PC really keeps up with it. And having cool air coming in just makes sense. And why not just keep that extra little bit of performance there because it does help. Now, after I'd done all the testing on the PC, I thought, how much better is it actually? And second question is, how expensive is it? How much do we actually have to pay for all of these? Because these parts I've got before the prices went up. So, if you were about to buy this, are you going to pay the ridiculous tax? Well, let's talk about the performance first. So, these two laptops, I did exactly the same tests on these two. So after exporting the PX16 with RTX 5090 mobile with 24 GB of VRAM, remember we are actually VRAM bottleneck there. Finished the export in 14 minutes and 18 seconds which is the slowest of the bunch. But regardless quite impressive for a laptop and the 5090 and create a laptop they're doing good work in there. Bear in mind, I wasn't running any other programs in there, but it's still about 4 minutes slower than what we have over here, which is huge difference in time. Now, what about the MacBook? A lot better. This MacBook has 128 GB of RAM, which also can be allocated to the GPU. So, the GPU has a lot of VRAM. This MacBook completed it in 13 minutes and 30 seconds, which for a laptop is impressive. But regardless, our PC here is about 22% faster than this laptop while having four times the SSD capacity and a lot better ports. Now, yes, this PC is not portable, but it's upgradeable. I'm sure you already know that. It's running Windows, which everybody hates these days, even the Windows guys. And the parts are overpriced. So, I thought, let's take a look at the pricing because if you want to pick up this any one of these laptops, you're going to have to cash out $5 grand, which is quite a lot new. And when adding all the same things into the basket, I can see that my total is $5,800, which yes, kind of expensive, but I thought, well, if you're a PC guy, you kind of know how to shop around and how to make sure that you're getting a good deal. So, I went on Amazon and then added some things onto the cart. We're using the 9950X, not the 3D because do you know what? The 3D for creators doesn't really give any extra performance. For motherboard, we're going with X870e because it's actually cheaper than the older version that I'm using. Also, go with slightly different model of the RTX5080. We're saving over $500. Bear in mind, there is another model if you've got Prime membership that is extra $100 off. Then using 96 GB of RAM. Yes, about $1,000, but one of the nicest looking ones in there. Using the same power supply, different NVME drive. If you don't want to buy this particular case and you want to go with any other case, I'm just picking up something random for 100 and a very good AISL plus a 32 in QD OLED 4K 240 Hz display from S Samsung on top of that. And we're $5,238. As you can see, more power, more storage, insane display with it, and we're about the same price. Bear in mind, the Samsung monitor also has a coupon code for $100. And there's another same spec GPU with a different model, $100 cheaper, which brings us to 5 grand. Now, I did not expect that. If you want to check these out, I'm going to leave the link in the description below. I don't know how long this lasts, but if you want to take advantage of that as a creator, if you need a workstation, this is amazing. I've been using it for a bit and it's just so nice. On a laptop, you feel like you're on a laptop. No matter what the benchmarks say that, oh, this is about 20% faster. When you're working on it, it's just so much better. You've got unlimited ports that are just way too much that you're ever going to need. Whatever you plug in, it's just fast. It's just incredible. It's just always jugs through. There's no like, oh, laptop fans are kicking in and it's going to get the performance down because it gets hot. It's just at that speed at all times. I'm loving it. I'm only scratching the surface of what this PC can do. And yes, in my workflow, I would love to have a 5090, but even the 5080 is just amazing. And finally having 10 GB Ethernet, oh, it's just so good. regardless of it being more expensive than a little while ago. But I'm sorry, laptops. PC building apparently is not dead. Surprise, surprise. I've got some awesome information for creators. As you know, we benchmark hundreds of GPUs and CPUs and other tech on the channel for creators. If you scan this QR code over here, you get access to our internal data and benchmark database. There's also a link in the video description below if you want to check that out. And we'll also be sending you my three tips for optimizing your PC that I also do for video editing. So, if you're interested in that, scan that QR code. If you have any other questions or requests, check out Min in the video description below. I'll always get back to my Min messages 100% and very fast. So, if you want that link in the description below. If you'd like to stay uptodate with the tech and information that's important for creators, highly recommend signing up to our mailing list, which you can scan through this QR code or find the link in the description below as well. And this is for people who don't have time to always search for the information, but just want the right information to land directly into their email box. And I am not a big fan of spamming inbox because I'm one of you guys. So, I've just created a way how you can get access to the best information relevant for you. And hey, if you've reached this far, then YouTube thinks that uh this is one of the videos that you'll like next. And actually, hitting that like button, it makes a difference. Subscribe with bell to not miss any of the future uploads. And I'll see you in the next video. Thank you very much, guys, for watching. Bye-bye.
Video description
Everyone said prices are high - Built a DREAM creator PC in 2026 and I couldn't be happier! 👇MORE👇👇 AD: Check out ASUS ExpertBook ULTRA here: https://geni.us/expertBookUltra26 Our full video here: https://youtu.be/3vKYjZLmm9k PC Specs: CASE: https://geni.us/ka4E SSD: https://geni.us/BM6He2 MOTHERBOARD: https://geni.us/QsLaz [Newer and cheaper] PSU: https://geni.us/0G17pr [FSP VITA GM850w] RAM: 1 - https://geni.us/9Rzb 2 - [Better] https://geni.us/LsWkkL GPU: https://geni.us/0sJAR EXTRA FANS [Black Noctua]: https://geni.us/daGsCzj DISPLAY: https://geni.us/MSi34WmonOLED 🔥🔥Ultimate Creator GPU Database Signup https://geni.us/TNemail 📽️📧 Creator Newsletter https://geni.us/Tnnews 👇❗️PC Builds for Creators [Latest]❗️👇 ➡️ $750 BB4B (Best-Bang-For-Buck) PC https://geni.us/750-1300BB4B ➡️ $1500 BB4B Creator PC https://geni.us/1500-2300BB4B ➡️ $2500 BB4B Creator PC https://geni.us/2500-3500BB4B ➡️ $4000 BB4B Creator PC https://geni.us/4000-5kBB4B Want me to check out some tech or interested in collaborating? 📩 email me: collab@technotice.com ✅ MERCH: https://www.technoticestore.com 👉 100% REPLY RATE on Minnect: https://geni.us/MinnectLP 📲 Facebook, IG, TikTok: @thetechnotice #CreatorPC #2026 #WOW Video produced by Lauri Pesur Edited by Sam Ruddick ------------------------------------------------------------------------------------------------------------- DISCLAIMER: Some of the links in this video description & channel are affiliate links which means by clicking on them and purchasing item(s) I get a small commission. As an Amazon Associate I earn from qualifying purchases. Using the provided links does NOT change the price for you. Same goes for other retailers. ⏲️ 0:00 Marvel intro & Why!? 1:38 Asus Expertbook Ultra 2:59 WHY PSU first! 3:54 Issue No 1 5:30 Replacement Motherboard. 6:12 CPU install - Ryzen 9950x3D 7:05 128GB of RAM!? 8:55 cable management 10:00 Sideways PSU is AMAZING! 10:49 Issue No 2 11:50 Why I chose THIS PSU 13:20 Extra Special Fans 15:20 24pin Cable Shroud 16:00 GPU Install 17:00 Issue No 3 18:15 Cooler & 2nd Chamber install 21:35 First Power ON! 23:00 WHY PC NOT laptop?! 25:50 CPU chamber test 26:52 OC & temps & CRASH 28:25 ULTIMATE Creator Video Export TEST 32:54 YES FASTER RAM speed Matter? 35:40 Does local Gen 5 speed matter? 37:50 VS BEST Laptops in the WORLD! 39:40 PRICE 41:28 My Experience