We can't find the internet
Attempting to reconnect
Something went wrong!
Attempting to reconnect
Analysis Summary
Ask yourself: “Did I notice what this video wanted from me, and did I decide freely to say yes?”
Worth Noting
Positive elements
- This video offers a clear, practical guide for setting up local DNS overrides and DHCP pools, which is highly useful for home lab enthusiasts managing private services.
Influence Dimensions
How are these scored?About this analysis
Knowing about these techniques makes them visible, not powerless. The ones that work best on you are the ones that match beliefs you already hold.
This analysis is a tool for your own thinking — what you do with it is up to you.
Related content covering similar topics.
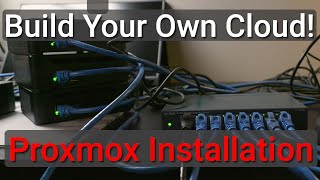
Installing Proxmox on a Home Lab
Heavy Metal Cloud

The Perfect Pi Hole Upgrade - Technitium Recursive DNS Server Tutorial
Craft Computing

MUST HAVE Home Server Companion Apps (mobile)
TechHut
You can NOW Self-Host UniFi
TechHut

The ULTIMATE homelab setup
Singularity Club
Transcript
Okay, let's start building on my little cloud. The first server I'll set up is called OpenSense. Now, normally OpenSense is used as a firewall, but for my cloud, I'm going to take a different approach and use it for DNS. Let's start by looking at the hardware. I'm using a pretty low-end Intel Nook, and I'll be connecting it to my network using an Ethernet cable and a switch. Now, my needs are pretty simple. I'm just using OpenSense for DNS, but if you want to use it as a firewall, you probably should buy a different server with two or more network interfaces. For this video, I'll assume you have a rough working knowledge of DNS. And by the way, if you're interested in a video about DNS fundamentals, let me know in the comments below. In my cloud, my apps will be reaching out to some shared services. One example is Vault, which is used for secret management. But instead of using the IP address, I'd like to use a domain name like vault.heavy metalcloud.lan. Since LAN is a private tople domain, I need a way to look up the IP address. And this is where open sense comes into play. You can create your own DNS lookup table where you can send a domain request to open sense and get an IP address back. Now, let's install OpenSense. To get started, I'll download the OpenSense image from their web page. Next, I'll flash the image onto a USB drive using a program called Etcher. And finally, I'll plug the USB drive and boot up the server. Okay, the server is booted up. And now it's time to log in. The default username is installer and the password will be open sense. I'll use the default key map and install the ZFS file system. This might take a few minutes. Now, we have to select the disk redundancy type. Again, I'll just go with the default, which is Stripe. Okay, a side note here. If you're using a more robust server with multiple hard drives, you might want to select a RAID or mirrored option. This will give you some assurance in case you happen to lose a drive. Next, I'll select my drive and click okay. Before installing, you'll get a warning message that your hard drive contents are about to be replaced. That's expected in this case, so I'll select yes and continue. Again, this will take a few minutes. Once the OS is installed, you'll have the option to change your root password and reboot. Okay. In the next few sections, I'll be updating a lot of settings. To make things easier, I'll have all the commands and configurations on my GitHub page. Link in the description below. With the server restarted, let's configure the network. This time, I'll log in as root. I'll select two to set up the IP interface. then one to update the LAN address. Since I want to manually configure the IP addressing, I'll go with the default, which is then and for the IP address, I'll use 192.168.3.2. The subnet mask I'll use is 24, which is a class C address space. And since I'm just using OpenSense for DNS and not as a firewall, I'll press enter here for none. For my cloud, I'll be using IPv4 addressing. So, I'll skip these steps by pressing N for all the IPv6 configurations. I do want to set up DHCP on the LAN interface. So, I'll select Y here. And this will allow me to automatically assign IP addresses. Next, I need to establish a pool of addresses that DHCP will use. I'll start with 192.1683.200 200 and I'll end with 250 for the guey protocol. I'll change this from HTTPS to HTTP. You can change this back if you decide to secure OpenSense with TLS. Finally, I'll select N for the guey defaults. At this point, OpenSense is installed with an IP address. To finish the configuration, I'll use my browser. For my server, the address will be 192.168.3.2. I'll log in using the root username and password. And now I'm prompted with an installation wizard. So let's click next to kick it off. For the host name, I'll leave it as open sense. And for the domain, I'll use heavy metalcloud.lan. Make sure that enable resolver is checked under the inbound DNS section. And for everything else, I'll keep the defaults and click next. And I'll also use the defaults for the name server. If you aren't using Open Sense as a firewall, you can leave the LAN settings as default. The LAN interface settings should already be populated. So I'll click next to continue. And again, you have the option to change your root password. I'll just click next. Selecting reload will restart the OpenSense server. And this might take a few minutes. Next, Open Sense will need access to the public internet. For this, I'll go to system gateways and configuration. Again, since I'm not using Open Sense as a firewall, I'll use the LAN interface as my gateway. To add a new interface, click the plus button. I'll use LAN_GW as the name. And for the interface dropdown, select LAN. The IP address will be 192.168.3.1. This is the IP address of my internet router. Then I'll check upstream gateway and click save. For my setup, I won't be using a WAN interface. So to avoid routing issues, I'll disable it. I'll do this by clicking the green arrow next to WAN_GW. Once that's done, I'll click apply. Now it's time to set up DNS. The subsystem that handles this is called Unbound DNS. It's a lightweight DNS server that's built into OpenSense. From the lefth hand menu, select services, unbound DNS, and general. Most of these settings I'll leave as defaults, but I'll check DNS SEC and DNS 64 support. I'll also check text comment support and flush DNS cache during reload. And I'll click apply to save the changes. Unbiod DNS will handle all the DNS for my heavy metalcloud.land domain, but for external DNS resolution, I'll have to point OpenSense to a public resolver. For example, if I want to look up the IP address for apple.com, I need to reach out to a public-f facing DNS resolver. To set up external DNS resolution, go to a system settings and general. In the networking section, I'll add a DNS server. And here I'll use Google's public DNS server which is 8.8.8.8. For the use gateway dropdown, I'll select the LAN gateway that I created in the previous step. And I'll click save. And again, this may take a few minutes. Okay, we're almost there. With unbound and external DNS set up, we can now create our individual DNS entries. To do this, go to services, unbound DNS, and overrides. I'll create a DNS entry for the OpenSense server. On the right hand side, click the plus button. For the host, enter opensense and the domain name will be heavy metalcloud. LAAN the IP address will be the IP of the server which is 192.1683.2. Then click save and apply. Now let's make sure everything works. To test this out, I'll hop on my laptop, which is on the 192.168.3.0 network. I'll use a command called NS lookup. Next, I'll change the name server to point to the OpenSense server. So, instead of getting my DNS from a public DNS resolver, I'll be pointing to OpenSense instead. I'll then type in OpenSense.heavy metalcloud.land. And you can see it's returning the IP of the server which is 192.168.3.2. If we type in google.com, you'll see that OpenSense is able to resolve the public DNS as well. So this is great. DNS is working and the first server in my small cloud is ready to go. In the next video, I'll set up the next server which will be used for shared services. Thanks for stopping by and I'll see you in the next video.
Video description
In this video, I'll continue building my "Heavy Metal Cloud" by setting up the first server: OPNsense. While OPNsense is traditionally used as a firewall, I’m taking a different approach by configuring it specifically for DNS management within a private cloud environment. I’ll walk through the entire process from hardware selection and installation to advanced configurations like Unbound DNS, setting up DHCP pools, and creating custom DNS overrides for private domains (like .lan). What you’ll learn: - How to install OPNsense - Setting up Unbound DNS and external resolvers - Creating DNS Overrides for custom local domains. - Testing your setup with nslookup. *To follow along, check out my GitHub page! All the commands and instructions from this video are in a README file:* *https://github.com/heavy-metal-cloud/youtube/blob/main/videos/build-your-own-cloud-series/05-dns-using-opnsense/OPNSENSE_INSTALL.md* 00:00:00 - Intro 00:02:22 - Installing OPNSense 00:04:23 - Configuring OPNSense with the Installation Wizard 00:07:11 - Creating DNS entries using Unbound DNS 00:08:27 - Testing DNS, using nslookup Links referenced in this video: https://opnsense.org/download/ https://etcher.balena.io/ Amazon Affiliate Links - The Cloud Hardware: https://amzn.to/49GQo81 https://amzn.to/48c5nUT https://amzn.to/48bkX38 https://amzn.to/43Qeh9o https://amzn.to/43J6TfV https://amzn.to/4p7dsBx