We can't find the internet
Attempting to reconnect
Something went wrong!
Attempting to reconnect
Analysis Summary
Worth Noting
Positive elements
- This video provides a comprehensive technical overview of a specific Linux configuration, including keybindings and workflow logic that are genuinely helpful for users of Hyperland or Arch Linux.
Be Aware
Cautionary elements
- The video uses 'gatekeeping' language (e.g., 'if you love computers') to make a niche, difficult workflow feel like a requirement for true tech enthusiasts.
Influence Dimensions
How are these scored?About this analysis
Knowing about these techniques makes them visible, not powerless. The ones that work best on you are the ones that match beliefs you already hold.
This analysis is a tool for your own thinking — what you do with it is up to you.
Related content covering similar topics.
Omarchy: Change font
David Heinemeier Hansson
Linux From Scratch 13.0 | HackerOS 4.4 | SQLite 3.52 | Postfix 3.11 | Wine 11.4
DistroTester
The 'fortune' Command in Linux (Hidden Terminal Fun!)
Learn Linux TV

How To Get Help In Linux (For New Users)
sleepyeyesvince
EndeavorOS - An Arch Distro Made Easy #linux #linuxdesktop
Learn Linux TV
Transcript
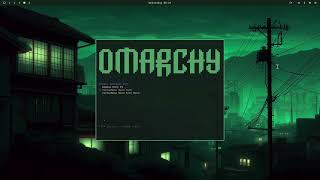
Umi is a beautiful modern opinionated Linux system. It is built on top of Hyperland and Arch Linux and it's made for anyone who loves computers. And that part is really important because Umachi is not trying to be like Windows. It's not trying to be like Mac OS. It's not trying to be like a familiar desktop operating system where you're dragging windows around and all the other ergonomics that you might have been used to for a long time if you've been using any of these other systems. Um is built on the tiling window manager and that experience is really quite different. It is a way of operating your computer that is driven far more through the keyboard than it is through a mouse or a trackpad. And it's gonna take some time to get used to, but if you love computers, I think it's worth taking that time to learn a better, more efficient, more fun way of flying through your operating system, getting things done and having a blast while you do it. That is what Umachi is all about. So, let me show you how it works. This is what Omachi looks like when you first boot into it. You'll see this beautiful backdrop and a couple of notifications to get you started. The first thing is if you are not on an Ethernet connection, you'll be asked to set up Wi-Fi. And right from the get-go, you're going to be introduced to this theme of the TUI. So, if we click here to set up the Wi-Fi, you'll see I am thrown into this nice little TUI called Impala where you can select your networks. You can see at the bottom the different commands you have. You can push S for scan if your network is not showing up and you pick a network, hit return or hit space and then you're entered the password and you will be online. The next notification here is an invitation to update your system. If you did not install off an ISO that was just baked, there will probably be a couple of packages that have been updated. And it's always a good idea to stay up to date. So, we can click this one. And here's the invitation. Are you ready to update Umachi? Once you do, we'll be taking a snapshot that you can actually roll back to. If you ever do an upgrade that goes bad when you start the system again, you'll have the opportunity to pick an earlier snapshot, but we don't need to do any of that right now. So, I'll just hit no and cancel out of that. So, let's jump into the meat of seeing what's in the key bindings. When I click that, you're going to get the same menu as you would get on Super K. The super key is the same as the Windows key is the same as command key on a Mac keyboard. So if I close this out on escape and hit super K, you'll see the menu popping right up again. And as you can see here, it is suggesting some of the most important applications first. If we hit super return, you'll see there's a nice little terminal opening here in the back. And then as you can see, we had super shiftB for the browser. Let's try that. All right. Now we have two windows. And those windows can be swapped around. If you hold down super shift and use the arrow keys, we can swap them back and forth. And if you do super J, you can toggle horizontal or vertical alignment. Now this system continues on. If I open yet another terminal, you can see it is dwindling as this setup is called down into smaller and smaller bits. You can close those windows again on super W for closing the window. The other key concept here of a tiling window manager is that you have different workspaces. So if I have my terminal down here and I want to move it to workspace number two, I can hold down super shift two and it'll pop over on workspace two. Super one will jump back to workspace one and super two will jump to workspace two. And I can pop this back again. Super shift one and it'll pop it back. And this is how you lay out your workspaces. This is how you lay out your windows. But there's a bunch of other neat tricks you can do here. For example, you can actually uh move around the windows, the focus of the windows. You can see that highlighted border using super and just the arrow keys. That's how you move around. You do not need to use the mouse to drag this around. But if you do use the mouse, you'll notice something interesting. The mouse here is centered on the window on the right. And if I move with the super arrow key to the window on the left, the mouse jumped over there. So there is really a focus here in Hyperland on not using your mouse a whole lot. And whenever you do have to use your mouse that you use it as little as possible because it'll literally always be where you need it to be. Now, as you can see, all these windows have automatically been tiled. And when we open new windows, they'll tile into predetermined locations. But we can also pop them out. If I do super T, I'm going to get a floating window just like a normal desktop interface. You move it around by holding down the super key and then the left mouse button. You can drag it around. You could do multiple windows in this way. And you can resize the windows by holding down the super key and pushing the right mouse button to resize. Now, if you're done with that and want to pop it back in, you just hit super T again, and it goes back into the tiling mode. One final thing that's kind of cool is the pop. So, we have that on super O. You're going to get this popped out window that is not only floating, it is also sticky. So, if I hop over to workspace number two and workspace number three, it keeps being there. This is really convenient for playing videos or being on meetings or the like. And again, as with the tiling and floating switch, if I hit super O again, it's going to pop right back into its tiling mode. Now, let me show you one last advanced technique. And first, I'm going to show you the key bindings for it. I hit super K again to see the grindings. And then I can go here to group. Grouping is an additional way of organizing your windows on a single workspace if you don't have that much room to tile a bunch of windows next to each other. You do it on super G. That's how you toggle the window grouping. And I'll show you how that works here. So, if we remove all of it, I hit super G. You'll see I'm going to get a little uh almost like a tab up here for these uh groupings. And if I now hit super shiftB to open a browser, I'm opening a browser inside that tab group. Now I could go back and forth on these using the mouse, but of course this is not what we do in um I'm going to mainly use the keyboard. So I opened yet another terminal here on super return. And now I can jump back and forth the between these tabs using super alt tab. I am cycling through this. And if I hold down shift, I'll go in the other direction. And if I just press the numbers like two, I'll jump to the grouping number two, grouping number one. And if I want something to pop out of this mode, I can use super altg. That pops it back out. And if I wanted to pop it in again, I can hold down super alt and then the arrow keys. And now it is back into the grouping. And if I'm done with my grouping, I can just hit super G and it'll explode all out. So, as you can see, you actually have a lot of very sophisticated ways of organizing your workspace in the way that makes sense. Some things like grouping is something I mainly use on a small laptop display. On this larger 6K display I'm on at my desktop, I don't use it as much. But these are the options that you have and you can just start easy. You don't need to learn or memorize everything. And as soon as you're interested in exploring it more, you hit the super K, you start browsing through these key bindings, you learn everything that there is in the system. So that's the basics of how to lay out your windows, how to do the tiling stuff. Let's jump into some of the other aspects of Umachi. And the first thing we're going to look at is the Umachi menu. You can see it is right here on the key bindings right up at the top. It is on super alt space. So let's close out some of these windows here. Again, that is super W. And then I'll hit super alt space and I'll get the omachi menu. The first thing on the menu is the apps. That is the app launcher. You can also get that on just um superpace. If I close that out and do superpace, I'm going to get that here. But if I jump back into the omachi menu, I'll dive into some of these sections we have here. The first section we have is learn. If you forgot that key bindings is on super K, you can access them right here. But you can also hop into the full manual for Umachi. That is a really great resource that we keep up to date at all times for learning how to set things up. Oh, what is this for example about the prompt? Oh, we use Starship. You can configure Starship to have your own prompt. Here there are a bunch of instructions on how everything works, how you set up your monitor, your dot files, your fonts, whatever else have you. And including is a full walkthrough of all the applications we have, whether that is Neoim, the editor, the shell functions, the two, the guies, the commercial offerings, and the development tools. So that is a great resource. I strongly encourage you to take a look and read through it. It'll go through everything that we have been covering in this video as well and you can peruse at your leisure. Let's jump back in here and see under learning. We also have a bunch of other things like the Hyperland wiki. That's a great way of figuring out how to personalize your system, how to set it up um just like you want it in certain ways. You can change all of these configuration parameters once you get a little more familiar with the system. Now, of course, out of the box, you don't need to change anything. Omachi is fully preconfigured for how I use this wonderful system. I don't tailor anything when I install UMachi on a new computer. It literally has everything built in for me to be productive, happy right away after a [clears throat] two to three minute install. The other thing that's good to uh dive into is uh Neoim. We use a distribution for Neo Vim called Lazy Vim. And Lazy Vim has a lot more key bindings. This looks kind of intimidating. Look how small that scroll bar is on the right. But you don't need to learn everything up front. You just need to uh learn basic things like, oh, how do I quit this damn program? Actually, we could start up Neoim right now. We can do that on Super Shift. N for Neo Vim. That's starting up this uh Lazy Vim version. If I hit N again, I am right here in a editor. Um, and if I don't want to save this and I want to quit out, I go out of insert mode as an escape. And then I can just do uh Q and exclamation point because I don't want to save it. Out we go. I could also just have closed that window on super W. All right, these are the learnings. Good stuff to dig into. But let's try some of the features that we have built into Omachi. I'll go into this trigger feature and you'll see here the first one is called capture. We have three different things you can capture. You can capture a screenshot, you can capture a screen recording, or you can capture just a color. Let's actually do that first. The color picker is something that's really useful when you're doing uh web development or any design work. We can just pick on what is the color for this nice little uh elk here or whatever it is. Uh deer. Boom. Now it's on the clipboard, which by the way on control superb, we have a clipboard manager with a preview as well. Isn't that nice? You can just hit return on any one of those and they'll be placed on your clipboard ready to paste into any program. But let's jump back into trigger, which you can get to not just by using the arrow keys as I'm doing here, but starting just to type. So if we type tree, it's going to match to trigger. I just hit return. I go to go to uh capture, that's of course the first one, but I could also just done ca if it hadn't been the first one to find it. Or I could have gone to toggle here. But hop into capture and then screenshot. Now there are two different ways to capture screenshot. Either you can capture it with editing, which is the default. That's also the one that's bound just to the print key. Or you can do straight to the clipboard. You can do that holding shift down and then pushing the print key. But let's do it with editing here. And I'm going to drag um something. I'm going to mark it up. And I'm going to get this editor that just gives me some basic functionality for highlighting things, for writing things, for doing all the normal things you do with screenshot. And then when I'm done, I can simply hit return. And when I hit return, it is copied to the clipboard and it's also saved onto the file system. Hopping back in, going to trigger here and uh doing a screen recording. You can do a screen recording with a region. You can do it with audio. You can do the whole display. And you can even do the display with a webcam where it'll place your webcam down in the lower right corner to make a screen recording. Not quite unlike this. Now for this specific screen recording I am actually using a tool called OBS OBS studio wonderful tool for capturing screen recordings. It is built in to umachi along with a bunch of other tools that uh I use to do my work. As you can see here I have one password and ether and elacrity base cam. Those were the captures you can do. You can also do share. Share is really neat. Share is a way of using local send to transport your clipboard, a file or a folder straight to your phone, straight to another computer, straight to an iPad, there is a local send client for almost anything. And if you hop into the file here, you're going to get this uh fuzzy finder where if I was going to find something for um here, oh, I could have a config, I could have the ISO, this I'll get the local send. And if I have a phone running local send, it'll pop up down here. I just click on it and boom, that file is sent to the recipient. As you can see, you can do the same thing with a folder. Now, that's trigger. Let's move on to style because style is a really important part of Umachi. Aesthetics in general is a really important part of Umachi. We have put a tremendous amount of effort into making this operating system look fantastic. Not just with the default theme, but with a bunch of other themes that'll fit your mood just right. So, I'll hop into that first. That's the theme here. These are some of the default themes that we have in the box. You can see we have 12 of them. There's also a bunch of extra themes you can install, but these are the ones we include. Uh, Catpuchine is always a favorite. I just hit return on that and it'll switch right over. I should actually open a bunch of terminals. And of course, you have to open btop. That is the prerequisite tool for taking screenshots on Linux. So, I can do that on super shift T. And if you didn't remember how to do that, you could just pop that open and you could look for activity. That's the activity monitor. Super shift T. That's how you do it. And doesn't that look beautiful? It has the catpine colors. Very nice. The other thing I actually want to show real quick is the integration with Neovim because Neoim will also change its colors when we change the themes. Oh, and so will the browser. So, let's pop open one of those and let's hop back into the theme menu. There is a shortcut for that. You can do super control shift space and you go straight to the menu. What should we pick here? One of my favorites that looks very unique is Osaka Jade. Boom. I update that and everything is updated at the same time. We even get this nice background which for a lot of the themes you can actually change real quick. do super control space and it'll cycle through the default backgrounds that you have for each theme and you could pop in your own if you have your own background but uh this is what we got. Let's try a few more here. We could do nor that's also a common and favorite amongst a lot of people. I really like it too. What else we got here? We got flexoki. That's one of the light themes. I really enjoy that. It might be a little bright if you are used to a dark theme. We have a couple of other light steams that are even lighter. Cat pu puccino latte for example or what do we have here? We got rose pine also a very nice one. But uh I mostly use the darker theme like uh matte black here also very nice. Let's see that actually with um with btop here. As you can see again all the colors are synced. But let me hop back to Tokyo night. That is the default. That is one of the ones I like the most. And let's have a look at some of the other styling options because you can also change the font. So if we hop back into the menu, hop down to style, hop into font, you can see there is a number of default fonts. You can install your own as well, but Jet Brains Mono is one a lot of people like. If I pop over that, you can see it instantly updated in Neo Vim. It even updated in the menu. I do like Cascadia. So let's hop back to that again. That is the default. And if we jump in and see what else we can do, we can change our backgrounds. If I open that, I'm actually just going to cycle through the background. That's the same thing as if I was doing super control space. You can, of course, also install your own. I can show you that real quick. If you go down to install, you go down to style, you go to background, it'll open up the defaults that are for that theme, and you just drag over something else from your own hard drive. You can open that file manager, by the way, on super shift F. Boom. You get that opened up. We can just drag things back and forth. Finally, let's look at the last bits of the style menu here. You can style uh hyperlink. You can style literally how the whole system is done. If I remove these out here and I hit save, it'll instantly update to having no gaps. If you like that look with no gaps, that's a great way of setting that up. I'm going to pop it back in. I do like the gaps when I'm on a slightly bigger display. You could even round the corners here, too. Let's try that. Boom. Look at that. Rounded corners. That is all it took to um to do that. And finally, this single window aspect ratio is actually pretty neat. Let's hop out of this. So we just have a single terminal open and then I'll boom see that if there's only a single window on the workspace you'll get an aspect ratio of 1 one. That's actually kind of neat. Now if you open something next to it it's going to use the full screen. I run this on a lot of systems that are wide and uh it's a neater way to look at it especially if you are on ultra wide you almost need something like that. All right, let's hop out of that, back into the style menu, and see some of the more fun things you can change, too. You can change the whole setup of how things look. First of all, here is the logo that we use for the screen saver. You can simply pop in your own asy art. Find that somewhere, pop it into this file, and I'll show you how that looks. So, if we do super escape, I'm going to jump straight to the system menu and I hop down to screen saver and it's going to start this wonderful fun screen saver showing a bunch of different effects can give you. It is a really neat beautiful setup. It's always a lot of fun to dazzle people with your new um setup. Showing off the screen saver. Now, by the way, on that screen saver, if you are on a laptop, do know that it is actually not saving your battery life. It's rather CPU intensive to shuffle all those characters around. So, we could hop in here and we could go to trigger and then we could go to toggle and I can toggle the screen saver on and off. This is also where you will toggle things like nightlight. If you want to change the Kelvin at night, you can ch toggle the idle lock or you can even toggle the top bar. If I do that now, you can see there's no top bar. I'm just going to have my windows right here. That is one of those setups I actually like on a smaller laptop screen. There's also a hotkey for that. If you do super shift space, you can toggle the top bar on and off. Let's leave it on for now. We have a big enough screen to fit it. But that is how you toggle all those elements on and off. Now, let's jump into some setup here because even though Omachi comes with everything that I need to do all of my work, you may need a few extra things or you may want to substitute some stuff. This is also important that Amachi is very opinionated, but it gives you all the opportunity to change the things that you don't like. You just don't have to make any decisions upfront when you're installing the system. The installer won't ask you which programs you want to install, which settings you want to have set up, or even what theme we should start with. I'm giving you all those defaults out of the box um style. But as soon as you are set up, you can of course change this because this is your computer. That's half the point of running Linux is that this is your computer. You can change anything. Everything is open source. you just dive right in. Now, first let's have a look at some of the things that are built in here. Power profile, for example. If you are on a laptop, you can pick something else than performance. I'm on desktop right now. I'm actually on the framework desktop. And you want to run that in performance. We try to set that automatically for desktop computers to performance and for anything that has a battery, a laptop to balance out the gate. But you can change it in here. Now, what you can also change is things like monitors. That's where you change your resolution and your hertz. That is just a text file, a config file that you're editing. The same thing with the key bindings. If I open that right up here, I can make it a little bigger on control plus. You can see there was just a little notification that told me what the path is for editing this. These are all your key bindings. You can change these key binding to anything you like. If you don't like my default, if you don't like that I have AI on uh super shift A, then you could change it to something else. I actually even have Grock here on super shift alt A as well. And all of these key bindings are something you can just change in here. You could change this key binding B if you wanted on that. I just have it on A. You can change it to any other destination you have. You can do Y then P add your own. DD to delete. uh control S to save and all of these key bindings are immediately effective as soon as you save that file. So that's one of the things that is a little uh funky perhaps about Umachi when you're coming from other operating systems that present every part of the configuration space as a guey. Lots of things in omachi, lots of things in Hyperland and the other tools that we use are configured through text files. Now the great thing about text files is that you can check them into your own git repo. You can keep your own dot file. You can easily move them from system to system. A lot of what is in Omachi is just these preconfigured configuration files. And it's a really nice way to have consistent setups. Let's jump out of this. I'm just going to do super W. Let's jump back into the setup here. And look what else we got. Oh, we got input. If you, for example, are running multiple keyboards in for different languages, you can pop those in. uh Danish, for example, and then you can set up a key to toggle between them, for example, on hitting both the alt keys at the same time. That could toggle your layouts. You can also set up the repeat rates and all the other stuff, the scroll factor for your touchpad as you see fit. Again, as soon as you saved it, it's going to be live. Finally, we have uh we have some defaults here. The main one you'll be editing is probably Neovim if you want to have a different editor. Not everyone loves Neoim, but that is just because you have not given it enough time yet. I very much encourage you to give Neoim a proper chance. It is not the easiest thing in the world to get used to out of the gate, but if you can push through a couple of days of discomfort, you're going to find an absolutely amazing editor. one I love dearly. Actually, I love it so much I will show you just right now. Let me open this up. I'm going to jump into my Umachi development repository here. I will show you just really quick a couple things about Neoim Space space. Brings up the fussy finder menu. I'll just type menu here. I'll open a file. If I want another file, I'm opening that up here. I can do shift H to switch back and forth. Crl H to jump between the sidebar and in here. I can make my changes by hitting O to open a new line. This is another comment. I don't need that actually. I'll save it. And then I'll hit space GG. That'll open up my lazy git. And I'll see I've actually made a couple of changes here. I can just hit space on that if I want that to be part of this selection set I'm doing. Or I can hit D and discard my changes from that one. Q to quit out of it. And there we go. Just a quick little tour. Just a little taste. Just a little taste. So hopefully you're interested in checking that out. And as I showed you earlier, there is that wonderful learn menu here where you can dive into Neoim. I also recommend that you check out some of the lovely videos from uh Typcraft or the Primagen on YouTube. They're great tutors of Neo Vim. You can learn a lot. All right, the rest of the setup here, you can set up DNS out of the box. It just comes with uh picking DHCP, but I like to use Cloudflare as my DNS provider, especially when I'm on the road and I don't quite trust the hotel Wi-Fi to do that. So, I can set that up here. What else can we set up? We can set up uh all the configs. So every single config to controlling the subsystems in Umachi you can access here. Let's try just one example the way bar that's that top bar. It opens up the config file for that. And if we want to make a little change like for example I don't want to look at the clock I can remove that save the file. And as soon as I save the file and I exit the file boom it has updated the top bar and away went the clock. You can do that on all of these config files. I'm just going to hit U here for undo, Crl S for save, and then close it again. Bam. I have my lovely clock back. All righty, I think that's it for setup. So, let's jump into install. So, install is how you add software to this system. The base way of doing it is just look at the let's see how many there are. 15,000 official Arch packages. So, if I wanted to install something like Visual Studio Code, I could just write Visual and use my little arrow keys here to pop up. And when I find the package I want, I hit return. I do sudo for installing that new piece of software. And um there we go. It has installed Visual Studio. But you know what? I'm not going to use it this way. So, let me first remove the package. It works the same way. This is all the packages you have installed. There's 188 here. I hit return. It's going to remove that package. And now I'm going to install VS Code through the dedicated VS Code installer that we have. We have that under editor VS Code. And when I install that, it is also going to set me up with the current theme. Visual Studio is in the right theme. And if I change my theme, let's hop to Grub Bugs here. Um, it's going to install the matching theme for it. Isn't that lovely? I think that's pretty neat. Let's hop back to Tokyo Knight and I will show you what else we got. [sighs] The AUR is the Arch user repository. There are 100,000 user submitted packages in here. You can find almost anything. This is for example where you will find Brave and you can install that from this menu. We have separated out. is not part of the same list as we have for the official packages because the AUR sometimes can have issues and not be available if it's being ddoed or something else that has happened in the past. You may also want to review some of these uh built packages if you don't trust the setup. We don't depend on the AUR for anything in the default setup for Umachi. There are no runtime dependencies on it. But um this is a great place to find extra software for Arch. Let's hop back in here and see some of the other stuff. For example, you can create your own web apps. Let me just do my own blog here. DH's blog. I'm going to do a URL for it. Mine is on Hey World. And then I will try to uh grab an icon here. Let me by the way, super T. I'll toggle this floater over here so we can find something. And then let me get some a vintage icon here, the blogger icon. What I'm going to go down here and do is I'm just going to copy the um the direct URL to the PNG. And then I'm going to use superv. Now this is actually an interesting feature here. In a normal Linux setup, you have to remember that the terminal uses its own set of hotkeys for copy paste. That is on control shift C for copy and control shift V for paste. That's different than the fact that everywhere else you got to use controll Z and controlV. In Omachi we have combined the commands into a unified clipboard. So everything is on super C superv. You do not have to remember that there are different underlying clipboard setup. So if I type universal here you can see I have all the universal copy paste and cut. Anyway, let's save that. Now you can find DJ's blog using the app launcher Super Space. Well, let's do that and then write DJH. Oh, great. There it is. It's showing up. Bam. Isn't that nice? You can just get any kind of web app set up this way. And if you don't want it anymore, you can go down to remove. You can go down to web apps. And then you could also see, for example, I don't want any of the Google stuff. Well, space space. Now, those are going to disappear when I hit return. I'm just going to remove this David's block here. Then hit return. Now, it's been removed. If I go to search for it, boom, gone. All right, let's hop back in under install here. Under services here, I like to use Dropbox. That's how I sync everything. When people ask me, oh, how do I move from one thing to another? Do you make backups? No, I don't. I just put anything I care about either on Dropbox or on Git or in a SAS tool. and therefore I can reinstall Omachi on any m machine and in very short amount of time have all my setups and all my data. I also enjoy using tail scaled as my mesh VPN connecting all my different systems. Uh you can set up Bit Warden if you want to use that instead of one password and if you want to use um Google accounts and synchronize your bookmarks and whatever else have you, you can set that up for Chromium right here. All righty. You can also install some new style stuff. You can install a new theme. For example, we can have a look at some of these uh themes that are out there. I'll pop this over. These are some of the other beautiful extra themes that we do not fit in the default box. But if you find something that you like, let's see what we could find here. I like the one that is called Mars. Let me see what that actually is. Oh, right there. I'll hop into the Mars one. I will grab this URL for it. I'll just paste it in again on SuperV. Hit return. It's going to clone the Mars setup. And would you look at that? There's Mars. Isn't that beautiful? Get on your rocket. Let's go. Mars has its own theme. Beautiful setup. Now, if you don't want that theme anymore, which by the way will show up here in your theme selector, you can also just uh remove that. Go down to theme and you see I also had monochrome installed. I had Mars. It's going to jump to another one of the built-in themes here. It jumped to the matte black one which is actually also kind of nice. Maybe we'll stay with that one for just a hot minute. All right, hopping back in under style. You can also install the backgrounds. I already showed you that. And then you can install other fonts where I've just added a handful of fonts that people commonly use for development fire or Messo or Victor Bitstream. These are nice. Of course, you can always install your own packages which by the way I can show you here TTF Victor for example. It would show up here. That's the Mono Nerd font. You want to use a nerd version. That's the one that gives you the glyphs. We use the glyphs for everything in this system. You can see these things up here. These are actually just glyphs out of the nerd font library. So make sure you get a nerd version when you install. So that was dial. Now development. Of course, this is um I use this for all of my development. And of course I use it for Ruby on Rails. So you just hit return here. It's going to install Ruby. It's going to install Rails. And you are ready to rock and do Rails new. And off you go. You can also install Docker databases here. If you are developing against MySQL or Postgress or whatever, you can get it set up straight away as a Docker database that is easy to run with. I'll actually show you another fun thing once you've installed one of those things. You're going to hit super shiftd and you're going to get this uh lazy Docker interface where you can see all the containers that you have, what they're running, what images that they're on, and so forth. very nice when you compare that with those Docker databases for development. But we have a bunch of other languages built in here. If you're developing Go or PHP actually, let's look at PHP. Laravel even is built in and set up the same with Symphony. What do we have for Python here? This is actually if I just wanted to install Python. Boom. This is all I needed. It installs UV at the same time. Wonderful package manager they've gotten over there in Python land. What else we got here? We got a bunch of other setups. JavaScript, we got all the three major runtimes here. You can find a bunch of things. Now, this is just a thin wrapper around mainly mi. Mi is a great way of installing these languages because you can switch between versions. So, if I'm running Ruby one or 317 on one project and I'm running 27 on another project, with me, you can manage all of it concurrently. It's really nice. So look into that. Look into mi. This is a thin wrapper around that. Now editor. I've already shown you VS code, but we have another set of the common editors that people use. Cursor, which is also linked to the theme switches. So if you're running cursor, you're going to get the same themes for almost everything. There's a couple themes that don't exist or cursor doesn't have access to, but the majority of them will get the same update as VS Code will get when you change your themes. You got Z, Sublime Text, Helix, Emacs. Now, just remember when you've installed these, if you want to make it your default editor, you also have to hop in there under setup and then under defaults and then you change this editor, which is one of those few things that requires you to reboot the system. Actually, to be able to have that take effect because it is a system environment and to make that available everywhere, it needs to be set at system boot. All righty. What else do we got? We got terminals. You can pick your favorite terminal. All these three terminals, elacrity, ghosty, and kitty are integrated with the default theme system for all the 12 default themes. So take your pick and uh run with what you enjoy. For AI, we have all the coding agents. We got LM Studio. We got cross and open code as well. Everything that you need right here to install. And then we even have Windows. You can run Windows on Amachi in a window. It turtles all the way down here and run those applications that you might not have access to natively on Linux. It's a great way of running, I don't know, Office if you absolutely must have the native version of Excel, all other forms of applications. Now, do know this is not at least yet GPU accelerated. So, it's not a good way of running games, but it's perfectly suitable for running all sorts of applications um you otherwise need. And then gaming, we also have made it super easy to install Steam, RetroArchch, and Minecraft. Now, of course, you can install any system you want. These are just recommendations, setups. If there's a bit of configuration is needed to set these things up, we made it easy. But as always, anything you need, most likely it's just going to be one of the 15,000 default Arch packages. And if it's not one of those, it'll be one of the 100,000 on the AUR. Now, Omachi comes with a bunch of things pre-installed, and some people don't like that. THEY'RE LIKE, "OH, THIS IS ALL BLOAT." NO, it's not bloat. I use everything that we install by default. There is not one gram of bloat in the default setup. I use everything, but you might not use the same things as me. So, if you want to remove some of those things, if you don't want um ether here, for example, which is a wonderful applications for setting up your own theming, you can see it right here. We have it for actually, let me just let me just show you. Let me just show you that this is a way of setting new color schemes, then applying that theme. It is a way of finding wall papers that you can use. You can then export these themes. It's a really nice application for truly tailoring um to your own preferences. But let's imagine that for some reason you don't want that. You want to save the let's see how much space it takes up. You want to save the one megabyte the one megabyte of bloat that is here. You hit tab on that. That'll mark it. And then you could uh pick something else that you don't want. I don't know here. Let's see. Can we find something that we don't want? I can't really find things I don't want because I want all these things. Let's say Kitty. I'd installed Kitty as an extra editor. You just you were playing with it and you don't want it anymore. You can hit tab on that as well. And then if I hit return, I am going to remove both of those packages. And away they went. Now there's no more kitty. There's no more either. They're gone. Now with either we can accept that we made a mistake, quickly hop down to install, do a package, do ether, and then pop it right back in. Boom. That was it. That is how quick it is to add and remove packages from the system. Now, as I mentioned, you can also remove web apps, you can remove tuies, you can remove any themes that you've installed extra. And if you've added Windows, you can take that out as well. These last two, these are the security tooling that you can set up. We have fingerprint sensor for a lot of machines including the framework laptop and a bunch of others. And if you have a phto key, you can set that up as well. Set that in under install. Um, no, sorry, in under setup, under security, you can set those things up there. And then if you didn't want them, you could just remove it. Now, under update, you can update. Oh, that's how you check for a new version. But when a new version comes out, there'll be a little icon up here with arrows going around in circle. Um, but you could also fool around with some of your configs. Maybe you mess some things up and you just want to reset everything to the defaults. If you have messed up your hyperland config, you just hit hyperland and it'll restore all of that. Uh, some of these other tools, hyper idle, that's what locks the computer when you've been away from it for a while. Hyper lock, that's what gives you the lock screen itself, where you enter your password. Hyper sunset is how you get the blue screen protection for your sensitive eyes at night. Plymouth is the configuration for booting where it shows the Machi logo and the decryption setup. Sway is for those overlays when you turn your volume up and down, for example. Like, isn't that nice? You can actually change that yourself and so on and so forth. There are also the extra Steams. If you installed any of those is something in addition to the final 12, it'll update them all through Git here. If you want to restart any of these things for whatever reason you have a problem with some of them, you can hop in here. Hardware. If you have an issue with your audio, you can try to restart that driver. The same thing with Wi-Fi and Bluetooth. You really shouldn't need that most of the time. Uh you can update your firmware here and you can update the password for the computer and you can set up the time zone. For example, here is the filter for the time zone. I can do Copenhagen. Boom. I was already in Copenhagen. So, that was already set. I can actually also do that on a little hotkey here. If I right click on this up here, I'm going to get the time zone filter. And also, if I just click on this, I'll toggle back and forth between the date and the time. All right, that's about it for the updates. And then finally, of course, you have the about screen which is running fast to fetch. That shows you some details about how many packages you've installed, what version you're on, what branch you're on. I'm on the development branch here, and what kernel version that you're on. So, that is pretty much everything there is in the Umachi menu. You're going to use that a lot to tweak your system. Finally, here, as we said, you got the system menu. That is it. So, I hope you've enjoyed this tour of Umachi. There is a lot of things to find in here. There is a lot of fun to be had. Just learning how to navigate things back and forth, how to pop things from one workspace to another, getting used to the fact that you should be driving your operating system with the keyboard, learning those uh key bindings, making Super K your friend, finding whatever it was. What was this the thing about groups? How did I move things in and out? This is a great way to discover it all and of course jump into the learn menu. Uh dive into the Umachi manual, figure everything out and make this your own system. Um is um it comes as I want the system to be. For a lot of people that's going to be just fine. They will not need to tweak or tune anything. And for others, they'll want to go further deeper and make this system truly their own idiosyncratic setup. I invite you to do all of it. I hope you really enjoy um if you like it. You can tag me on X with DHH and show me your setup. I love seeing these setups. There have been hundreds of thousands of people who have already downloaded the ISO and I've seen so many amazing workspaces and workstations. I love to see it. I think we should all be sharing this excitement for computers, this excitement for Linux and this excitement for Omachi. I am incredibly thrilled to be sharing this journey with so many people in the community. You can hop on the Discord as well. Actually, let me just show you that. If you go to umachi.org, there is a Discord where we have over 20,000 people hanging out. If you get stuck on anything, of course, there's also the merch, the Umechi store where you can uh get one of these nice t-shirts. We sell them all just as cost because um is not a commercial project. It is simply something we make for the love of computers. I make it because this is how I want my computer to work. We have hundreds of people who've contributed to the repo. Here you can see at this present moment 245 people have code in Omachi and I welcome you to become one of them at least with your own setup and if you find something cool open a PR and let's collaborate on making um even better. Now, to get started with your own setup, you will download the ISO first. I'll give you the latest versions, about 6 GB of highly tuned default implications that I need to do all of my work with. And then you can hop into the manual. You can go through the getting started guide, show you how everything is done, and you can see in less than two minutes on a very fast machine, you can be up and running with Umachi. So have fun, enjoy yourself, love Linux.
Video description
Beautiful, Modern & Opinionated Linux. https://omarchy.org