We can't find the internet
Attempting to reconnect
Something went wrong!
Attempting to reconnect
Zen van Riel · 8.3K views · 173 likes
Analysis Summary
Ask yourself: “Did I notice what this video wanted from me, and did I decide freely to say yes?”
Performed authenticity
The deliberate construction of "realness" — confessional tone, casual filming, strategic vulnerability — designed to lower your guard. When someone appears unpolished and honest, you evaluate their claims less critically. The spontaneity is rehearsed.
Goffman's dramaturgy (1959); Audrezet et al. (2020) on performed authenticity
Worth Noting
Positive elements
- This video provides a practical, functional Python implementation for connecting Claude Code to Google's Gemini Pro Vision API, which is a legitimate technical utility.
Be Aware
Cautionary elements
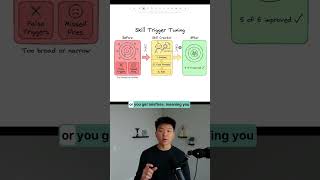
- The use of 'revelation framing' (e.g., 'super secret pro tip') to describe common knowledge in the AI field, which serves to manufacture an aura of exclusive expertise.
Influence Dimensions
How are these scored?About this analysis
Knowing about these techniques makes them visible, not powerless. The ones that work best on you are the ones that match beliefs you already hold.
This analysis is a tool for your own thinking — what you do with it is up to you.
Related content covering similar topics.
Claude Just Rolled Out 2 Big New Features
Matt Wolfe

How AI is breaking the SaaS business model...
Fireship
Claude Code Skills Just Got Even Better
Nate Herk | AI Automation

I Tried Claude Code Remote Control So You Don't Have To
Mark Kashef
Cursor Automations Clearly Explained (worth learning?)
Nate Herk | AI Automation
Transcript
There's one thing getting in the way of AI agents like Claude Code becoming truly amazing. The ability to generate images until now. I'm going to show you a simple Python script that Claude Code can understand to always generate images when you need them for designing websites, iconography, or anything else. You can even use this to change specific elements of an image like how this rocket ship here can be changed easily into a checkered flag. All without messing up the rest of the image. claw code is now going to be able to use nano banana directly and that's going to become your super team. So let's see how it works. Well, I can show you by first manually calling this code with UV run Python. I'm going to generate a 3D cube on a black background which uses the API version of nanobanana. Now you will see that the image is already generated and it saved it to output.png. Pretty cool. Just a random cube, but it shows you that it works. Now the great part about this is that I can make Claude Code do this for me. If I open up claw code in here, I can simply drag the readme that instructs the model on how to use it and then say generate a 3D cube for me. And then what it will do is it will understand how to call all the right Python scripts in here and generate an image whenever I need to. This can be useful in so many different ways. If you're generating a front end with Claude code, you can first brainstorm a couple of different styles without having to just rely on textbased input, which can often lead to super generic, obviously vibecoded UI designs. But this way, you can actually generate all kinds of reference images for Claude Code to use when designing websites or applications. While Claude Code is thinking, I just wanted to let you know that this repository is available for free in a link in the description below. But don't click on it yet because I first want to explain how everything works. In this case, we're just creating a simple 3D cube. And you can see that it's created it like so. But you can see how these two very much differ in style, right? So, how do we get that consistent? Well, this repository allows you to determine a specific style that must be used for every single image generation. In this case, I actually have one style defined here, which will create blue glass 3D objects. Some examples of those are this one, this one, this one. They're pretty cool 3D objects, right? So now let's try and generate an image using that style. So I can just say use the blue glass style and claude code will understand that it needs to now reference this markdown file when it's calling the Python script. You can see it does it automatically. I didn't even tell it that the markdown file exists but it still knows where to find it. Now it's going to generate another cube but it's not going to determine any styling itself. It's simply going to pass along this markdown file which contains a bunch of style parameters. Now, when we have the new cube 3D image, you can see that it looks pretty similar to the same style as these previously generated images. What's even better is that you can even create a new image using one of these images as a reference. This is one of the great parts of modern image generation using AI, which is something that was not possible years ago. If you're coding with AI, it's very easy to just go back and and fix things with Git, right? But with image generation, if something here is messed up or I want to change something like how I might want to change this rocket emoji to something else, you often will find that AI generation will mess up the image and just change it completely. With Nano Banana, you can actually make varants on a specific image and make sure that only the aspect of the image is changed that you actually want to change. So let me give you an example. I'm going to say going to pass in this image. Change this image by making nano banana remove the rocket ship replacing it with a finish flag emoji in the same style. And now you will see that it's going to properly read that image using its own image OCR capabilities. And then what's going to do is it's going to prompt that same Python file with the directive to remove the rocket ship. But what's most important to understand here is that it doesn't just call that API without passing the reference image. No, it's actually passing 4.png as a reference image to Google so that the AI model knows what kind of image it needs to take as inspiration. Now, if you go to the edited file, you will see that it's pretty much the same thing and it's properly replaced this one icon with the new flag. funnily enough, it doesn't even know what nano banana is because it's not that aware of the script. It just knows how to call the script and it will handle it from there. So, let's have a look at the code so you can actually understand what is going on here. In main.py, we're using the Gemini 3 Pro image preview API, which is basically the latest Nano Banana API, and you can change this whatever you want. But the most important thing to understand here is that we use a bunch of different parameters that really customize this experience. For example, you can pass your own style, which is just a markdown file, but you can also pass an edit flag with an input image. And that's basically what Claude Code did for me to make sure that this edited image uses the exact same style and just replaces one part of the image. Now, I want to give you a super secret pro tip that has taken me dozens of hours to understand. So, make sure to pay attention to this. You want to avoid generating complex gradients in your images because the problem with gradients is that they make it very difficult for these AI models to edit images without losing a lot of quality. Here's an example. I have a decently highquality image here with a Python and TypeScript logo with a nice little gradient. Now, I've asked Gemini to redo this style and change the gradient. With the first iteration, you can already see, you know, it's changing the gradient properly, but things are getting a little bit lower quality. I'm actually just going to zoom it in so you can see the differences more clearly. You can see here that it's starting to get a lot more grainy, right? And this is only the beginning. With the second iteration, it's starting to look even worse. The gradient has changed, but the Python logo is looking quite fuzzy. And in the third iteration, it looks even worse. This is basically unusable if you wanted a high quality asset. And once your image is this kind of poor quality, it will be very difficult to rework it using Nano Banana. So that's why you want to avoid creating gradients and instead let it generate the iconography that you want. Then using something like Canva or Photoshop, you want to add complex gradients afterwards. In my case, I also generate a bunch of backgrounds that I simply edit using those tools. And when it comes to text, if you want to, you can add them at the very end or you can just add them using something like Photoshop because even though Nano Banana is pretty good at adding text, if you ask it to do many things at once, it will be pretty poor at doing so. So go ahead and grab the repository in the link in the description below and know that you can extend it to make it a skill that can be called anywhere or even turn it into an MCP server. It's all up to you, but I want you to go ahead and try it because that's the only way that you can actually master this.
Video description
🎁 FREE AI Image Agent Repo: https://zenvanriel.com/ai-image-starter-kit ⚡ Master AI and become a high-paid AI Engineer: https://aiengineer.community/join AI agents like Claude Code, Copilot and Cursor have always been missing one crucial ability: generating images. In this video I show you a Python repository that lets Claude Code use Google's Nano Banana API directly. This Claude Code tutorial covers how to generate images, maintain consistent styles across generations, and edit specific parts of images without destroying the rest. This is how AI-assisted design should work. Timestamps: 0:00 AI Agents with Image Generation 0:32 How Python and Claude is used to generate with Nano Banana 1:45 How To Get Consistent Image Style Generation 3:16 Create New Variants of Images 5:05 Pro tip: Avoid gradients for quality Sponsorships & Business Inquiries: business@aiengineer.community