We can't find the internet
Attempting to reconnect
Something went wrong!
Attempting to reconnect
Dreams of Code · 160.0K views · 5.3K likes
Analysis Summary
Ask yourself: “Did I notice what this video wanted from me, and did I decide freely to say yes?”
Worth Noting
Positive elements
- Practical, hands-on guide with exact commands for VPS security, Node.js install, Clawdbot onboarding, skills addition, and integrations like Google services.
Be Aware
Cautionary elements
- Parasocial sharing of personal AI expectations to build rapport and enthusiasm for the featured tool.
Influence Dimensions
How are these scored?About this analysis
Knowing about these techniques makes them visible, not powerless. The ones that work best on you are the ones that match beliefs you already hold.
This analysis is a tool for your own thinking — what you do with it is up to you.
Related content covering similar topics.

Join Me at JavaOne!
Java
🎬 Download and Play YouTube Clips with bash/Go
RWXROB
Raising Funds For World Domination (Day 318)
RobertElderSoftware

January 2026 Q&A
Jon Gjengset
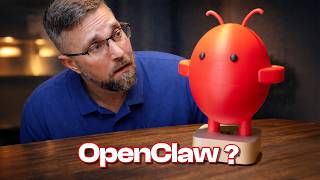
WTF Is OpenClaw? And Should You Even Care?
Elevated Systems
Transcript
Now, I don't know about you, but when AI first came onto the scene, I was expecting it to basically take over all of the boring tasks in my life. Uh whether it was just ordering groceries, managing my email, or preferably at doing my laundry. Unfortunately, as you're probably well aware, this expectation hasn't really manifested, and instead, it seems that all AI has been good for is generating slop and taking away my favorite activity ever. Fortunately, for those of us who wanted to see some real benefits come from AI, things are starting to look up. And we've now got something that I think fulfills my original expectation of what I wanted AI to do, which is basically manage all of the boring tasks in my digital life. These include things like managing my emails, automatically replying to business requests, updating my accounting software, and even helping me to save money by monitoring the prices of flights, all whilst letting me know when a good deal is available. Of course, all of this has been promised before. However, the difference this time is that this is an open- source piece of software running on my own private server, which means it can do some more interesting things like building and publishing the Linux version of my latest app whenever I ask it to or turning my raw thoughts and ideas into concrete linear tickets. Perhaps my favorite use case, however, is that it can manage the actual machine it's running on. Whether it's installing applications, improving my systems security, or just increasing its own capabilities. Yes, the AI future that I was hoping for is finally here, and its name is Claudebot. This little guy is an open- source agent that hooks into a configured LLM provider, handling all of the tasks and messages I send over to it using a common messaging app such as Telegram, Discord, Slack, or even WhatsApp. In addition to helping me automate a number of tedious tasks, it's also been incredibly fun. And I'm certainly not the only one who thinks so. as pretty much everyone I've seen online who's used it has given it huge praise and for myself it's probably the most fun I've had playing with servers since setting up my home lab back in 2023. There's only one real wrinkle, however, in that it does take a little bit of technical skill to get set up, although far less than it did a few days ago because the devs behind it are absolutely shipping. Therefore, in this video, I'm going to show you how to set up your own Claudebot personal assistant on your own personal server, as well as showing some of the ways that I personally like to configure mine. Additionally, we'll also take a look at the concept of skills and how you can add them to your own Clawbot so that it can achieve whatever you ask of it, except of course perhaps doing your laundry. In order to begin, we're first going to need a place to install Clawbot on. This can be any machine that you want, such as an old laptop, a desktop PC, or even a Mac Mini. All of these are perfectly viable if you have a spare one lying around. But for the best experience, you're going to want to use a machine that is always available online. Whilst you can achieve this with your home network, the easiest and most affordable way, at least in my opinion, is to make use of a VPS instance. So, that's what I'm going to use to install Claudebot on. Specifically, one provided by the sponsor of today's video, Hostinger. Hostinger specialize in providing high resource, long-term VPS instances at an incredibly affordable price, which makes them perfect for this use case. The instance size that I'm going to be using in this video is the KVM2, which comes with two vCPUs and 8 gigs of RAM, as well as 100 GB of SSD storage. >> [snorts] >> This is more than most people probably need for an AI assistant, but it gives me a little bit of headroom when it comes to building projects or even if I want to run a simple web app. And because it comes in at the low price of only $6.99 a month, then it makes it a very compelling option. Additionally, [snorts] if you use my coupon code dreams of code when checking out, you'll also get an additional 10% off this already low price. So to get your own VPS instance to use with Claudebot, then visit hostinger.com/dreams a code and make sure to use my coupon code dreams a code for that additional 10% off. A big thank you to Hostinger for sponsoring this video. Okay, with your VPS instance in hand, the next step is to select the operating system that you want to use. In this case, the choice is ultimately up to you. Uh, but if you want to have the least amount of headaches and follow along with what I do, then the latest YUbuntu LTS, which at the time of recording is 2404, is going to be the best choice. Once you have your VPS instance size and operating system chosen, the next thing to do is to follow along with the rest of the setup steps. First, setting a root password to something ideally secure and then adding in an SSH key, of which there are instructions on how to do this uh when it comes to using Hostinger. Once you've completed both of these, you can carry on with the rest of the remaining steps, and you should then land on a page where your machine is being configured, uh, which will take about a minute. Once that's complete, you'll then be presented with the following screen, which will display the SSH command for you to access your new machine. Go ahead and copy that and then paste it into a new terminal window, which will then bring you straight into your new machine. Okay, now that we've managed to set up our VPS and managed to SSH in, the next thing we want to do is a couple of good security practices when it comes to using a VPS. Let's begin by first creating a new user on the VPS called claudebot using the following add user command. This will prompt us for the password, which we should absolutely set, and some other information that we can just skip. Next, it's time to set up some SSH keys for our new user. To do this, [snorts] I'm going to go ahead and open up a new window and run the following SSH copy ID command with the username Claudebot in this case, followed by the IP address of my VPS. Make sure to replace this with the IP address of your own VPS instance. This will then prompt you for the password of the user that you just created. Once that's copied, we should then be able to SSH into our new user without needing to enter their password, which we can go ahead and verify and see it's working correctly. The last thing to do is to then add this user to the pseudoiz group so that it can perform elevated tasks. But we're also going to allow the user to do this without needing to provide a password. Now, fair warning, this is kind of reckless. So, I wouldn't recommend setting this option if you're planning on running Claudebot on a machine that you care about. Uh, but for a dedicated VPS instance, then it's not the end of the world, and it's better than sending a password over a messaging app anytime Claudebot needs to elevate its permissions. there is a better way to communicate passwords with Claudebot uh which I'll show later on. In any case, with our changes now made, let's go ahead and confirm that our user can perform pseudo commands uh by sshing back in and running the following pseudo ls command, which if configured correctly should work. Okay, with that, we've managed to set up a new user and do some light security practices when it comes to our VPS. Now, there are a few other practices that I've intentionally left out as we're going to defer those to Claudebot to handle. With that, we're now ready to begin installing Claudebot onto the system. Just a quick note from the future, since recording this video, Claudebot now has a single command you can use to install both the dependencies and Claudebot, simplifying the whole process. However, I'm going to leave my section in just because I haven't tested this, so your mileage may vary. First things first, we need to install the node runtime at version 22 or higher. To achieve this, there are a couple of different approaches we can take. However, the one that I went with was to use MVM, which was easy enough to achieve by just copying over the install script from the NodeJS website and pasting it in. Once it's installed, you should then have both NodeJS and mpm available with a similar version to what I have on screen. [snorts] Now, it's time to go ahead and install Claudebot. to do. So, let's first head on over to the Claudebot website, which provides us a single line to install via mpm. If we go ahead and run this, we can see that Claudebot will be installed after a minute or two, which means we're now ready to set it up. Fortunately, setting up Claudebot is somewhat simple thanks to their interactive wizard, which is accessed by running the following Claudebot on board command inside of the BPS, which will take us into the onboarding TUI. The first choice we're given is to choose the onboarding mode. Either quick start or advanced. Uh for this video, I'm going to go ahead and choose the quick start commands, but if you're a little bit more familiar with setting up a VPS from scratch, uh then feel free to use advanced. The next choice we're given is to set up an LLM provider. Claudebot supports a few methods out of the box, including using anthropic oorthth tokens, OpenAI codeex or API key, Google Gemini, anti-gravity, and a few others. Initially, when I first started using Claudebot, I was using my Claude Max subscription, but they recently decided to block thirdparty harnesses. Whilst this has been fixed using Claudebot and you can do so, it is against their terms of service. So, I'm not going to go ahead and show it in this video because I don't want anyone to get banned. Instead, I'm just going to go ahead and use my chat GPT plus plan by selecting OpenAI codeex. This will prompt me to load a URL inside of my browser, which will trigger the OOTH flow for me to sign in. Once this completes, I'll end up on the following page, which does suggest that something's wrong, but it is in fact correct. Here, we need to copy the URL of this page and paste it back into the TUI, which will allow Claudebot to authenticate. This does feel somewhat janky, and to be fair, it definitely is, mainly because it's hijacking the oorthth flow. Once that's done, we're then presented with an option to select a messaging provider, which can be either Telegram, WhatsApp, Discord, Slack, etc., etc. For the moment, I'm going to go ahead and skip this, but we will add this in later. The next prompt we'll receive is whether or not we want to configure some skills. Now, we'll take a look at skills later on. So, for the meantime, I'm going to go ahead and set no. Okay, with that, we completed the onboarding TUI. Now, we should be able to communicate with our new digital assistant in order to finish up the rest of our setup. To do so, let's go ahead and use the Clawbot Tui command, which will open up a simple chat box we can use to begin communicating with our digital assistant. Let's begin by saying hello, which will cause our bot to respond with the following message. This message asks for some information from us in order to customize and configure the bot to our liking. For my own assistance, I'm going to go ahead and call them Zenbot and give them the creature of a Zen fox with the fox emoji. Lastly, I then need to provide my name as well as a nickname for what it can call me. Afterwards, we should receive a confirmation that the assistant has removed its onboarding step as well as adding in the information that we've provided into its own configuration. Very cool. You can also see that it mentioned it was unable to restart Claudebot uh due to restarts being disabled inside of the configuration. Here we have a couple of options to resolve this. We can either restart manually, enable restarts in the config, or a third option, which is to just ask our assistant to do it themselves, which is what I'm going to do in my case. By the way, this step can be a bit hit or miss. Sometimes it works perfectly. Other times, you may need to SSH back into your VPS and give it a kick start. In my case, it did work, but I did need to refresh the TUI session. Okay, with that, we have our bot configured, and now we can start asking it to do some things for us. Before we do anything too critical, however, and now's a good time to address some security issues our VPS instance has, uh, specifically related to SSH. Currently, there's a few loose things when it comes to our SSH configuration. However, rather than figuring out what these are and solving them by hand, let's instead leave this as a new task for our new assistant. To do so, let's actually use the web UI rather than doing this in the terminal just so I can show how one might access this. By default, this UI isn't available over the internet as it's bound to local host only. So, in order to access it, we're going to need to set up an SSH tunnel in a new terminal window uh by using the following command. [snorts] In your case, you'll want to replace this IP with the one for your own VPS instance, but the rest of the command should look the same. With the tunnel up and running, we can now access it through the web UI using my web browser at localhost 18789, which will bring us into the Claude UI dashboard console. Very cool. Here you can see this dashboard provides us with the current health of our bot as well as a few tabs to manage configuration. For the moment, we're just going to ignore all of that and use the chat interface. Therefore, let's go ahead and send a message to our assistant to perform a review of the SSH config suggesting any improvements. I'm also going to make sure to specify that it confirms with me before taking any action. Okay, we've got a message back with some proposed changes. Although this is for the entire SSH configuration, I probably should have specified this just for SSH server. In any case, the proposed changes look pretty much in line with what I would want to change myself, although it doesn't realize that it has pseudo permissions. So, I'm going to go ahead and let it know, as well as confirming the changes that I want it to make. Okay, let's go ahead and send this and hope for the best. Okay, it's been about a minute and we've got back a confirmation on everything that it's changed, which does look like it's actually done a good job. So, let's go ahead and confirm these by heading on over to a new terminal window and seeing if everything is working as expected. First, let's try and SSH in as the root user, which we can see has been disabled. Very cool. Next up, let's try and SSH in using password authentication, which again gets rejected. So far, that's two for two. Lastly, let's go ahead and make sure that we can still SSH into our clawed bot user using public key authentication. Hey, [clears throat] look at that. Everything's working as expected. Our bot has managed to upgrade the security of our machine that it's running on. I don't know about you, but I actually find that really cool. Awesome. Okay, next up, let's go ahead and add in the ability to message our bot using a normal messaging app, of which there are a few to choose from. By far the easiest in both my opinion and the opinion [clears throat] of the developers is to use Telegram. So, that's what we're going to do in this video. To do so, you can absolutely ask your assistant to help set this up. uh but you will need to provide them with a bot token securely which means not sending it over the chat interface. Therefore, for this video, I'm going to go ahead and show how to set this up using the Claudebot CLI. To set up Telegram, we can call the Claudebot provider ad command on our VPS instance, which will then bring up a list of providers. Uh let's go ahead and select Telegram. Next, we then want to select the default or primary account, and we're then prompted for our bot token. To obtain a bot token for Telegram is in fact really simple. All you need to do is head on over to the Telegram app and message the bot father to create a new bot. In this case, I'm just using the UI, but you can also do this over the chat interface. Once you've created your bot, you can then copy your token and paste it into the terminal UI, after which you can then select the following defaults. These basically mean that in order to message your bot, you need to explicitly allow a request or a pairing. With Telegram set up, the next thing to do is to authorize our personal account to message our bot, which we can do by initiating a chat. This will then send us a message letting us know that we need to run the following command, uh, passing in our user ID in order for the bot to accept the request. Therefore, I need to head back into my VPS and paste it in. With that, I should now be able to message the bot over Telegram and receive back a response, which, hey, look at that. You can see it's now working. With Telegram now set up, I can pretty much message Claudebot from anywhere I might be using my phone. Very cool. Okay, now that we can access our bot via a simple messaging interface, it's time to start putting it to work. Uh, but where to start? Well, a good place to begin is by adding in some skills. These are documents written in Markdown that provide instructions to an agent on how to use a specific tool or perform a specific task. It's basically a form of light documentation, but the way that I like to consider it is rather than providing a full recipe book, you're instead giving a single recipe card with the goal of narrowing down the choices the LLM can potentially make. As for where to find these skills, well, Claudebot does provide some out of the box. However, the best place to find them is the official Claudebot skill website, Claude Hub, which is where you'll find skills created and uploaded by community members. As for how to add these skills, well, these are all stored within Claudebot's file system, of which Claudebot can actually manage itself, whether it's creating new skills or downloading them from Claude Hub itself. So, rather than adding this manually, let's go ahead and add in our first skill using Claudebot, which is going to be the Claude Hub skill itself. This will give our assistant the ability to search for skills on Claude Hub and download them onto its registry. In order to bootstrap this, let's go ahead and ask our bot to install this skill itself by passing in the URL and ensuring it sets up any required dependencies. After a minute, the bot has let me know that it's set everything up. So, let's go ahead and confirm that this is the case by heading on over to the VPS instance and running the Claudebot skills list command, which if I scroll to the top, you can see Claudebot is now available. Very cool. With that, we can now begin adding in skills from Claude Hub. Uh, by the way, you don't have to use skills, but they do make things a little bit easier. In any case, let's go ahead and use this new Claudebot skill to add in some more assistant functionality to our bot. In this case, I want the bot to be able to summarize any new emails that come in on my Gmail account. So to achieve this, let's begin by first adding in a new skill, which is going to be the GOG skill, which provides instructions on how to use the GOG CLI, which is used to access Google services such as Gmail, Google Calendar, etc. So, I'm going to go ahead and ask Zenbot to search for and install the GOG skill as well as any dependencies. Uh, this time without providing it a URL. In the response I get back, we can see that the skill has been added. uh but the actual GOG binary has not due to homebrew not being installed on the machine. This is one caveat that I find when it comes to skills on claudhub as they're usually more optimized for Mac OS. In any case, this isn't too much of an issue as the bot has recommended to try and install it using Go. So, let's go ahead and do just that. Okay, so it wasn't able to install using the Go install command due to having an older version of the language. So instead, it just went and downloaded the binary direct from GitHub, which is pretty cool. Next, we need to then authenticate with Google, which is achieved by setting up an OOTH client in the Google developer dashboard. I've done this step already off camera, so I'm just going to go ahead and copy over the client details via SCP and ask it to authenticate with it. Next up, I now need to provide it my email address of which it will go and create an oorthth URL for me to use. Okay, so it's managed to do so and now I just need to initiate my oorthth authentication flow by clicking the URL it's provided me and then logging in followed by pasting back the local host redirect we receive pretty much the exact same process as it comes to authenticating with open AI. Unfortunately, it's failed. This is because I haven't set up a key ring password for it to store the OOTH token in which is a good security measure. So to resolve this, I'm going to go ahead and copy over a password file using SCP and then try again. Okay, this time it did work and Google is now authenticated. As I mentioned, there is a better way to pass secrets into your assistant, which I'll talk about near the end. But for the moment, let's go ahead and test to see if everything is working by asking the assistant to summarize the last email I received. And after about a minute or two, we get back a message summarizing the last email that I received on my inbox. uh which yes was an email that I sent to myself for testing. Okay, with that I now have the ability to ask Claude to be able to summarize any email that I receive in my inbox. Uh which means I can start setting it up to do some other things. So I'm going to go ahead and ask it to set up a repeating interval or a chron task to check my email twice a day and let me know if anything important comes through. By the way, this brings up a good point. Uh Clawbot can actually be tasked to be triggered a few different ways. One, of course, is to respond to a message, and another is the ability to set up a chron configuration, which is what it uses by default for its scheduling. This allows you to schedule tasks that your agent should perform periodically. For example, in my production bot, I have a cron task set up to periodically check for flight prices uh using the Amodus API and let me know when a good deal becomes available. In addition to Chron, your bot can also be configured to work with web hooks in which you enable web hooks using the configuration and it'll expose a small HTTP web hook for external triggers. This allows you to add even more forms of automation. In my case, I have a web hook set up with Polar so that my bot lets me know whenever a purchase is made. The other trigger types that Claudebot has access to include monitoring for orth changes which is good for informing you if your OR credentials expire and also Gmail pops up which can be used to respond to email events. There's also just good old-fashioned polling when it will just check a task periodically. All of these triggers make Clawbot extremely versatile and really the only limit in what you can achieve is your imagination and of course any infrastructure/physical world constraints. Now, that being said, Claudebot is definitely not perfect, and at times it feels like it's only really being held together with duct tape and popsicle sticks, but even then, it's still really fun to use and adds a brand new dimension to automation and self-hosting. One that I'm finding to be really fun. That being said, there are some good tips I think worth sharing. Number one, it is an LLM, so there is times it's going to do the wrong thing. So, I definitely recommend not running this on production hardware and making sure to run it on an instance that you feel comfortable if it absolutely breaks. Number two, make sure to use Git and the GitHub skill to back up and version control your bot configuration, which is really nice if you want to make sure you have a backup so that you can move it onto a different machine or in case you make a breaking change. Just make sure to ask it not to commit any secrets. And perhaps the most important tip I can give is to make use of a secrets manager in order to share passwords with your new bot. In my case, I've set up Doppler using a skill which allows me to easily add secrets to my bot remotely without me needing to store them into a file or send them over Telegram. I've done this by providing an access token which limits it to a specific project in my Doppler configuration. By the way, if you're interested in more in how Doppler works, I've actually done a whole video you can watch about it here. However, before you go and do that, let me take a moment to thank the sponsor of today's video, Hostinger. If you're looking to get your own VPS instance to host Clawbot on, then Hostinger is a great and affordable option and one that I've been using now for just over a year. Not only are they really reliable, but they're also incredibly affordable and a great option for running projects like these. So, if you're interested, then make sure to visit them at hostinger.com/dreamscode and use my coupon code dreamscode to get an additional 10% off. Otherwise, that's all from me. I hope you enjoyed the video and I'll see you on the next one.
Video description
UPDATE: It's now called OpenClaw To get your own VPS to run ClawdBot on, then visit https://hostinger.com/dreamsofcode and use my coupon code DREAMSOFCODE to get an additional 10% off. When A.I. first came on to the scene over 10 years ago (hello, Siri). I was expecting it to basically act as my digital assistant, taking over many of the boring tasks in my digital life. Unfortunately, that never really manifested, and instead we've been left A.I. generating slop and taking over the act of writing code. Fortunately, things are looking up, and it seems we finally have something that fulfills my original expectation: Clawdbot And it's glorious. This video was sponsored by Hostinger. Video Links: - Clawdbot (now known as Moltbot): https://clawd.bot - Clawdhub: https://clawdhub.com/ - Install Node: https://nodejs.org/en/download - Telegram: https://web.telegram.org/ Watch my course on building cli applications in Go: https://dreamsofcode.io/courses/cli-apps-go/learn 👈 How I edit my videos: https://getkiru.app My Gear: - Camera: https://amzn.to/3E3ORuX - Microphone: https://amzn.to/40wHBPP - Audio Interface: https://amzn.to/4jwbd8o - Headphones: https://amzn.to/4gasmla - Keyboard: ZSA Voyager Join this channel to get access to perks: https://www.youtube.com/channel/UCWQaM7SpSECp9FELz-cHzuQ/join Join Discord: https://discord.com/invite/eMjRTvscyt Join Twitter: https://twitter.com/dreamsofcode_io 00:00:00 Intro 00:03:18 Hostinger 00:04:15 VPS Setup 00:06:48 Installing Clawdbot 00:08:04 Onboarding 00:09:56 Hello World 00:11:04 Self improvement 00:13:37 Setting up a messaging app 00:15:20 Adding Skills 00:17:06 Connecting to Google services 00:19:42 Scheduling tasks & triggers 00:21:17 Advice & Tips