We can't find the internet
Attempting to reconnect
Something went wrong!
Attempting to reconnect
Slab Rehab · 7.8K views · 231 likes
Analysis Summary
Ask yourself: “What would I have to already believe for this argument to make sense?”
Performed authenticity
The deliberate construction of "realness" — confessional tone, casual filming, strategic vulnerability — designed to lower your guard. When someone appears unpolished and honest, you evaluate their claims less critically. The spontaneity is rehearsed.
Goffman's dramaturgy (1959); Audrezet et al. (2020) on performed authenticity
Worth Noting
Positive elements
- This video provides a detailed, step-by-step look at the physical mechanics of paper fiber expansion and compression used in professional card conservation.
Be Aware
Cautionary elements
- The video normalizes 'card doctoring' techniques without discussing the potential risks of having a card labeled as 'altered' or 'authentic altered' by grading companies like PSA.
Influence Dimensions
How are these scored?About this analysis
Knowing about these techniques makes them visible, not powerless. The ones that work best on you are the ones that match beliefs you already hold.
This analysis is a tool for your own thinking — what you do with it is up to you.
Related content covering similar topics.

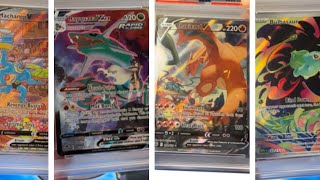
Day 211 of Collecting EVERY Pokemon Card Master Set! #pokemon #pokemontcg #pokemoncards
Danny Phantump
PSA in 2025… It’s WORSE Than You Think. #pokemoncards #psagrading #gradedcards #pokemon
Fredy Cards
25 Card Pokemon PSA Sub Order Reveal 👍 $18.99 Bulk Rate Grading TCG Return. Charizard Rayquaza
Little Victories Sports Cards
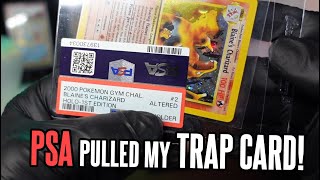
THIS happened when I graded REPAIRED Pokemon cards!
Slab Rehab
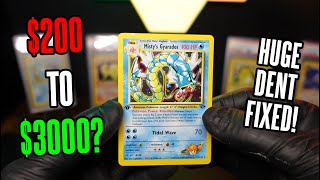
ASMR Pokemon Card Repair #5: Misty's Gyarados with HUGE dent!
Slab Rehab
Transcript
Cracking my vintage slabs to get better grades. Episode 11. Jungle Needle Queen first edition PSA 3. This thing is an absolute pile. Let's see what's going on. I don't even really know why I graded this. Um, it's clearly in terrible condition, but at least now you guys can see uh kind of a demonstration of uh crease and dent removal because first thing you'll notice on this is we got a gigantic gouge, a ton of scratches all over it. Obviously, I'm not going to be resubmitting this. This is going to be more of a fun one because I got a lot of questions about gou uh dent and crease removal. Got some big dents on the right side of the card. Here's that gouge. some more dents on the left side of the card kind of going vertical as well as one going horizontal right next to that. A little bit hard to see, but here's what that looks like from a different angle. Here's a close-up of that gouge. Deepest one I've ever seen. I don't know how that didn't go through the back of the card. I don't even know how it's possible to gouge a card like that. But on the back side, we've got a deep dent running perpendicular to this gigantic crease. So, we got a crease on a dent. That's going to be fun. Got another gigantic crease on the left side here. It's about an inch and a half long going all the way down to the Pokéball. And a couple smaller round dents on the front of the hollow that you can see here. Not really visible from the back. And to top it all off, it's just covered in dirt pretty much everywhere. So, this one's going to be really fun. See what I can do. It's really going to take a lot of magic. And as the title states, this video did take three weeks to make. So, hope you enjoy what you're about to see. Here's a closeup of that gouge on the front of the hollow. Actually did not break the surface, which is astonishing. So, if I could fix this somehow, that might actually be worthy of grading in a grading scenario. I'm going to start cleaning things up here with my cotton swabs. And I'm going in just spot checking. This is kind of a simulation of what I would do if this was a real card that I was going to grade. And I'm doing the spot cleaning because I don't want to use lots of pressure on a thumb cotton swab or a cotton pad when I can really just focus in on exactly where the dirt is. because some of the stuff on this really old cards are really embedded onto the cards themselves and I don't want to scratch or remove any of the surface when I take the material off. Got everything at least roughly cleaned up. I'm going to throw this down and we'll start to get to work on these dents. Here's you can see the dents on the back. I'm going to saturate my cotton swab with my cleaning solution. And I'm actually just going to transfer the liquid onto the card. So, the methodology here is basically letting that liquid soak into the fibers of the card. And just by the nature of absorbing into the card, it's going to expand those fibers. and uh not only expand them, which in and of itself could reduce the depth of that dent, but also loosen it for us to work it. So, now that that's all been absorbed, some time's gone by. I'm going to hit this with my little ball pen tool. And what I'm doing here is really just touching I'm just touching the crease. I'm not really applying pressure. I'm just kind of loosening up the fibers, making it workable, following the lines of the crease. It's going to be a long process and we're not going to go for immediate gratification on this. We're not going to try to fix the dents on day one. If this were a real card, I would have to take my time and be very careful because every piece of pressure that you apply to both the front or the back of the card can can scratch it, can break the surface, you name it. There's a lot of things that can go wrong. So, you have to start small and work your way up very slowly. Using the bone tool to kind of flatten down the dents from the front side of the card. I'm just going to try to push out that gouge from the back a little bit with some direct pressure. Here I am actually applying a little bit of pressure. You can see that's uh made that a little bit more prominent on the front side. Now, since it's prominent, I'm going to take my tiny ball pen tool and work the outer edges to basically kind of average out the height of that gouge. This is what things look like before we go through round one of many rounds of pressing. This is a humidity press. Using a couple sprays of my solution between foam here. Basically, that solution will expand the fibers and then as it dries, those fibers will contract again. So, one cycle of this should get us a little bit of progress towards all those dents and creases. And it's worth noting that one cycle of that takes at least 24 hours. If you do it right, it takes quite a bit more than that. I live in a very humid environment, so usually two to three days actually for full drying. So, we got some reduction in visibility on those creases. I'm bending the card to test the humidity just to make sure that there is still some left in there because I'll need it for the hum the heat pen. The heat pen is a specific heat applicator for small areas like creases. the heat will kind of expand and dry those areas simultaneously, but also the pressure flattens it. So, it's kind of a threein one functionality. And the heat pen is one of the more advanced tools, especially when you're dealing with the plastic cards or hollow surfaces. So, you need to start light. You can't apply heat directly when the pen is applied to the card. You need to turn the heat on and then run their pen across the surface. Still working on that gouge. I'd say we got a slight reduction in depth on there. I'm going to hit it from the back with the ball pen again. Try and push that out. And here's what that ends up looking like. Trying a few different things because I've never worked on a gouge like this. So, I'm actually applying some solution to the back. So, once that absorbs, it again, makes those fibers expand, which in and of itself could reduce the gouge, but I'm going to do that for the purposes of making it a little bit more malleable when I apply pressure with a ball pen. Here you can see me actually using my fingernail to try and push that out from the back. and then using the heat pen to dry and flatten it from behind. Only really want to play with the card so much between humidification processes and drying because if the card gets worked too much, the fibers could truly start to break down. So, put it through the press just for pressure. I didn't actually use any heat there. You can see we got some slight reduction in those dents on both the right and left side, but still quite a bit of work to do. There's also some whitening that has appeared after working on those creases. And this is a little bit unavoidable if the crease is bad enough. The left crease is looking better. There's no whitening here. So, that's still salvageable for a full restoration. But sometimes those creases are just so severe that the actual surface of the card breaks. And no matter how much you reduce the grease, you can't restore the coloring on that top layer that broke. Trying again to push out that gouge from the back with my ball tool. I thought if I could apply pressure, constant pressure over a long period of time, that would result in more of a permanent change in that gouge. So, I'm actually taping the card on top of a metal BB. And this is something that I just kind of cooked up off the top of my head with what I had around me, but you can see the BB is underneath that gouge there. And I'm just going to apply some pressure to that with the foam pads. So, it's not direct pressure. Kind of distributing that a little bit. And then whatever I had handy to apply some pressure for 24 hours to see if that would help push that out. And it did indeed push that out, but not as much as I'd like. So, I put it through a round of humidification humidor. And we're going to bust out the big guns. And big guns [snorts] for me is the heat press. Something I've been learning to use over the last few weeks. This card, having gone through the restoration process, this card alone has gone through the heat press probably 10 to 12 times. This is the first time it's going through the heat press. I use about 160° anywhere from 30 minutes to an hour at a time. And let's take a look at our results after round one. So, they got a weird texture to the card. Heat press does that. So, part of the heat press process requires flattening. So now instead of just humidifying and pressing, one full press cycle requires humidification, heat press, drying, and flattening, which lengthens lengthens the cycle to 3 to 4 days uh per cycle. So you can start to see why this video took so long to make. So we got that flattened out. I skipped about uh 8 days worth of repetitive work, and this is what we ended up with. All the dents on the right side of the card have been completely removed. The gouge has been drastically reduced, but not removed entirely. And all the dents on the left side of the card are also completely removed. So, great progress on those. Our dent or our crease on the left rather is completely gone. So, that's been restored pretty much what I would consider fully. That was going all the way down to the Pokeball. We do have that whitening left over from the crease on the right, but that is the only remnant of the crease. The crease itself is gone. This is a flat card, although it might look like there's a crease there. That's just from the surface break. The dents on the back were also gone. There's a little bit of clouding on the hollow that came through one of the heat press processes where I tried a kind of a wet press method localized to where that gouge was. And uh basically that ended up transferring too much heat directly to the card because a wet uh pad actually conducts more heat than a dry pad does and it basically burnt the hollow. So be careful with your heat on the hollow. We're going to see if we can remove a little bit of that with a round of Curt's recovery. Now if I was doing a real restoration, I would have not have done an experimental method like that on a card. Again, I'm not grading this. This is just a little exhibition for crease removal. Although that cloudiness did clear up significantly with a round of the recovery. So, that was an interesting finding. Do a layer of polish simulating the standard workflow here as if I were just because I want to see how much this affects that hollow burn. And you can see that actually it's it's pretty significant improvement. Although it's still very obvious that there's some burn there. So, this is our end result. Hope you guys enjoyed the crease removal process. Those are about as bad as it's going to get. I'm going to work on that gouge. See if I can't figure out some kind of technique to fix that entirely. But we got a lot of progress on that, too. Hope you guys enjoyed this one. Thanks for watching.
Video description
IG: https://www.instagram.com/slabrehab_yt/ Viewer Repairs: https://slab-rehab.myshopify.com/products/pokemon-card-restoration?variant=45325519552569 Contact me on IG/email if you'd like to have your cards repaired by me! contactslabrehab@gmail.com Materials used: Kurts care kit https://amzn.to/3JnLaDd Kurts Recovery: https://amzn.to/4706s2O Can you fix creases and dents on damaged Pokemon cards? In this episode I crack my PSA 3 vintage Nidoqueen and attempt to repair multiple creases and dents. Just how far can you go with Pokemon card repair? Lets find out! 💬 Drop a comment: Would YOU risk cracking a graded slab to chase the 10? 👍 Like, subscribe, and turn on notifications if you enjoy card restoration experiments, PSA submission tips, and Pokémon investment content. #PokemonCards #PSA10 #CardRestoration #Lugia #PSAResubmission #CardCollecting #PokémonTCG #PSA #SlabCracking #CardGrading #VintagePokemon #BaseSet #PSA9To10 #Collectibles #TradingCards