We can't find the internet
Attempting to reconnect
Something went wrong!
Attempting to reconnect
Analysis Summary
Ask yourself: “Did I notice what this video wanted from me, and did I decide freely to say yes?”
Worth Noting
Positive elements
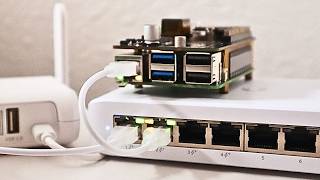
- This video offers a highly practical, hands-on demonstration of setting up zero-trust tunnels, which is valuable for developers looking to host local projects securely.
Be Aware
Cautionary elements
- The creator's financial incentive via affiliate links for NameCheap and Raspberry Pi may slightly bias the recommendation of those specific tools over free or existing alternatives the viewer might already own.
Influence Dimensions
How are these scored?About this analysis
Knowing about these techniques makes them visible, not powerless. The ones that work best on you are the ones that match beliefs you already hold.
This analysis is a tool for your own thinking — what you do with it is up to you.
Related content covering similar topics.
Transcript
hi welcome to programming Percy today we'll be talking about how you can self-host your applications in a secure way using cloudflare tunnels so whenever I want to deploy an application right now I tend to use some kind of cloud provider now it's quite painless but let's be honest whenever I have this like funky Play application that I just want to run for fun maybe share it with a few friends um or if I want to run my own cloud or anything like that um setting it up on the cloud it just it can be quite tedious and sometimes it feels kind of Overkill and if we want to stuff add stuff like a database and stuff it's going to cost sometimes I feel like ah it's so simple to run an application from home on my computer and it costs nothing but electricity and I kinda for a long time have been thinking should I buy a Home Server so I can do this I have many small applications that I think oh gosh I want to deploy this but it ends up with me not doing it because it's too much work I need to set up the cloud I need to secure the cloud accesses I have to fix the infrastructure to create a database and I need to configure those Services etc etc but what if we could skip the cloud what if I could just run a Docker on my computer running my software and I could host it from home on my say raspberry well we have always been able to do that but there's a few Bots it would either require you to open up a port to your network to your home network this will expose you to attacks just opening a port won't make you suffer an attack but it will open up a attack Vector for any bad guys and we also probably need to fix a VPN to host through and if you're not allowed to have a static IP for instance by your ISP you would need to also rent a VPS service so you could have a static IP to host on it's always scary and there's a lot of places where you can mess up but cloudflare tunnels allows us to do this in a matter of minutes and it's for free so that's even better now I would be able to make this video with a good Consciousness if I didn't mention that there is a but it is free it is super simple to set up but they will perform a man in the middle this is the way they make it work Cloud Fair tunnels is Major it's used by a lot of people I don't see an issue but I know some people are really really really scared about these kind of things so you should know about it now using cloudflare tunnels I can just easily in a minute run a Docker expose it to the internet and have my own application up and running in a minute and it's amazing so how does it work now it works by you on your server running something on your local host and having an application there running and then we install their service which is called Cloud flared and it's a software and it will open up four connections using quick to communicate and these connections are only outbound this setup allows us to expose a application or SSH or anything else without exposing your internet so that's why we say that this is a secure hosting solution because you're not opening up your network I have to mention the application that you host can still be insecure so this just removes one necktac vector you still need to secure the application that you are hosting the difference between cloudflare tunnels and using a other solution out there is that cloudfare tunnels is really easy to set up it's super beginner friendly basically you can almost not do anything wrong to follow this tutorial you will need two things you will need a computer and this computer is used to host an API and also to install Cloud flared I don't want to install cloudflare on my main computer so I will be using a Raspberry Pi which I will be hosting a API on you will also need a domain name the domain is used to reach the service that you expose you can do this without a domain a cloudflare comes with a testing API which you can use to host but it will give you a random domain name and stuff but you can only use that for testing how the service works so if you want to just try it out without connecting a domain to it you can do that but I do recommend you to get a domain you can get a domain on nameship and they currently have a offer so 698 dollars and you can get your.com name for a very cheap price I will put a link in the description to nameship note that this is an affiliate link so purchases will sponsor me what's great about Cloud Fair tunnels is that you can use subdomains so you only need one domain to host a lot of different applications if you don't care about the domain name you can just connect them to subdomains and you can basically have how many you want in this tutorial I will be using a Raspberry Pi 0 which is this very weak Raspberry Pi that I have to play around with I do recommend you to get on Raspberry Pi with a Raspberry Pi 4 you can host pretty much they are really strong for the price that they come with they're really capable so I will put a link in the description for Raspberry Pi's as well if you want to buy one so one other thing that we will need on the computer that you're hosting is golang you don't need it the only thing we will use go for is that we will build a super simple web server that exposes a API that we can reach out to and this is just to test cloudflare tunnels out and see that it's actually working as expected it's like 10 lines of code that we will write so if you want to expose something else go ahead and use that instead if you want to follow along and expose the same go Application you can find the download instructions on their websites it's pretty easy to install note that if you're using a Raspberry Pi you can find the download link for all the architectures if you go here to the other downloads it will bring you to a list where you can find different architectures so me Raspberry Pi zero I have to use the r arm v6l for instance once you have a domain you have a raspberry or a computer to use and you have go installed if you installed it you will need a cloudflare account for this so I will put a link in the description where you can go and sign up for an account it's pretty straightforward you enter your email and stuff so go ahead and create a account for cloudflare because you will need one to use this service so before we begin creating our tunnel we will need to add the domain that you have to cloudflare and in the cloudflare dashboard which looks like this you can go into domain registration if you go inside here you can manage your domains so I already have a domain but you can add more domains you can also buy domains with registered domains you enter the domain here you search for it and so for instance if I want to search for test it will search and you can see that they are also selling domains if you buy a domain from cloudflare it will automatically fix the DNS settings for you I usually use namespace to buy my domains it's a habit but you can also buy the domains from here so what you want to do is to add your site to cloudflare actually visiting their documentation I will put a link in the description they have this really nice instructions on what you will need to do at your domain because you need to expose your domain to cloudflare so you will need to go into your registrar and make sure to apply the settings that they say so that cloudflare can reach your domain and manage it you can for instance set the name servers to the name servers that they want so go into the documentation and follow the steps that they have here it will be different depending on what registrar you are using so I can't really show you how you do that but they have a pretty good example here where they show you how to do it basically you change the name server settings and update those at the Domain provider that you have chosen once you have added the name server for cloudflare to your registrar so they can reach your domain it is time to start actually building our tunnels which is great so the first thing that we want to do is we want to create a so-called website so going to the websites Tab and at this location you can add a website so let's go ahead and do that the website I have is percybalmer.work which is a domain that I own and you press add you will see a lot of pricing here don't worry you can scroll down and there's a free tier which is really really great so let's come select the free tier and continue so after you've selected free tier you will see that they are reviewing the DNS records for your website so if you set up your DNS records correctly you will be brought to this page if you have any errors this page will tell you what you have to fix and make sure that the DNS settings are up to date and what they need to be so once you click here we will be adding our website to the cloudflare so now the DNS records are correct they will also need to make sure that the name server is pointing toward the cloudflare so let's go ahead and check that and if your name servers are configured correctly you will be brought here at this point you can improve security optimize performance and get the more out of it so if you go here you can see make sure that https is correct we always want to use https and make sure that you select https always unless you don't want to but shouldn't be an issue now you can Minify CSS automatically javascripts and stuff like that I'm just going to go ahead and click that and save it and I'm Gonna Save this and finish you can change this to have the settings that you need once you are brought to this screen your domain is successfully added and we have a web application created in cloudflare so we have our web application created this is needed to manage the DNS records and that's all we do here so once that's done it's actually time to start using the tunnels so to start using the tunnels it's actually pretty easy we're going to go one step back because we don't want to mess around here you can do a lot of changes here depending on the application you're hosting but we're we're not here for that so let's go one step back and you can see something called zero trust here you can see your website also appearing here correctly that's good but let's go to zero trust zero trust is the cloudflare platform for applying a zero trust management to the applications and it looks like this now I already have mine configured since before so it actually won't ask me but if this is if this is the first time you're doing this it will ask you for a team name the team name is what your account name will be used a and it's called team because you can apply many users to have access to the same zero trust so you can have a team working on this together one thing to note is that a team name will get a URL so for instance my team name is programming Percy so if I go open up a new tab in the browser and I can go to programmingper C Dot cloudflare cloudflare access .com now each team name will get this little app launcher where you can find all your applications later so remember to pick a appropriate team name if you're going to use it with other people so after you enter the team name you will be brought to a screen looking kind of like this I already have a plan so mine looks a little bit different but make sure you select the free tier which allows for 50 users and a lot of stuff more than enough for this so continue with free select the plan you want and select proceed now don't worry proceed won't actually ask you for any billing information since the plan you select is free so go ahead and make that purchase and once that's done you'll be brought back to the dashboard inside the dashboard we can see a few things we can see analytics which will show you information about your tunnels and amount of users and stuff like that we'll look at that later what we are interested in is the access in the access we can create accesses to our domain and we are going to create a tunnel so go ahead and click on Tunnel and it's going to look like this create your first tunnel we are going to do that so select a name for your tunnel now as they say here you should select a name that is not don't name it like API one or something like that the name for the tunnel should be wider so maybe the network that are connected so I'm on my guest Network right now so maybe I should call it guest tunnel or guest applications um so select a wide name I'm just going to call mine application tunnels I'm going to go ahead click click on Save now this step is the installation step it will ask you to it will ask you to store your tunnel now as you see here you see a code down here this code is secret do not share this code with anyone if you do so they will be able to connect to your tunnel so it will tell you how to install go ahead and select your operating system that you're using you should find most of it here you can even use Docker if you want to select your architecture now if your architecture is not listed in this tab you can go ahead and clone the GitHub repository for cloudflare because it is open source cloudflare is the service that will be running on your system performing this man in the middle that makes this a possible so they decided to have it open source because nobody is going to install anything on your computer unless they know what it is so it's really nice now either follow these instructions for me since I'm using a Raspberry Pi I cannot use these instructions I have to build the application from scratch so I'm just going to go ahead clone the Repository and I will be sharing these commands inside the description if you need to build it from source code so you can just go ahead and do the same thing once it's cloned let's go ahead and go inside the folder and do make cloudflare and it will run make and install everything that you need the make can run for quite a while so just let it run and whenever it's done let's go ahead and let's also install the command line tool from golang and one final thing that you need to do is you need to move the binary that was created and it will be inside cloudflare folder slash cloudflare and it's the binary that was built with the make file and you need to put it in your local bin so it is accessible so once we have installed it correctly we need to go inside the website again copy the command if you have cloudflare installed so copy the command with your secrets so copy the command go inside a terminal and execute it and it will install cloudflare on your machine now it will also install and connect to the tunnel so this secret is connected to my tunnel and as you see it's successfully installed now if you go back to the UI and scroll down you will see connectors and you can see my computer is actually connected now so we have a connection between my raspberry and this tunnel it's that easy so the connection is working let's go to next and it will tell us to edit a public hostname so here you can add subdomains and you can add as many as you want you can add the domain I only have one domain so I'm going to select that one you can also add paths so if I host anything on my machine I can direct them through here so in my case I will be hosting a HTTP API so I'm going to select the type http you can see here there's https TCP you can have SSH RDP some samba and a lot of other stuff but for Simplicity I'm going to use a localhost I'm going to expose my localhost 8080. so what we're doing here is that we're saying whatever my Raspberry Pi is serving on localhost 8080 will be available on this URL so you can go ahead and add whatever you want test and then it will be available on test dot Percy Baltimore work and whatever path we set the subdomain and the path is optional and you can use this to control where your applications should appear so I'm going to go ahead and add a test API subdomain you can find additional settings so that's warning okay so the DNS probably hasn't just updated yet but no worries you can go ahead and find additional settings here you can control the HTTP header and you can set connection timeouts and keep our lives and you can really have a bunch of stuff that you can change here depending on what you want to do I'm just going to leave everything at the default for now I'm going to save this it's going to work a little bit it will pop up here so I'm inside my tunnel I have my application tunnels and it's connected and you can see here that we have a route and you can go inside configure to see all the routes as well so you can see I have this route up and running so test API goes to localhost 8080 on my Raspberry Pi so if I visit this URL now I will see this bad gateway and that is expected because I'm not running anything on my device right now so I'm just going to go ahead and jump to my device I'm going to clear my screen I'm going to go to my home folder I'm going to make their demo and I'm going to go inside demo so I'm just going to create this super simple go program so I don't have neovim installed on this computer so I'm just going to go ahead and use Nano because I'm not really fond of the regular bi um so I'm just going to go ahead create a simple main package and I'm going to do a few Imports and I'm going to use the net http I'm going to make a log I'm going to create a simple endpoint function which will take a HTTP request and just print a simple string that's that's the application that we will be hosting for now so I'm gonna have a super simple API here you can host whatever you want this is just to showcase um how easy we can add stuff to the tunnel so welcome to your API hosted locally because this will be running locally on my Raspberry Pi hosted on localhost and not exposed to the internet posting on 8080 a simple log message whenever we start the program I'm gonna add a handle Funk on the root path and assign my endpoint I'm going to start the web server listen and serve on port 8080 and like that that's it so I'm going to save this file I will put the code in the description if you just want to copy it and go ahead and follow along so once I have that I'm gonna run it so I'm gonna go ahead and do go run main.go and it's going to load for a few seconds so it's hosted on 8080 now I'm going to navigate back to the browser I'm going to refresh the URL and as you can see welcome to your API hosted look so we have a service running on my Raspberry Pi on localhost 8080 and cloudflare tunnel is exposing that to this domain and I mean you have to agree that it was really simple to set up you define where the service is you tell which domain and subdomain to host it on and that's it so whenever I want to add stuff I can just add these if I have more services I can just go ahead add a new sub domain to that domain maybe on localhost 8081 for instance if I have another service running there it's that simple really there's nothing more to it so we have a tunnel up and running which routes are traffic using the UI is really nice and simple as you have seen but sometimes you want to use a command line because you get more control when using the command line so I kind of like running the command line so let's go ahead and take a look at how we can do that so the first thing that we need to do is that we need to connect to the account and we're going to do that using cloudflare tunnel login cloudflare tunnel login and it will open up a browser if you're using a headless UI you can see this link which is printed if it doesn't open up just copy that link and go inside your browser and open that link doing so will bring you to the dashboard now it will ask you to authenticate your tunnel so just click the tunnel that you want to authenticate and authorize it and it says successfully and it has installed a certificate so what it did was it went to your server using the cloudflare service command that is running and it actually installed a certificate on your server so whenever you use the cloudflare the CLI it will be authenticated right now using that certificate we can easily use the command line to do to do stuff so cloudflare tunnel lists will actually show you all the tunnels that you have available you can see the ID of the tunnel the name of the tunnel and the ID here is really important because we will be using that to configure tunnels so I will begin creating a new tunnel actually because this tunnel I want to manage by CLI so I'm going to call it CLI tunnel so cloudflare tunnel and it's going to be tunnel create and Then followed by the name so tunnel create CLI tunnel this will go and create a new tunnel for us so you see the tunnel credentials files written too and you see a credential file that is written and you can also see that everything worked out this is great this file is important because we can use it inside the tunnel configuration later so just remember that the file is created for us and it's a Json file with the credentials to this tunnel keep that file safe so I'm just going to go ahead and create a new file and I'm going to call this file test API dot javel I'm going to open it up you use these jaml files to configure the same things that we did in the UI basically you say URL on the device so localhost 8083 for instance and the ID of the tunnel and the configuration file or credentials file we can go ahead and do that so I'm just going to go ahead create a new service and the service will be on 8083 and I will go ahead and create a tunnel and the credentials file now I'm going to save that I'm gonna copy the credentials file that the command gave us because that is related to this tunnel insert that there and we also need the tunnel ID so I'm going to copy the ID from here and I'm going to place that in the tunnel this will actually create the same thing that we did in the UI let's go ahead and save that file and we need to also create the domain routing so we need to do because in this file we only said that the service is on 8083 and which tunnel to host it on we never said on which domain to host it so we need to do that we can do that with the cloudflare command so we do cloudflare tunnel route DNS we say the name of the tunnel so CLI tunnel and I can say I want to route percybalmer.work [Music] for instance this is the route oh okay so I already have something on that domain so maybe I'm gonna do CLI dot Percy Balmer and it has added the CNN for that route and it connected it to the tunnel we need to start the tunnel because when you create the tunnel in the CLI it won't automatically start you need to start it so what we can do is I'm going to do PVD to see where I am and we can do cloudflare tunnel we can pass in a configuration file and it's the configuration file that we just created home demo and test API Dot jaml and then run the Run command will start the tunnel so you will see a bunch of logs and you will see four connections being created remember so you see here connection blah blah connection connection so we have four connections up and running for redundancy redundancy is great I'm gonna open up a new terminal and I'm gonna log in to the raspberry because the other terminal is running the program right now I'm gonna go in demo I'm going to modify my golang program and instead on of 880 I'm going to run it on 8083 because that's the port that I set in the configuration file I'm going to go ahead and run the program the program is hosted on 8083 so if I go ahead and go into the terminal now and I'm gonna go search for the website CLI dot percybalmer.work it's working so the tunnel hosted through my CLI is actually working as expected if you go back to the zero trust platform and refresh and you go inside the tunnels we should see the CLI tunnel up and running yes the CLI tunnel up and running you're gonna see a warning here saying that it's locally managed because you can't you can't manage it using both the UI or the CLI if you create your tunnel through the command line you will need to manage it through the command line but so why why would you want to do that it seems like a lot more work but it also gives you a lot of flexibility one thing that is really cool is that we can add Ingress rules so I'm just going to go ahead and close the tunnel the tunnel is stopped I'm going to add Ingress rules and Ingress rules is used for routing basically so we can go ahead and do an LS I'm going to do Nano test API jaml open it up I'm going to remove the URL because we no longer need that so I'm going to go down and I'm going to add the Ingress Field which allows us to add Ingress rules now I'm going to go ahead and say CLI dot percybalmer.work which is the domain name and I'm going to point it towards the correct server service localhost 8083 and we can add multiple stuff here so if you have many services that you want to manage and control you can easily update this file and have it running correctly so I can also say Percy Baltimore dot work slash test for instance and I can point that towards a service now I only have one service so I'm just going to redirect it to the same simple service but I think you get the idea now one important thing is that in the end of the Ingress you need to have a catch-all rule a catch-all rule will catch all other URLs that doesn't match any of the ones we have configured if we have a somebody go to percybalmer.work.test2 we need to catch that and give them a 404. so I'm just going to go ahead and do that we can do that using this small little helper function called HTTP starters 404 so I'm going to go ahead and save this file again simply restart the tunnel then go ahead restart the tunnel and once that's running I'm gonna go ahead revisit the browser make sure that my CLI Percy Balmer still working so that's how easy you can use the CLI you can configure a lot of stuff using the CLI such as origin and a bunch of other stuff and you can find all those settings inside the documentation which I will also put in the description one other thing you can make the tunnel start up as a service on your computer and it's really easy I won't cover that in this tutorial it's like one command and you can find that in the documentation I'll put it in the description as well tunnels are really easy to set up and really easy to use and they allow you to create different routes and endpoints easily and one other great thing is that they come with built-in analytics so if you go into analytics and access and let's let it load and you can see here I have failed logins I won't cover that in this tutorial but we can add logins and stuff we can see how many connected users we have how many have accesses and we can see a little graph we can see the apis and which endpoints people are using so that's also a nice little feature so tunnels are really easy to set up really easy to use they allow you to create different routes and endpoints really easily both through the UI or the CLI now they're great because they don't expose your network directly and you don't need a VPS VPN or open up any ports to your network is this all good and you can go full Loco now and just publish everything well it is secure yes but that doesn't mean you can skip any other security measurements now now you might still want to encrypt your traffic I don't know if you noticed but since we're forcing https they're creating our certificate for us and it's great and stuff but we don't own it really and they also encrypt your traffic locally internally on the cloudflare network but this means they can unencrypt it if they want to so encrypt your stuff by with your own stuff also this reduces the accessibility for cloudflare and I mean the applications that you expose they can still be vulnerable so it's not like you're safe you still need to take security measurements inside the applications that you host but it reduces the attack Vector for the users what now so I'd really do recommend you to go ahead and buy a Raspberry Pi and they're amazing and start playing around with it as your Home Server it's a really super powerful single board computer and you can use it with cloudfare tunnels really easily The Next Step would be protecting your apis or services that you expose so as you see anybody can visit this link and I'm gonna shut it down later but anyone can go here anyone can use it that's maybe not what you want but cloudflare tunnels also makes it super easy to add a SSO login screen which can protect your exposed services with a login for GitHub or Google or whatever you want to have your users authenticate with this was actually all for this tutorial you have learned how to use and set up cloudflare tiles I hope you enjoyed this tutorial and I hope you watch my other tutorial tutorial about SSO logins and that's it thank you very much and bye
Video description
A tutorial that covers how to use Cloudflare Tunnel to provide a secure connection to your local resources without publicly exposing an IP. You can also find this tutorial as a written article on my blog at https://programmingpercy.tech/blog/free-secure-self-hosting-using-cloudflare-tunnels/ *** Links *** Cloudflare Apps - https://developers.cloudflare.com/cloudflare-one/connections/connect-apps/ Cloudflare Tunnels - https://www.cloudflare.com/products/tunnel/ Cloudflare Add Website / Domain - https://developers.cloudflare.com/fundamentals/get-started/setup/add-site/ Cloudflare Registrar - https://www.cloudflare.com/products/registrar/ Cloudflare Dashboard - https://dash.cloudflare.com/ Cloudflare Zero Trust Dashboard - https://one.dash.cloudflare.com/ Cloudflare Build Cloudflared From Source - https://developers.cloudflare.com/cloudflare-one/connections/connect-apps/install-and-setup/tunnel-guide/local/#set-up-a-tunnel-locally-cli-setup Cloudflare Default Directory - https://developers.cloudflare.com/cloudflare-one/connections/connect-apps/install-and-setup/tunnel-useful-terms/#default-cloudflared-directory Cloudflare Ingress - https://developers.cloudflare.com/cloudflare-one/connections/connect-apps/install-and-setup/tunnel-guide/local/local-management/ingress/ Cloudflare Run As Service - https://developers.cloudflare.com/cloudflare-one/connections/connect-apps/install-and-setup/tunnel-guide/local/as-a-service/ Installing Go - https://go.dev/doc/install Find Network Devices - https://itsfoss.com/how-to-find-what-devices-are-connected-to-network-in-ubuntu/ *** Affiliate links *** NameCheap - https://shareasale.com/r.cfm?b=1781996&u=3461269&m=46483&urllink=&afftrack= Raspberry PI - https://amzn.to/3vrv5Se *** Code Blocks *** ```go package main import ( "fmt" "net/http" "log" ) // endpoint that returns a welcome func endpoint(w http.ResponseWriter, r *http.Request){ fmt.Fprintf(w, "Welcome to your API hosted Locally") } func main(){ log.Println("hosting on 8080") http.HandleFunc("/", endpoint) log.Fatal(http.ListenAndServe(":8080", nil)) } ``` 00:00 Introduction 02:40 A Word Of Warning 03:02 How Does Tunnels Work 04:17 Adding DNS Settings And Website 11:56 Adding you first Tunnel 21:03 Creating A Simple Go Web App 24:00 Configure Tunnels With CLI 31:27 Ingress Rules 34:00 Conclusion