We can't find the internet
Attempting to reconnect
Something went wrong!
Attempting to reconnect
Analysis Summary
Worth Noting
Positive elements
- The video provides legitimate, high-quality explanations of complex art concepts like subsurface scattering, ambient light, and anatomical construction.
Be Aware
Cautionary elements
- The use of 'shock' humor and suggestive themes (the 'goon' subculture) is primarily a hook to keep viewers engaged with otherwise dry technical art theory.
Influence Dimensions
How are these scored?About this analysis
Knowing about these techniques makes them visible, not powerless. The ones that work best on you are the ones that match beliefs you already hold.
This analysis is a tool for your own thinking — what you do with it is up to you.
Related content covering similar topics.
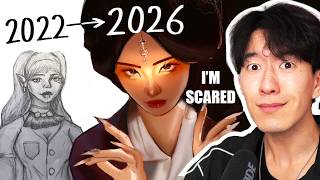
RATING YOUR ART GLOW UPS
SamDoesArts
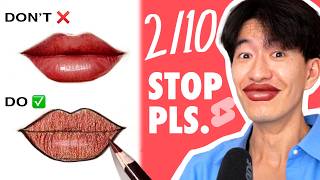
RATING YOUTUBE SHORTS ART TUTORIALS 🤨 10
SamDoesArts
10 EASY WAYS to Improve Your Art In 2026 (beginner friendly)
SamDoesArts
6 SIGNS YOU'RE A GOOD ARTIST ❤️ (to me)
SamDoesArts
Transcript
Oh god. Oh god. Oh. Oh god. He's blushing. Oh. >> I recommend you that to draw a hand milely open. >> The location is anus. >> Let me teach you how to draw a trick. >> What the is going on? What's up, guys? Welcome. It's been a while since we've checked out some Tik Tok art tutorials. Hopefully, they've had time to procreate and propagate and spread more misinformation and lead more young artists astray. We're going to take a look at them now. Give them a rating from 1 to 10. One being booty cheeks and 10 being pretty damn good. >> I cheat to make colorful line art. Have lines. Very important. >> Why are we whispering, bro? That make me uncomfortable. >> Duplicate the layer with the lines. Set the top one to overlay and the bottom one to multiply. Pick a light color for the multiply layer. I like light orange tones, but you can get crazy with it. Now, pick a darker color for the overlay later. I usually use a few different colors to keep things interesting. Color that bad boy however you want. Now your line art will just adapt to it. All right. You know what? Despite the molestation of my years, this is actually pretty sick. So basically a light color for the multiply layer and a dark color for the overlay layer and you get adaptable coloranging line art. That's nine out of 10 minus one for the whisper. >> Let me teach you how to draw. Here's a trick. What the is going on? Okay. Will this video get me demonetized or are these tasteful butts? >> Here's a trick to drawing more expressive butts. Most of the time you think of butts as two big circles. Yes. >> But butts are actually made of four slightly smaller circles that arranged like this in the shape of a butterfly with two larger muscle groups underneath that pull the legs up and these two smaller muscles that attach onto the back. These muscles all contract and relax. are tense and defined when pulling the leg back, stretched when the leg is pulled forwards, and squishy and soft when doing nothing at all. And both sides are rarely doing the same thing. >> Well, thank you, Mr. Lizard. That was much more tasteful than I expected. Here's something else to note if you are a serial butt drawer. But everybody has very differently shaped butts, so you got to be aware of that. You know, some people have more filled out, more plump shapes. Some people have skinnier shapes. And two butts are never really quite the same. I don't draw them a lot necessarily, but I do observe a lot. Women and men, I don't discriminate. >> Have you ever wondered how these pro artists render the skin to make it look so luminous and gorgeous? Well, you might have noticed they use [music] these exact three colors and a super bright orange line on next to the shadow of the skin. I'm going to [music] explain exactly where these colors come from and how to apply them. Okay, let's get down to what's going on in this shadow on a paper. First of all, it's going to be meaningfully affected by ambient light [music] cuz it's in shadow. It is an absolutely beautiful day today, so the entire shadow is going to be covered in blue color. Now the sun's going to come down, [music] hit my hand, adopt the color that my hand is, and scatter ambient orange light everywhere. Now I used a paper shadow to show this because it's white base color shows all the ambient colors very clearly. >> I'm going to pause it right here just to say this is a fantastic example showing bounce light and ambient light. And she is 100% spot on right here. So you see the blue on the paper there. The shadow's not being hit by the direct light from the sun, but it's actually being hit by the blue ambient light from the sky. And I love the way you've shown the warm bounce light there. That's great. But this is a skin render tutorial, so we're going to find ourselves with a blue ambient light color at [music] the top of the skin shadow from the sky. And then because of the nearby hands ambient bounce light, we're going to get a brighter yellow color at the bottom of this shadow. But that still doesn't explain the mysterious orange line. Well, this extremely saturated area is caused by subsurface scattering. [music] Skin is a translucent object, which means that only some of its waves passes through. Then it exits the skin at some other location and [music] then enters our eyes. >> Great examples there. Now, if you're wondering why the golden sunlight turns almost reddish as it enters the skin, it's because we have blood vessels and blood is red. >> First of all, I'm just going to add a darker [music] skin color to add in the shadow area of the drawing. And because we're outside, there's going to be a ambient shadow color from the sky reflected onto some parts of the skin. And then [music] near to the edges of the sky, we're going to get a much much brighter color [music] because of subsurface scattering. Yay! It looks so pretty. Why? Because orange and blue are opposites on the color wheel, which creates complimentary hue contrast. Also, I want to branch out to YouTube. So, check it out right here. There's some uh cringy but adorable yahi on there from a few years ago when I was worse at drawing. >> Listen, Navy, you have my full support for your move to YouTube. I actually think you're a really good teacher. You've broken this topic down in a way that's very easy to understand. That's what a good teacher does. A good teacher breaks a topic down without using huge words so that even 5-year-olds can understand it. You've done a great job at this. 11 out of 10. Most artists can make a solid sketch, but not many can paint properly. In fact, it's probably one of the least understood concepts by intermediate artists. If you paint from intuition without a clear plan, this simply leads to a sloppy, unstructured painting. The process has only three steps. Now, assuming you have a solid sketch, meaning no major perspective issues, the first and easiest step is to block in your local colors, meaning the base color of each material when it's not being hit by light. Now, step two gets a little harder. Once we have a solid base, let's identify the number, direction, and intensity of lights. Especially for beginners, it can be very tempting to add all sorts of intense colorful lights to show that you can play with the lighting. But this often times leads to problems in your values, composition, and can cause overexposed scenes. Usually, you want to have one main clear source of light that will help highlight your focal point, aka the area you want your viewers to look first. Every other light source should act as a supporting character. Now, the final step is probably the step most artists get wrong, yet invest the most time into, and that is rendering, aka zooming in to paint the details of the materials. Now, there's three things most artists get wrong about rendering. Number one, as tempting as it is, first make sure most of your structure and perspective is right. Otherwise, you'll be rendering garbage. And no matter how much icing you put on top of a pile of garbage, it will only ever be a pile of [music] garbage. Two, not everything has to be rendered. If in a superhero movie, everyone had powers, Superman would no longer be remarkable. Likewise, in art, if every single area of your canvas was filled to the brim with dense detail and rendering, people wouldn't know exactly where to look. This is exactly why we need to learn to balance the areas of rest and areas of detail. [music] And now, the final tip is probably one of the most helpful, yet the one that might shock some people. Oh, [ __ ] yeah. [applause] I'm Gordoning my Ramsey now. >> Do you want to paint your characters like this? Most artists can make a solid sketch. >> Brother, I trusted you. You dirty dog. You stupid. You little cockroach. Now, this entire video, except for the part where you decided to Gordon your Ramsay. It's just straight facts. I really resonate with the point of getting your sketch right, getting your perspective and your anatomy right before you actually go and spend too much time on rendering. An unrendered drawing of an anatomically correct character in the correct perspective is going to look much more highcale than a fully rendered drawing of a character whose anatomy makes literally no sense. And that's just one of the facts. You know, you want to get your fundamentals down before you start putting lipstick on the pig. This is going to get a 1 out of 10 for Gordon my Ramsay. Bro, there's kids here. Stop drawing like this. Stop. I mean, that's pretty good, though. Use your eyes, not hand. What do you mean by that? What are you talking about? Hang on, brother. I'm confused [laughter] like this. Dude, that's a great drawing and I love seeing a great drawing. But you know what I love seeing even more than a great drawing? A Tik Tok tutorial with no context. What are you talking about draw with my eyes? What do you mean? What? You want me to just Come on. Explain yourself, brother. Now, I think what this person means is you want to actually go in and look for relationships and context and proportions between all the different things that you're drawing instead of just doing it without a plan, which is absolutely true, but again, that might just be me giving you too much credit. 1 out of 10. How to draw a kiss. 14 plus. Okay. Well, I appreciate the age warning here for the children. First, you draw two eggs. You merge the two eggs and you draw Oh, Jesus Christ. Oh god. What is Oh, god. Oh. Oh, God. He's blushing. Oh, what in the Picasso is happening here? This is not a kiss. This is cannibalism. One out of 10. >> I recommend you that to draw a hand milely open. >> Hey yo, brother. What is going on on this platform, you guys? What are you guys doing? Goon talk. Bro, the location is anus. >> Here are some beginner exercises that you should be doing if you're not already. >> You look like you have a very drawable face, my brother. >> So, the first exercise that you're going to want to do are drawing lines and circles. This is straightforward, but this is the foundation of drawing really anything. So, make sure that you have confident lines and you can draw circles effortlessly. After drawing circles and lines, you're going to want to start practicing [music] perspective. You know, I do these exercises as warm-ups. I'll just draw a perspective grid and draw some cubes [music] in the perspective grid. And then you're going to want to move on to primitive forms. This is going to be the the building blocks of everything that you're going to draw. And then an exercise that I like to do is just draw these primitive forms just stacked on top of each other or just try to draw them in perspective. Then after that, you're going to want to construct objects [music] with these forms. So I'm showing a toilet here. Then after that, I like to practice gesture. You're going to want to practice gesture all the time. Do as many [music] gestures as you can. Draw figures using gesture. And then after that, you're going to want to mannequize the that a freaking box. And then after that to bring [music] it all together you can do master studies. So I would start with the gesture then you can draw [music] those primitive forms on top of that gesture and then the master studies are [music] really good to just understand how they render things. Um so make sure you incorporate those exercises daily. >> These are all really great ways to hammer down your fundamentals. Now of course if someone's doing a demonstration I would want them to be able to draw the perspectives right but getting a seven out of 10. I think it's a bit long-winded for me. How to draw the sexy. Look, dude. I'm not even like I'm not trying to do this, okay? Tik Tok's doing this to me. Every two posts we learn nothing. Yeah. No. Oh my god. This is the last time I do this. Do you guys have the same experience when you go on TikTok or is this just me? Like, did I build this myself? >> What's wrong with this line art? Technically, it's fine. There's nothing wrong with the outline and we can easily tell what we're looking at, but it feels really flat. The problem is that the lines are treating the whole arm as one big shape and not saying anything about how the little shapes in the arms interact. Let's break this up into smaller shapes. Thinking in 3D, they overlap and merge with one another. So now let's extend some of our existing lines to outline some of the smaller shapes that we can see in the front, merging and overlapping the others. It's just a little difference, but the drawing has now got a lot more depth and detail. We even now have some guidelines to start placing shadows. >> See, now that's a great piece of advice. Nice and concise, super easy to implement. And in general, yes, you absolutely do want your line art to kind of follow and reflect the anatomy of the subject that you're drawing, the shapes, the forms. One of the most common mistakes that a lot of beginners tend to make when it comes to drawing line art is they treat it as an outline. Always, always remember when you're doing line art, you're not outlining. 10 out of 10. This goofy lizard is the only thing keeping me sane today. >> Blend skin tones. These are the pastels that I'm going to be using. >> If you guys don't know by now, I hate oil pastels. It's one of my longest standing ops. >> As usual, I'll start with the eyes and work I'll just work from dark to light. I'll start with the shadows and then I'll use the lightest pressure for the first shade I use and then I'll start to increase the pressure as it goes on. If I want the color that I'm using to [music] be more evident than the color that's already on the paper, I'll apply more pressure. But if I just want this soft blended look instead of having one color be more stark than the other, then I'll [music] just use the very lightest pressure. >> How are you adding so much detail on such a small surface with oil pastels? You you're you belong in a psych ward. Oh my lord. That is beautiful. I don't know if I'm more impressed with the drawing or if I'm more impressed with the fact that you drew this with oil pastels. This is incredible, man. Like I mean, why oil pastels, though? I don't get it. Is everything okay at home? 10 out of 10 for showing me that maybe my hatred for oil pastels is just a skill issue. There we go, guys. That was a very treacherous expedition through some Tik Tok art tutorials. Hopefully, you learned something new. And if you didn't learn anything new, hopefully you just had a good time because I certainly did not. Okay, so hopefully you enjoyed watching me not have a good time. Subscribe to my channel if you want to see more art related content and check out my Patreon if you want to see monthly tutorials. If you're finding that you're plateauing a little bit in your art journey, we have some very good fundamental building art tutorials there that should be able to help you break through some of those walls. That being said, thanks so much for watching this video all the way through and I will see you guys on the next video where hopefully there's more art tutorials and less gooning content. I'm freaking tired of this. What is this? This is a children's platform, you guys.
Video description
Goontok 🤨 ✨ Monthly Tutorials on my Patreon: https://www.patreon.com/samdoesarts 🫶 Limited Merch and Print Releases: https://samdoesarts.com/ ⭐️ check out my work here: https://www.instagram.com/samdoesarts/ 💫 Gumroad shop: https://gumroad.com/samdoesarts My art book: https://store.3dtotal.com/products/the-art-of-sam-yang