We can't find the internet
Attempting to reconnect
Something went wrong!
Attempting to reconnect
Heavy Metal Cloud · 30.3K views · 852 likes
Analysis Summary
Worth Noting
Positive elements
- This video provides practical, reproducible steps for setting up a local AI server and integrating it into a development workflow using VS Code.
Be Aware
Cautionary elements
- The video may lead viewers to underestimate the complexity of maintaining local hardware compared to the plug-and-play nature of cloud AI services.
Influence Dimensions
How are these scored?About this analysis
Knowing about these techniques makes them visible, not powerless. The ones that work best on you are the ones that match beliefs you already hold.
This analysis is a tool for your own thinking — what you do with it is up to you.
Related content covering similar topics.

AI this, AI that, Here's Raspberry Pi's new AI HAT
Jeff Geerling

DeepSeek 671B params on Mac Studio
Alex Ziskind
GLM 5 on cluster of Mac Studios
Alex Ziskind

$5,000 Mac Studio vs. $4,000 Gaming PC
Joe Urbinati

Desktop AI Compared - From 2GB to 1024GB, Deepseek R1, Gemma3, and More!
Dave's Garage
Transcript
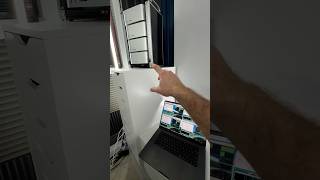
So, check it out. I bought a new toy. It's a Mac Studio with a ton of memory, and I'm interested in running a really big, large language model. So, normally you would need an expensive Nvidia card to run these things. But, I want to see if a Mac Studio can handle it instead at a fraction of the price. Since I'll be running such a big model, I'm also curious about a few things, like how much power will it use? Is it going to get too hot and shut down? And I'm also curious how loud it'll be and if the fan will be running constantly. Let's start with the hardware. I'll be using a Mac Studio with a 14 core CPU and 40 core GPU. I want to run really large models, so I went with 128 GB of RAM. And by the way, if you're on a budget, you really don't need that much memory. I've had pretty good results using a MacBook Pro with 32 GB of RAM. You just have to use a smaller model. For a size comparison, here's the Mac Studio sitting next to my Beink servers. One of my goals is to run AI agents on my home lab, but instead of using a cloud AI service like Claude, I want my agents to communicate with the Mac Studio instead. To make that work, I have to set up local networking. This process is pretty easy. I just have to connect my Ethernet cable to the back and plug the other end into my switch. Okay, I'll hop on my Mac Studio and start by installing an app called LM Studio. First, let's go to the website and click the download button. In my case, I'll be installing the Mac OS version. Oh, there's one thing I want to point out. During the installation process, I selected developer to expose all the options. This will be useful when exposing your LLM as a service. Once everything is installed, let's open it up and take a look. The first thing we want to do is download a model. On the upper right hand side is an icon called model search. And I'll search for GPT-OSs. And I'll click 120B, which is the 120 billion parameter model. That's the uh really big one. In this case, I'll be selecting the GGUF version of the model. And then I'll click download. Once the model is downloaded, let's test it out. I'll click the chat icon. And then at the top, I'll select the model. I'll slide the context length all the way to the right. And by the way, if you don't have enough memory, uh, you'll get a warning. And in that case, just slide it back until the warning goes away. Finally, I'll click the load model button. I'm going to make the prompt pretty complex, and that should give me some time to take a few measurements while it's running. Things like power usage, temperature, and noise levels. For the prompt, I'm going to combine two topics, healthcare and programming. I'll ask it to first create a healthcare document using a complex standard called fire. And then I'll process a claim using some custom Rust code. While it's processing, I'll start to take those measurements. Let's take a look at the power usage for the GPT120B model. I've been getting an average of about 150 watts, which is quite a bit lower than I was expecting. Next, let's take some temperature readings around the case. And again, this is a lot lower than I was expecting. In terms of sound, the fans have been really quiet when running this model. And here's some of the stats from the activity monitor. It looks like the model is using about 70 GB of RAM and very little CPU usage. It looks like uh the model mostly runs using GPU, which which makes sense. Going back to LM Studio, you can see the token count for the 120B model. I've been getting roughly 70 to 80 tokens per second. The smaller version of the model called 20B seems to run a lot faster at about 100 to 120 tokens per second. Okay, let me show you something cool. I'll open up a new chat and this time I'll use a smaller model called Medgamma 4B. So, what makes this model special is that it's trained against healthcare imaging data. At the bottom, you can see a vision icon. And if I add an attachment, we add the option to select an image. I'll grab a chest X-ray that I found on Wikipedia. And then, uh, I'll open up the file. In the prompt, I'll ask it to describe the image. Then, I'll ask it to expand on the hazy markings. So, this is pretty cool. We can use both text and images as input if the model supports it. Next, I want to show you one more model, and I think right now it's my favorite. It's called Devstral Small 2, and I've run this model on a MacBook Pro with 32 GB of RAM, and the results have kind of blown me away. It has a really large context window of 300,000 tokens. So, here's an example of what it can do. So, up to this point, I've been running all the prompts directly on my Mac using LM Studio. And this is great, but if you're developing software, you really want to access your AI models using an AJ mode. And this will allow your model to view all your files and load them into the context. It'll also allow you to create and modify your files. To do all these things, we really need to run LM Studio as a server. Let's start by clicking the developer icon on the upper left hand side. I'll then click this slider button to start the server. The IP address of my Mac Studio is 192.1683.23. And the server will be running on port 1234. So I can use the IP in the port to connect to the LLM remotely. I'll use my MacBook Pro as the client. And to connect to the server, I'll use a VS Code plugin called continue. Assuming you already have VS Code installed, click extensions on the lefth hand menu. Then search for continue and click the install button. To run the extension, click on the continue button on the lefth hand menu. The first thing we'll need to do is point to our server by setting up a config file. To do that, I'll select the config dropdown at the top. Then I'll click the little gear icon on the right side of configs to bring up the config file. I'll paste in a sample config file to get it started. And by the way, I'll have all the instructions and configurations for this video on my GitHub page link in the description below. Okay, under models, you can configure each model that you want to access. At the top, I have the first model configured for that uh GPT120B model. The name can be anything and provider should be LM Studio. For the model, we'll have to go back to LM Studio to figure out what the name is. In LM Studio, click the developer tab on the lefth hand side, then load a model. Next to LLM, you should see a model name. Now I can jump back to my MacBook Pro and you can see that the model name matches the value from LM Studio. You also have some additional settings. Context length is important and should match the size of the context you set when loading the model. The roles and capabilities are kind of like access controls. Apply edit and tool use will let us view and modify local files. Now for a quick demo, I'll create a new chat and select the model. Then I'll make sure I'm in agent mode. Next, I'll ask it a question about networking. Just a reminder, I'm running this on a MacBook Pro and the laptop is talking to my Mac Studio, which is acting as a server. And the important point here is the Mac Studio is completely self-contained. It's not reaching out to the internet to pull this information down. Finally, I want to try something a little more advanced. First, I'll select a folder in VS Code that points to some application code. In this example, I'll use a Java app. The idea here is I want to use that entire folder as context for my prompts. Okay, let's start a new chat. I'll ask it to view all the code from the folder. And to do that, I'll use the at tree and then ask it to describe the application. Then I'll ask it a question about the code. I'd kind of like to know what are the Java dependencies in the application. Okay. And then finally, I want to show you how we can create a file. I'll ask it to create a new file called example.json with some random contents. And then I have to accept the changes. And there it is. It created the file. Okay, that was pretty cool. I now have an AI server that I can use for my bare metal cloud. So, what do you think? Is it worth all the hassle to host your own models? Let me know in the comments below. And as always, thanks for stopping by and I'll see you in the next video.
Video description
Can a Mac Studio actually replace an expensive Nvidia-powered AI rig? In this video, I’m testing a brand new Mac Studio (128GB RAM) to see if it can handle massive 120 Billion parameter models locally. We’ll dive into hardware specs, power consumption, and thermal performance, then walk through setting up a self-contained AI server using LM Studio. I also show you how to connect a MacBook Pro to your Mac Studio using the Continue extension in VS Code to run a fully local AI coding agent that can read and write files without an internet connection. Topics Covered: - Mac Studio for Large Language Models (LLMs). - Power usage, noise, and temperature benchmarks. - Running GPT-OSS 120B & specialized healthcare vision models. - Setting up LM Studio as a local server. - Integrating local AI into VS Code with the Continue extension. 🔔 **Subscribe** for more hands‑on cloud tutorials! *To follow along, check out my GitHub page! All the commands and instructions from this video are in a README file:* *https://github.com/heavy-metal-cloud/youtube/tree/main/videos/bare-metal-ai/01-hardware-mac-studio* 00:00:31 Hardware Specs 00:01:19 Installing LM Studio 00:02:30 Benchmarks: Power, Heat, and Noise 00:03:51 Testing Vision Models (Healthcare AI) 00:05:00 Turning Mac Studio into an AI Server 00:06:06 Connecting VS Code via Continue Extension 00:06:41 Configuring the Local AI Agent 00:07:44 Demo: Remote Coding Agent in Action Links referenced in this video: https://openai.com/index/introducing-gpt-oss/ https://huggingface.co/openai/gpt-oss-120b https://huggingface.co/openai/gpt-oss-20b https://www.apple.com/shop/buy-mac/mac-studio https://deepmind.google/models/gemma/medgemma/ https://huggingface.co/google/medgemma-1.5-4b-it https://docs.mistral.ai/models/devstral-small-2-25-12 https://huggingface.co/mistralai/Devstral-Small-2-24B-Instruct-2512 https://lmstudio.ai/ https://docs.continue.dev/ https://marketplace.visualstudio.com/items?itemName=Continue.continue Amazon Affiliate Links https://amzn.to/4cHEvjq