We can't find the internet
Attempting to reconnect
Something went wrong!
Attempting to reconnect
Analysis Summary
Ask yourself: “Did I notice what this video wanted from me, and did I decide freely to say yes?”
Worth Noting
Positive elements
- This video provides a clear, functional roadmap for setting up a DIY KVM, which is a highly useful tool for home lab enthusiasts and server administrators.
Be Aware
Cautionary elements
- The strong emphasis on purchasing a specific brand's proprietary power connector and specific Amazon-linked hardware, despite the project being 'open source'.
Influence Dimensions
How are these scored?About this analysis
Knowing about these techniques makes them visible, not powerless. The ones that work best on you are the ones that match beliefs you already hold.
This analysis is a tool for your own thinking — what you do with it is up to you.
Related content covering similar topics.
Transcript
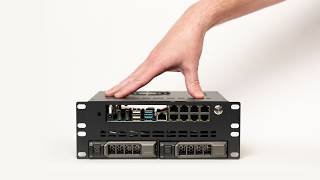
Hi, welcome back. So, originally I planned to build on my first server in the bare metal cloud and using a technology called OpenSense. However, I ran into an issue. You see, for my cloud, I'll be installing different operating systems onto all these bare metal servers. And to do that, I'll plug a USB drive that contains the operating system into each machine. Once the server boots, there might be some initial configuration to get things going. The problem is since the server is booting up, I have no way of recording what's going on. I mean, I guess I could point a camera at the monitor, but that wouldn't look great. To solve this problem, I'll use something called a keyboard video and mouse switch or KVM. And the solution I decided to go with is called Tiny Pilot. To learn more about Tiny Pilot, check out the link in the description below. I'm not sponsored or affiliated with the company, but I like the product. So, please check out their site and support them if you can. They offer a commercial device called the Voyager 2A, which looks pretty nice. Or if you're feeling adventurous, you can try to piece together your own using their open- source instructions on GitHub. For this video, I'll be setting up the open- source version. One thing I did buy was this power connector, but I'll explain more about that later. Now, let's talk about the hardware. First, you'll need a Raspberry Pi model 4B. Now, this is really important. If you try to use any other model, the software won't install, so make sure to get the right one. Next, you'll need a power supply designed for the Raspberry Pi with a micro USB adapter. Some power supplies don't provide enough current, and you'll get warnings about low power, so make sure you get the right one. You'll also need a micro SD card to install the operating system onto the Raspberry Pi. Again, I'd also recommend picking up the power connector from Tiny Pilot. You'll then need a micro USB to USBA cable. Since the Tiny Pilot exposes a web server, you also need to think about networking. In my case, that means an Ethernet cable connected to my Switch. And finally, you'll need a USB to HDMI adapter and a short HDMI cable. I'll link the one I'm using below using some Amazon affiliate links. Now that we have the hardware sorted out, let's set up the Raspberry Pi. First, let's grab the operating system and flash it onto the micro SD card. Just like the Raspberry Pi model, it's very important that you use the correct version of Raspios. It's an older version based off Debian Bullseye. Now, it was kind of a pain to find the right version, so I'll have a link in the description below. I'll also have all the instructions in my GitHub page, also linked in the description. So, next, you'll want to download the file that's about 366 megabytes in size. Now that we have the image, we need to flash it onto our micro SD card. To do this, I'll use a program called Etcher. It's pretty easy to use. Just select the image that we just downloaded, then connect your SD card to your computer. Finally, click the button to begin the flash operation. Now, let's insert the SD card into our Raspberry Pi and power it up. By the way, that power connector from Tiny Pilot has a really nice power switch that's built in. Okay, now we select our language. I'll use English US. Then, I'll create a user and I'll set a password. With the settings in place, the OS will reboot. Okay, let's log in with our username and password. And now I want to set a few things up using the Raspby config command. I'll select the interface options three, then I1 for SSH, and select yes. What this will do is set up an SSH server, which will give us remote access to the device. Moving on, let's select advanced options, then AA for networking config, and I'll press two to activate the network manager. The next step will be to set up the IP address on our Tiny Pilot. But before I do that, let me show you how everything is connected. Here you can see our Tiny Pilot server running on a Raspberry Pi. And the goal here is to control another server as it's booting up. In this case, that'll be my OpenSense server. So the K and M and KVM stand for keyboard and mouse. To get this going, we'll use the Tiny Pilot power connector. Starting from the Raspberry Pi, I'll connect it to the USBC connector and to our target machine, which is OpenSense, I'll connect it to one of the free USBA ports. Now that we can control the keyboard and the mouse, let's move on to the V and KVM, which is video. To do that, we'll use our USB to HDMI adapter. On the Raspberry Pi side, I'll connect to one of the USBA ports. And on the target machine, I'll connect to the HDMI port. Okay, so we have everything hooked up, but now we need a way to connect to the Tiny Pilot so we can connect to our OpenSense server. To control the remote server, Tiny Pilot offers a web server. But to access the web server from my computer, I'll need to assign an IP address to the Tiny Pilot device. In this case, I'll use 192.168.39. Note that all the servers on my little cloud will be using the same 192.168.3.0 network. If the last section about networking was a little confusing, check out my networking series, specifically the OSI layer 3 video. Okay, now let's set up the IP address on our Tiny Pilot device. Going back to the Tiny Pilot terminal, let's first inspect all the network interfaces. To do this, I'll run a command called nm CLI, which we activated in one of the previous steps. As you can see, we have an Ethernet interface called wired connection one. Next, I'll set up the IP address of the Ethernet interface using this long command. Again, check out my GitHub page for all these commands and instructions. Next, I'll run a command IP space a to make sure our IP address was set up correctly. Okay, that looks pretty good. Now, let's use this curl command to install the Tiny Pilot software. Finally, we'll have to reboot our Raspberry Pi for the change to take effect. Next, I'll hop on my personal computer and access the web server that's running on Tiny Pilot. And I'll boot up my OpenSense server with the USB drive attached. Okay, this is really cool. I can see the OpenSense server booting using my browser and I can control the keyboard and the mouse. Okay, so this is great. And I can now record the bootup process and control my servers remotely. In the next video, I'll set up a DNS server in my cloud using OpenSense. Thanks for stopping by and I'll see you in the next video.
Video description
In this video, I'll walk through the set up of an open-source Keyboard, Video, and Mouse (KVM) solution using a Raspberry Pi and the TinyPilot project. I will be using this device to record the initial boot operations of my servers, on my bare metal cloud. You will learn how to select the correct hardware, flash the necessary OS, configure SSH, set up static IP addresses, and successfully install the TinyPilot software for remote server management. *To follow along, check out my GitHub page! All the commands and instructions from this video are in a README file:* *https://github.com/heavy-metal-cloud/youtube/tree/main/videos/build-your-own-cloud-series/04-tinypilot* 00:00:00 - Intro 00:01:20 - Hardware requirements 00:02:21 - Raspberry Pi Setup & Flashing the OS 00:04:22 - Let's connect everything up! 00:06:34 - Installing the Tiny Pilot Software 00:06:59 - TinyPilot in action! Links referenced in this video: https://tinypilotkvm.com/ https://tinypilotkvm.com/products/tinypilot-power-connector https://github.com/tiny-pilot/tinypilot https://downloads.raspberrypi.org/raspios_oldstable_lite_armhf/images/raspios_oldstable_lite_armhf-2024-07-04/ https://etcher.balena.io/ Amazon Affiliate Links - Raspberry Pi and KVM parts: https://amzn.to/3MrDvov https://amzn.to/3XFJicA https://amzn.to/4iFvPLq https://amzn.to/4iM0gQc https://amzn.to/3MnWNeD Amazon Affiliate Links - The Cloud Hardware: https://amzn.to/49GQo81 https://amzn.to/48c5nUT https://amzn.to/48bkX38 https://amzn.to/43Qeh9o https://amzn.to/43J6TfV https://amzn.to/4p7dsBx