We can't find the internet
Attempting to reconnect
Something went wrong!
Attempting to reconnect
Analysis Summary
Ask yourself: “Did I notice what this video wanted from me, and did I decide freely to say yes?”
Worth Noting
Positive elements
- This video provides a clear, high-quality technical walkthrough of integrating Kubernetes subsystems like MetalLB and Longhorn which is highly useful for DevOps learners.
Be Aware
Cautionary elements
- The subtle framing of specific hardware as 'necessary' for the architectural pattern described, which serves the creator's affiliate marketing.
Influence Dimensions
How are these scored?About this analysis
Knowing about these techniques makes them visible, not powerless. The ones that work best on you are the ones that match beliefs you already hold.
This analysis is a tool for your own thinking — what you do with it is up to you.
Related content covering similar topics.

Installing Proxmox on a Home Lab
Heavy Metal Cloud

Talos Linux for Kubernetes on Proxmox
TheAltF4Archives

MUST HAVE Home Server Companion Apps (mobile)
TechHut
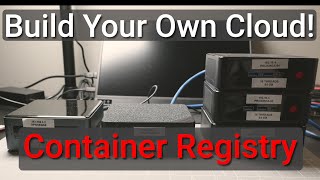
Create a Container Registry, using Twuni
Heavy Metal Cloud
I might switch from Proxmox to MicroCloud...
TechHut
Transcript
Okay, we're starting to make good progress. In my last video, I built out an OpenSense server, which will be used primarily for DNS. And this time, I'll create something that I like to call a platform server, which will be used for shared services. To get started, let's take a look at the hardware. For this server, I'll use something a little more substantial. I'll go with a BLink server with an AMD CPU that contains eight cores, 16 threads, and at least 32 GB of RAM. The hard drive will be a 500 GB NVME. And finally, I'll be connecting it to my network using an Ethernet cable and a switch. All right, so what is the server for? You see, for my applications, I'll need some shared services. things like single sign on, a container registry, secret management and so on. So if you look at the architectural diagram, you might be wondering what's the point of a separate server. I mean why not just put the shared services in the Proxmox cluster and uh the short answer is you could. But the reason I'm building out this cloud is for learning and experimentation. and separating out my shared services allows me to swap out my Proxmox cluster without losing things like single sign on or my Docker images. Okay, it's time to build this out. For this video, I'll assume you already know how to install a Linux operating system like Abuntu. I'll also assume that you have a working knowledge of Kubernetes and its subsystems. Things like load balancers, ingress, storage classes, and using Helm to install apps. As always, I'll have the full instructions in my GitHub page linked in the description below. I've already installed Abuntu and this server will have an IP address of 192.168.3. Next, I want to install a lightweight version of Kubernetes called K3S. It's easy to install using this curl command. Once K3S is installed, I'll copy the cube config to my home directory. Just a side note, the cube config is a file used to connect to Kubernetes. It contains the URL for the cluster along with the user and authentication information. With Kubernetes set up, I'll install a few tools. First, I'll install Helm, which is kind of like a package manager for Kubernetes. Since I'm using Abuntu, I'll install it using the snap command. The last tool I'll install is Kines's. Now, this is completely optional, but Kines's makes visualizing and managing Kubernetes really easy. It kind of reminds me of the top command in Unix. To install it, I'll use another snap command, then create a symbolic link to the binary. All right, I have Kubernetes installed, but now I need to add a few subsystems before it'll be useful. Now, Kubernetes is a huge topic, but at a high level, it manages containers like Docker. The containers run inside an abstraction called a pod. And the pod has a life cycle. Where we run into a problem is when the pod terminates. You see, the containers running inside the pod are essentially stateless. Normally, this is okay. But what if the pod is running a database? When the pod terminates, you would lose all your data. To solve this problem, we need a way to persist the data. One option is called seph. And I'll be using Seph for my Proxmox cluster. Seth is great, but it's really designed for installations where you have multiple servers to distribute the storage. Since my shared services run on just a single server, I'm going to use a lightweight solution called Longhorn. Longhorn will give me access to something called a storage class that will allow me to persist my data. This way, when the pot is terminated, the data won't go away. Installing Longhorn is really easy. Just run this cube cuddle command. We can then make sure that a storage class was created and you can see the new storage class here. There is one minor problem. It looks like we have two default storage classes. To fix this, I'll run this cube cuddle patch command. Now, if I view the storage classes again, you'll see that Longhorn is the default. Now, we have another issue. My application is running on Proxmox. We'll need access to the shared services cluster. And that brings up an interesting point about Kubernetes. In terms of external access, it runs in kind of a sandbox. The only way to gain access to the Kubernetes cluster is using something called a node port. And unfortunately, using a node port directly isn't very practical. They only run on TCP ports above 30,000. What we want is to access the Kubernetes cluster using port 443, which is the HTTPS port. To do that, we have two options. The first option is called a load balancer. And typically, a load balancer is a separate server running outside of Kubernetes. Behind the scenes, it's wired up using node ports, but that part is usually abstracted away, so you don't have to worry about it. For my server, I'll use a load balancer called Metal LB. It's a little bit unusual in that the load balancer actually lives inside of the Kubernetes cluster. Metal LB is a layer 4 load balancer, which means it operates at the TCP layer in the OSI model, but it uses layer 2 our broadcast to draw in the traffic. To install Metal LB, I'll use this Helm command. Then wait for everything to come online. And I'll also create a pool of addresses that Metal LB can use when allocating Kubernetes load balancers. And finally, I'll create that layer 2 listener that I mentioned earlier using a cube cuddle command. A load balancer works great, but it operates using an IP address and a port. So, what if I want to access multiple services? I would need to create a lot of load balancers. And one way around this is to use domain names with URLs instead of IP addresses. To do this, I need to add another subsystem called an ingress controller. The reason we need an ingress controller is that URLs operate at layer 7 of the OSI model, whereas our load balancer only operates at layer 4 with IP addresses and ports. The solution I'll use for this is called ingress engine X. To install it, I'll use this Helm command. Once it's installed, I'll need to make sure an IP address was allocated using metal lb. To do that, I'll run this cube cuddle command. And here you can see the IP address the metal will be allocated for the ingress. Now all we have to do is set up DNS to point to the IP address. For example, we could assign the domain name vault.heavy metalcloud.land to point to the IP address on metal lb which is 192.168.3.20. Okay, my shared services server is ready to go. In the next few videos, I'll start to install the shared services starting with the Docker registry. Thanks for stopping by and I'll see you in the next video.
Video description
In this video I'll show you how to create a lightweight K3s Kubernetes server that acts as a shared‑services hub for my Proxmox environment. The cluster runs essential services such as a Docker registry, secret manager, SSO, and more. Allowing my apps, running on Proxmox, to consume resources over the network, without tying them directly into the Proxmox stack. 🔔 **Subscribe** for more hands‑on cloud & virtualization tutorials! What you’ll learn: - How a dedicated K3s cluster can provide centralized shared services for a Proxmox cluster - K3s installation and kube‑config setup on Ubuntu - Adding persistent storage with Longhorn for stateful workloads (databases, registries) - Internal load balancing using MetalLB (L2 mode) to expose services from k3s - Setting up an Ingress‑Nginx controller and DNS to give expose k3s services *To follow along, check out my GitHub page! All the commands and instructions from this video are in a README file:* *https://github.com/heavy-metal-cloud/youtube/tree/main/videos/build-your-own-cloud-series/06-shared-services-cluster* 00:00:00 - Intro 00:01:44 - Install K3s on Ubuntu 00:03:26 - Deploy Longhorn storage and set it as the default StorageClass 00:04:56 - Set up MetalLB (layer‑4 load balancer inside K8s) 00:06:15 - Install Ingress‑Nginx controller using Helm Links referenced in this video: https://k3s.io/ https://metallb.io/ https://longhorn.io/ https://github.com/kubernetes/ingress-nginx Amazon Affiliate Links - The Cloud Hardware: https://amzn.to/49GQo81 https://amzn.to/48c5nUT https://amzn.to/48bkX38 https://amzn.to/43Qeh9o https://amzn.to/43J6TfV https://amzn.to/4p7dsBx