We can't find the internet
Attempting to reconnect
Something went wrong!
Attempting to reconnect
Analysis Summary
Worth Noting
Positive elements
- This video provides a clear, step-by-step CLI and WebUI demonstration of clustering LXD, Ceph, and OVN, which is technically useful for home lab enthusiasts.
Be Aware
Cautionary elements
- The sponsor (Canonical) reviewed the video for 'accuracy,' which often serves as a euphemism for ensuring the brand narrative remains strictly positive.
Influence Dimensions
How are these scored?About this analysis
Knowing about these techniques makes them visible, not powerless. The ones that work best on you are the ones that match beliefs you already hold.
This analysis is a tool for your own thinking — what you do with it is up to you.
Related content covering similar topics.
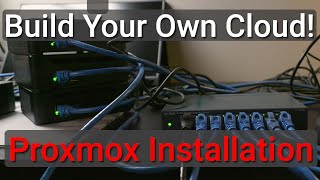
Installing Proxmox on a Home Lab
Heavy Metal Cloud

MUST HAVE Home Server Companion Apps (mobile)
TechHut
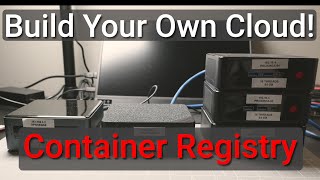
Create a Container Registry, using Twuni
Heavy Metal Cloud
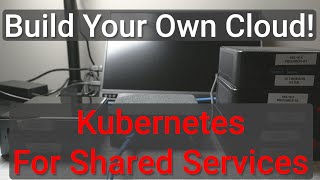
Kubernetes (k3s) for Shared Services
Heavy Metal Cloud
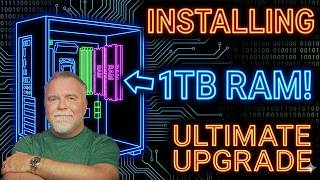
What can you DO with 1TB of RAM?
Dave's Garage
Transcript
Hello everybody. In this one, we're going to be talking about something pretty cool, and that is Canonicle's Micro Cloud. A straightforward, lightweight, and featureful way to go ahead and manage your Linux containers, virtual machines, and build your very own cloud. I will note I'm partnered up with Canonicle to make this video. They've reviewed it for accuracy, and it's been a privilege to work directly with them. MicroCloud is a service that's pretty easy to deploy on just about any Linux distribution with a combination of a couple different snap packages. And at first glance, at least when you sign into their web interface, it is very familiar to something like Proxmox. If you use Proxmox, you're probably going to be pretty comfortable diving into something like MicroCloud. And the kind of learning curve for that is going to be much lower for you. A benefit versus something like Proxmox is you can deploy on any existing infrastructure that you already have and start implementing it now without having to set up a whole dedicated Proxmox machine. But we're going to dive more into that into my overall thoughts and conclusions at the end of this video. So, MicroCloud is based on a couple different components. First, we have LXD, which is Canonicle's kind of own spin on LXC, which these are just really lightweight kind of Linux containers that borrow the kernel resources from your host operating system, making them incredibly efficient on resources. For the storage, it uses SEPH. And as we dive into the actual tutorial section, it is pretty cool and easy to set up as you can set up localized storage volumes for the specific machine. Or if you actually create a micro cloud cluster, you can set up an actual volume that's replicated across all the different clusters. And then there's OVN, which manages the networking and overlays. Also does security groups, DHCP, and other networking services, making it highly scalable. I'll link to the page here that I'm skimming this information off of. You can see some of the features here. It's easy to replicate at scale, remote authentication and fine grained access controls. And of course, it is completely opensource. Now, as we dive into this video, I've already recorded the whole middle part of this section. First, we're going to get into actually setting it up and building a little cluster with this test environment I put together with some virtual machines. So, we're going to set that up, dive into the CLI and actually show you how to interact with it that way. And then on the latter half, we're going to go into the web interface and kind of show you all the same features that you can access there. And do make sure you subscribe because in an upcoming video, what I got is three of these little Zimma boards here, the newer Zimma board 2, and we're going to create our own clustered microcloud environment using these guys. In that one, we're going to try to get like hardware transcoding and a bunch of stuff that you'd want to work to work with these. But for this one, we are going to dive into kind of the general setup, how to use it, and a little bit of use case stuff at the end. All right. Now, for this section of the video, we're actually going to get this set up in this kind of test environment that I built here. We have three different machines. This is going to be Micro 1, Micro 2, and Micro 3. Of course, they're all running Ubuntu, and they all have just about the same specs and same hardware. So, you can see 4 gigs of RAM, four cores, and they all have the same kind of disc setup here. So, we have our root drive, of course, it's 32 gigs. And then we have some additional drives. So, we have an additional 16 gig disc and an additional 128 gig disc. For storage, you are going to need an additional disc. The reason I have two of them is because the first one is going to be specifically for local storage on this one node. And this 128 gig disc, I'm going to set up as distributive storage. So all three nodes or the entire cluster can access that storage. Now, additionally, another thing to note here is going to be the networking. So if I do IPA, these machines only have one networking interface. You could see that right here. So what I had to do is I had to add an additional bridge interface which you can see here. And I just did this by editing a net plan file, adding the bridge right here. So if you only have one interface, you may need to set up a bridge to get this to work properly. If for example, you are running something such as this ZMA board here that has two interfaces, you're going to be good to go. That's going to be required for distributive networking and you can't run microcloud directly on the interface that's already being used for everything. Additionally, this is going to be running with snap. So, if I do a little snap list here, you can see I have no snaps installed. And to fix that and to get all the dependencies, we will simply run a pseudo snap install. And we're going to need four packages here. We're going to need lxd micro seph and then no not and microvn and then of course micro cloud. And I'm just going to grab this and install it on all three machines I'm going to be doing this on. Of course, you don't have to do this on three machines. You can set this in the non-clustered single node and scale up from there as it's pretty easy to go ahead and add other machines to a cluster. So, let's install that and then head on over here and just drop this into all all of the machines. So, on this last one, we can see all successes, everything's installed, and everything is installed. So the process to begin actually setting this up is pretty easy. We're just going to do a pseudo micro cloud and in it. So we can see we're waiting for the services to start. And here is where it's going to ask if we are going to have more than one cluster member. I'm going to say yes. If you're only doing this on one machine, you would type in no here. But I am going to go with the default. Now here, since I created a bridge because I only have one interface, it's going to list these bridge networks. So, I'm just going to select this first one here by hitting the space bar and then hitting enter. Now, we're going to have some machines join our network with the microcloud join command. This is the passphrase we're going to use. So, I'm just going to copy this passphrase, head over to our first machine, and then run a microcloud join. Just like that. While those services start, I'll head over to this machine and do a microcloud join. Head back over here. this now. Now select the interface again. I'm going to go with my bridged interface on IPv4 and then paste in that passphrase. When I hit enter, you can see it found the system and I'll need to select it over here to join the cluster which you can see. But I'm going to join this third machine here by picking our network, pasting in the passphrase. And now if I head over here, we could see both of these machines. So I'm going to select both of them and hit enter. And look at that. We have all three systems selected. I can see their IP addresses, their host names, and now we're going to set up storage. The first one is local storage. If you only have one extra storage device connected to your cluster, it's probably a better idea to go with distributive storage. So, in that case, you'd say no here. But since I'm sitting at both local and distributive storage, I am going to say yes. Then, it's going to list all the hard disks. I want all these individual 16 gig ones to be the local stoages for each of the three machines. So I'll select them, hit enter, and now I'm going to wipe them. So select the same three, hit enter, and now it's asking if I want that distributive storage. I am going to say yes. Since we use the other ones, these 128 gig discs are all we have to select. So let's hit enter. Wipe them. And then we'll have the option to encrypt the discs. generally recommend doing that, but I'm going to go with uh no for now. And would we like to set up remote storage? Sure, let's do it. And what IP or subnet are we going to use? I'm going to use my base subnet. And I'll do the same thing for public traffic. We're going to configure distributive networking. And for this, I'm going to select all my bridge interfaces. Again, depending on how you have your network, your specific hardware, this may be a little bit different, and I will link to the documentation down below. So, let's hit enter. Now for the IPv4 gateway, again this is going to be different depending on your actual IP address schemes, but for me it is going to be 10.17310.1 with the mask of 24. So let's hit enter. And now we're going to have an address range that we're going to use in this uplink network. Do note right here, you cannot have or you cannot select a range in which the host machines or nodes have the same IP address. In this case, I have machines with uh 9 or 1 912 and 3. So, for example, I would do a range something like 10.17310.200. And then the last IP might be 10.17310.240. So, I'm giving it a range of 40 [snorts] different addresses there. So, hit enter. Uh, this is IPv6. I'm not really using it in my network right now. So, I can just hit enter. And this is the DNS for the distributive network. Again, it's just going to go with that default. Hit enter. And now, do we want to set up an OVN underlay network? That's a slightly above my skill set at the moment. So, I'm going to not set that up for now. And there we go. The services are initializing. You could see the individual elements are getting ready. Microcloud OVN 7 LXD. It's getting the cluster information. And now the peers are actually beginning to join. So we have Ubuntu Micro 2 and then Ubuntu Micro 3 join the cluster. And will you look at that? Microcloud is ready. Now right now we can technically go into a web interface and manage everything from there. But before I show you that, I do want to kind of run through some of the basic commands. So you just kind of familiar with how to use some of the CLI interface stuff. And one of the first things that we could do is a lxc cluster list command. So if we list the clusters out, maybe make this a little bit bigger just so it looks better. We have the name, the URL, which is how we would access that web interface. We have the ROS, architecture, online status, and a bunch more stuff. So if I put that back there, there we go. Additionally, we can list our stoages. So if I do lxc storage list, we could see we have local storage and then we have our remote storage there. So if you only set up one, you should only see one of those options. If I run a pseudo seph status command, we can see the actual health of seph and everything that it's doing. And something you'll probably end up using a lot is lxclist. If I do that, it'll list all your actual Linux containers that you have running. And you can see we don't have any. So before we get again dive into the actual web UI, I'm going to show you how to create something or one of those via the terminal here. And let's say we just wanted to spin up a simple like engineext web server and use Ubuntu as the base operating system. All we would do is do an LXC launch. We would set this as Ubuntu and let's go with the latest LTS which is 2404. And then we could call it something like web server. Now, there's a lot more variables and things that you can add to this. For example, one of them, if I wanted to spin it up on a um specific actual node. So, we're in micro one right now. If I was on micro one, I wanted to spin this up on micro 2. All I would do is add a target. Oh, my bad. I hit tab. But then I could set the target as Ubuntu- micro 2. Micro 2 and then hit enter. And then it's going to go ahead and launch that web server container. It'll take it just a sec. It has to retrieve an image, build the file system and all that. And this is very similar to like um lexes on like Proxmox. It's just Linux containers all around where it uses the actual uh underlining root system kernel. So it's very it takes minimal resources to actually run a Linux container as opposed to something like a virtual machine which you can do on here in which it has its own separate kernel and all that. So it takes a lot more like RAM and CPU. But look at that. We we launched it. So now if I run lexe list once again, you can see here that the web server is running. We have the IP for that. It's a container, no snapshots, and the location is on micro 2. Now let's say I want to actually get into this container to start doing some work, building some HTML files, whatever it may be. All you need to do is type lxc to execute into it. We're going to execute into the web server using bash. Just like that. Hit enter. And there we are. We're now logged in as the root user on the web server container. Of course, let's update our system here. Or at least update these repositories. And you know what? We might as well upgrade everything. So, let's apt upgrade. And yes to everything. And there we go. So, let's just spin up a nice little web server real quick. Let's install Engine X. So, that' be apt install X. There we go. Accept those packages. Let's make sure the service is running. It should be. So, systemct ctl uh start engine x. And now we can get the status of that status engine x. There we go. It's running. Beautiful. So, let's get out of there. So, now if I do recall, um it's under var www html. So, if we see what's in there, we have that default uh Debian HTML file. So, if I just copied and pasted it into index html just like that, we should be able to see it now. If I did like a curl http localhost like that, maybe. Yep, there it is. So, there we go. It's running all that. So, now how do I expose this? How do I see this on other machines? Because even if I'm to exit out of here, for example, we're now just on micro and I try to curl the exact same thing localhost, it is not going to work. Not even if I specify a port. That's cuz we need to actually port forward that container. And this is a longer command. I hope I get this right. Uh lxc, we're going to edit the config for a device because we're going to add web server. and add a web proxy and this is going to be a proxy and we're going to listen on uh TCP on the root. So 0000 and this is uh we should let's forward this to just 8080 and we're going to connect that to TCP of the local host within the container host on port 80 TCP. I'm dumb. So TCP there we go. Enter. I I knew I was going to screw something up. Local host is in fact not a real IP address. So I'm pretty sure we can use 127.0.0.1 maybe. Hopefully. Hey. So now from this machine if I am to curl um should be able to use localhost at the port 8080. I just realized I'm dumb. It's because I went off script. I It It's on micro 2. It's on micro 2. So if I do a curl localhost 8080, there it is. I found it. And if I do this, there it is. Okay. And if I do 192880 here, well, look at that. We have EngineX up and running. Beautiful. So, real quick before we dive into the web UI, let's touch on the actual storage for this. So if I do lxc storage volume list, you'll see here all the different volumes that we have. So under local storage, it's being used for images and backup. So two different volumes on each local instance. And then for the remote stuff, we could see web server is being used right here. And we have an image, which I do believe is that image of iuntu that we downloaded when we spun up that container. Now, if I wanted to create additional volumes to actually add to these containers as just extra storage, I could do that as well. And I'm going to set this in remote. So, for example, if I do this list command again and I type in remote, it's only going to show us the two remotes right here. And I can create one just by going uh lxc storage volume create. We're going to create this in remote. And we could give it the name of something like app data. And then we could set a custom size if we would like to. So let's say I wanted this to be let's say 16 gigabytes. So [snorts] I'd hit enter. Then it would create that storage. Now if I list it again, you can see we have a custom of app data. And then to actually attach it to something. So I want to attach app data to our web server container. For example, all I would do instead of running the create command, let's attach app data. We're going to attach this to our web server and then we do the actual mount point. So let's do uh mnt and data. So if I hit enter, it should work, which we can test. Let's go ahead and go back or execute back into this container. Alex execute web server bash. And now if I cd into our root directory, we can cd into mount. And I have that data folder there. So that's how you attach and create new uh storage volumes within the terminal. And then I can touch it. Let's touch it. Test.txt. So now we have Oh, I touched it in the wrong spot. My bad. Let's move the test txt into data test.txt. And now it it should be in there. Okay. Now, let's show the good old seph replication because seph is kind of the backend for this pseudo seph OSD uh pool. This is ls detail. I memorized a lot of these commands, but this one I don't memorize. I'm just pretending like I do. Let's grip it. I just realized I'm dumb. I was still in the container. There we go. So, run this command here. Type in our password. So, this is our seph pool info right here. And then if I type a tree, we can see under root, it is being replicated among these three. Now one thing before we finally go to the web UI is if I list these clusters one more time, we can see everything's fully online and operational. But what happens if one goes down? So for example, micro 3 here. If I reboot this entire server like so, it's disconnected. And then if I run this command again, okay, let's wait for it to shut down all the way. Run it again. Still shutting down. Run it again. There we go. It's offline. There's no heartbeat. And then when the system comes fully back online, we can see that everything is fully operational. Now, let's actually access this web UI from Micro One here. And there's some steps to do this. It's a little bit more complicated than you'd think. So, I'm going to minimize this. Let's do this in Firefox. So, you go to the IP address of the machine ending in 8443. We're going to go ahead and skip this because this is our server. We know what we're doing here. Uh, I'm going to don't send certificate for now because we're going to need to actually do this. So, you see Canonicle LXD right here. Uh, we're going to need to generate a certificate. So, all you do is click right here, generate certificate, generate and download. And then you can see the file there that was generated. So then, at least in Firefox and all the instructions for all the web browsers are right here. I'm going to copy this, go to a new tab, scroll on down to the point where I have my certificates. I'm going to view a certificate. We have my certificates. So you see I have one right here that I was already uh kind of testing. But what I'd want to do is import a certificate. Grab the one that I just downloaded. Select that. Didn't have a password, so I just hit sign in. And there it is. So now I'm going to grab this and restart our browser. Drop our URL in right there. I'm going to hit okay to use this certificate. And now we need a trust token. So to generate that token, we are going to copy this command and run it in the instance that we want the token from. So I'm going to paste it in here. Here is our token. So we're going to grab that. Much more secure than uh a lot of other uh self-hosted services. that's for sure. So, drop that in. Oh, copy it properly. Drop that on in and click on connect. So, there we go. We can see our one instance web server right there. And we can see a lot of the stuff that we've already done such as here under devices. We have our web proxy. We have app data. So, the additional storage that we added to it, of course, our root disk. You could see some usage information, CPU, root file system, so on. All the information about it. And over here in the configuration, this is where we could actually make some changes such as the discs. So we have the mount point right there. And attaching a disk device is really easy through the web interface. So you can do custom devices. For example, you could create volumes through here or you can mount a host path. So, for example, if you set up a like a NSF or NFS share on your system, connected it with uh FS tab or however you want to do it, you could mount that directory right in here, which that might be helpful for like a homeland use case where you're using one of these containers to maybe manage a rstack, media server, whatever it may be. You can attach your storage from a .naz right into here and uh check everything out that way. So, let's close this out. We have our network uh GPU right here right now. GPU pass through it. Uh they have support for Nvidia GPUs. I asked them about Intel and they say their team hasn't specifically tested it. So, that's something that I am going to attempt or try to do. And then we have some proxy stuff here. So this is what we set up in the terminal earlier where we are listening on TCP to this address at this port or it's sending that out and it's connecting the local basically engineext instance there and you can add proxy devices through here and all of this is also available with just YML configurations so it would be really easy to save and like export your configurations for all your various containers and things. If we go over here to storage, we can see our actual pools which again we saw in the terminal as well as the volumes including this app data volume that we created. If you click on it, you get a lot more details, a lot more on the configuration, so you can easily change the size of these things directly through here. You could set up snapshots. You can upload custom ISOs if you'd like to, which again, this does support virtual machines, but I'm not really going to dive too far into that. I'm focusing more on the uh Linux containers here. under buckets. I don't have any buckets set up. If I go over to images, this is that Ubuntu image that downloaded for us. And then we have the full configuration for like the default. So when you you probably noticed when I spun up that first Ubuntu container, it didn't really ask me how I wanted to set up networking, where I wanted the storage to be, resource limitations or anything like that. And all that is managed through profiles right here. So right here if I click on the default profile go to default I can edit my default network configuration right here and again everything is available in a simple YAML file and just as an example if I go to my instances here and let's create one for I I gave the Plex example let's create a one for jellyfin granted I'm not going to add hardware transcoding but just to show you how easy it is and a use case is if I create this instance let's call this jellyfin media streaming server We can pick our base image, use custom files, but if I browse images, it's going to load them up and it's going to give me a huge amount of options including other distributions too. So, we have Debian, Gentu, Nixos, bunch of different things that we can run right here. Ubuntu desktop, which is cool, and they are LXD images. But I am going to go up and I'm just going to use this one that I already have downloaded for a cluster group. Default is all we have. Again, this is incredibly scalable. So you can have different groups of clusters that still are kind of intertwined and you could pick what group things are installed on. Cool stuff. Cluster member default is any. So I'm just going to let it drop wherever it needs to. And here the the we have the default profile. If I wanted to remove that, I can add a profile which I'll just keep that as is. And instead of hitting next, we're going to have to go over here and kind of select exactly what we want to do. So we have remote. The size by default's unlimited. We have our network GPU proxy. So I would actually want to add a proxy device. Jellyfin is going to be on 8096. So for listening let's do 0000 at 8096. And for this we'll do 127 001 at 8096. Right here on bind. You could select just to bind it directly to the host or the specific instance if you'd like to. But this should kind of work as is. Under other this is where we can attach custom devices. And here I'm going to give it two cores and then 2 gigs of RAM. And I mean that that should be uh just about good enough when it comes to everything. You can go through and customize a lot more. But if I just hit create and start, give that just a little bit to run. You can see the creation has begun. We have one operation going here. But if I go over to instances, could see it's setting up. And just like that, it is running. So now if I click on Jellyfin, we can see a lot of the same information that we saw in our web server. But if I go up to the terminal, this is where we can kind of begin to set things up. Now, I'm just going to make directory of uh movies. I'm not actually going to put anything in there just so we can select it in a minute. And for installation on Linux, we can just run this jellyfin. Uh we can run the script for Ubuntu. As simple as dropping that on in, hitting enter. All this looks good. So, let's hit enter. There we go. Everything's downloaded. So, now we're installing. And there we go. So, it's waiting for Jellyfin to start up. And look at that. The the Jellyfin service is active. So, what I'm going to do is leave the terminal real quick. Looks like this is running on Micro One. So, if I head over to Micro 1's IP address and we go to 80 96, we have Jellyfin. If you guys are interested in seeing an actual like full kind of home lab server setup using MicroCloud, that that is something I'd be interested in trying to get going. But regardless, that is an example just kind of showing how easy it is to get some of this stuff spun up. And that is MicroCloud. Do let me know what you think. Is this something that you could actually see yourself using, maybe replacing a current solution like Proxmox? I do know that Proxmox is much more mature in its development, has a lot more like community helper scripts and things like that. But if you're somebody who already has like an Ubuntu server or really any Linux server in production, you want to start utilizing LXD containers, virtual machines, this is a really efficient way to go about it. We didn't really dive into VMs in this video because my environments were already in VMs, but again, I'm going to make a whole dedicated video on actually setting up a cluster using MicroCloud. So, do subscribe so you don't miss that. And when that video, we'll set up a couple different VMs for some different purposes. But overall, I really enjoy the product. We're going to see how difficult it is to do things like um hardware acceleration, which it shouldn't be too bad. It should be pretty easy to figure out, but if I can get hardware acceleration personally on my own end, get a better understanding of OVN to really understand how networking works, I will I'll be pretty pretty proficient. Right now, I do have Proxmox running on a minis form kind of mini PC. And I might just go ahead and throw Ubuntu MicroCloud on it because I don't really have too many services running on that as I've switched a lot of my media stuff to Unrade and a lot of my other like proxy stuff and things like that over to kind of my dedicated uh bare metal Linux server which hell that might even be a pretty good place to throw microcloud. Uh we'll see. Time will tell. Subscribe so you know what time tells. With all that, big thank you to Canonicle for helping me put this video together. You guys are awesome. I appreciate the support through my journey. And if you're interested in checking this out, again, I'll go ahead and link to all the resources that I mentioned in this video. And with all that, I do hope you have an absolutely beautiful day and goodbye.
Video description
In this one we're checking out MicroCloud by Canonical https://canonical.com/microcloud an impressive way to manage LXD (Linux Containers) and Virtual Machines in your home lab environment. We overview the basic setup, command line use, and their web UI. This video is sponsored by Canonical :) 🏆 FOLLOW TECHHUT X (Twitter): https://bit.ly/twitter-techhut MASTODON: https://bit.ly/mastodon-techhut BlueSky: https://bsky.app/profile/techhut.bsky.social INSTAGRAM: https://bit.ly/personal-insta 👏 SUPPORT TECHHUT (all links below this line will earn us commission) BUY A COFFEE: https://buymeacoffee.com/techhut YOUTUBE MEMBER: https://bit.ly/members-techhut —PAID/AFFILIATE LINKS BELOW— 🛎 RECOMMENDED SERVICES VPN I USE: https://airvpn.org/?referred_by=673908 📷 MY GEAR HARD DRIVES: https://serverpartdeals.com/techhut MinisForum Tablet: https://amzn.to/3SeMmds Beelink N200: https://amzn.to/3xZjeQs Raspberry Pi 5: https://amzn.to/4f3yUCN Q1 HE QMK Custom Keyboard: https://www.keychron.com/products/keychron-q1-he-qmk-wireless-custom-keyboar?ref=techhut ASUS ProArt Display: https://amzn.to/4i4cAKz 00:00 - Start 02:34 - MicroCloud Setup 09:15 - CLI Managment Demo 19:58 - WebUI Demo 26:41 - fin