We can't find the internet
Attempting to reconnect
Something went wrong!
Attempting to reconnect
Analysis Summary
Self-promotion Disguised As Neutral Recommendation
This technique was detected by AI but doesn't yet map to our curated glossary. We're tracking its usage patterns.
Worth Noting
Positive elements
- This video provides a practical, hands-on look at the assembly and Linux compatibility of the Framework Desktop, specifically regarding high-RAM AI workloads.
Be Aware
Cautionary elements
- The host recommends 'Open Code' with a degree of separation that masks it being his own product, making a self-plug feel like an objective tool recommendation.
Influence Dimensions
How are these scored?About this analysis
Knowing about these techniques makes them visible, not powerless. The ones that work best on you are the ones that match beliefs you already hold.
This analysis is a tool for your own thinking — what you do with it is up to you.
Related content covering similar topics.

Desktop AI Compared - From 2GB to 1024GB, Deepseek R1, Gemma3, and More!
Dave's Garage

Why Everyone's Switching to Linux for Local AI
Zen van Riel
Linux on the New Framework Desktop PC!
Level1Linux

host ALL your AI locally
NetworkChuck
Transcript
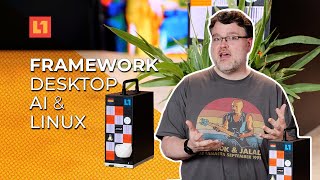
This little machine right here is an absolute powerhouse. I mean, seriously, it's amazing. This is a new framework desktop. And not only is it a great Linux development machine, which it is, by the way, but it's also really great at both AI and gaming. Now, you might be asking yourself, how is it good at gaming and AI? I mean, where does the GPU go? Look, I I even brought a banana here for scale. How do you fit the GPU in here? Well, the thing is the framework desktop has a little bit of a trick. So, in this video, I'm going to show you how to set this up for both gaming and hosting AI for your network on this one machine. And we're also going to talk about why it's so great at AI and gaming. But first, we got to build it. All right. So, let's build the framework desktop. It comes with all these little tiles that you can put on. That's really, really cool. You'll see it later in this little build section here, but it comes packed really, really nicely. Everything is in its own little box. It's all labeled super nice, and it's just pretty easy to get going with it. You see, I have a two terbte hard drive, and I go through all the rest of the boxes really quick. And then here is the chassis. Now, most of this stuff is actually already in there. You don't have to do too much, but the instructions are awesome. If you ever have any issues or questions, locate the instructions. Super easy to do. is usually a QR code and it's uh really easy to follow along with. Um so yeah, now to start, you unscrew a couple screws at the top and take off the little top piece there. Pretty straightforward. And then we locate where we install our hard drive. Again, I got a two terbte hard drive. And installing it is pretty easy. You see my son's actually helped me out here. But you can just seat it into where the hard drive goes. And that's one screw that you screw it in. And there you go. You have your hard drive. Next up is the actual uh fan for the CPU cooler. This brings me back to my days uh back in high school when I would build computers. Um this is way easier than that, but it kind of reminds me of it. Anyway, installing the CPU fan is pretty easy. It has these little posts that you can kind of slide it onto. You put the top on it, and yeah, the screwdriver that comes with the framework is really nice, too. It comes with a couple little bits. Then you screw down these screws to hold down the CPU fan. You plug the CPU fan into the motherboard, and then that's about it for the build. Then you just kind of slap on the sides. As you can see, I'm kind of manhandling this thing right now, but it's pretty straightforward and uh easy to do. And then you put the top back on and you get everything nice and snug. And that's about it for the build. After that, it's the fun part. At the bottom here, you see we have a couple of expansion ports. Uh Framework supports a lot of different expansion ports. I went with two USBC's for now. Then you can just pop off this little thing that holds the tiles. It's magnetic, so it's pretty easy to just take it on and off. You can see we have a TypCraft logo there. Framework sent that to me. It was really nice of them. And that's about it. Snap that thing back on. And that's the whole entire build for this computer. Really straightforward. Now, after seeing that build footage, you might be asking yourself, "Okay, I get it. It's really cool. But again, why is this good at AI and gaming? I didn't see any GPU going there." And that's a really good question. Look at you all smart and intuitive and handsome. You see, this machine comes with the new AMD AI Max 395 chip. And on this architecture, it actually shares the RAM between all these processing units, the GPU, the NPU that's used by the AI. All of this uses the same pool of RAM. And in this machine right here, I have 128 GB of it. So, I have a lot of RAM that I can use on AI or gaming or whatever I want. You get the idea. Okay. So, in the beginning of this video, I said that I was going to show off how to actually set this machine up to host your own AI models and for gaming. So, let's start off with hosting our own AI models. It's actually really fun. Like I said, here I am on my framework desktop and of course I'm using the excellent Omari. Now Omari is amazing. Of course, it is a tiling window manager based on Arch Linux, by the way. And it's incredible. I mean, we have amazing workspace switching. We have tiling. We have all kinds of cool stuff. And I've covered this before on the channel. So, if you want to check it out in more detail, you can watch this video right here. >> Use Typcraft because of course I'm Typcraft and I'm also >> pretty great and handsome. I should probably bring that mustache back, huh? I think so. Either way, in this video, we're going to show off how to run AI models locally on the framework desktop. And I'm also going to show really quickly, just for demonstration purposes, how to run it over the network so you can use your local AI models on any computer in your house. Sounds pretty great, right? I think so. Now, to do this, I'm going to do it the easy way. I'm going to use Olama to actually download and run my local models. Now, Olama, if you don't already know, is a great piece of software that allows you to serve up your local AI models to download them, to run them. It's really great and really easy to get set up. Now, on Arch Linux, it's really easy to install Olama. I use Yay, and I can run yay- sama, and I can just choose which Olama I want to install. And that's about it. I installed a lama. Great. Now, after you've installed Olama, you can run it using system cuddle or run it manually, which is what I'm going to do just for demonstration purposes with Lama Serve. Now, once Olama is up and running, I can download a model to use on this computer. I can go ahead to um.com/ library and I like the GBT OSS model. So, I'm going to go ahead and download GBTOSS1 120B. That B stands for billion. That's the number of parameters in this model. Now, I don't know a lot about AI, but I assume that bigger number means better AI. I don't know, but that's what I'm going with. Now, all I have to do is type pull and then paste the name of the AI model I just copied from the website and hit enter. And there we go. I just downloaded GBT OSS1 12B. Now, if I type list, I can see that GBT OSS120B is in my list of models among the other ones that I've downloaded before, and it's ready to go. Now, when it comes with interacting with O Lama, you can use Lama run and paste in the name of the model and it'll run that model and you can use it CLI to interact with it. But I don't want to do that. I actually want to use a different program to interact with Lama, a different front end, if you will. And my favorite is Open Code. Open Code is fantastic. It's an amazing open-source AI coding agent. It's really great. So, I suggest you use it. It's it's really really nice. Just trust me on this one. You can install Open Code the same way we installed Olama by running y Open code. Enter your password if you have to and then you've installed Open Code. Congratulations. And once you've installed Open Code, all you have to do is type Open Code and it'll open well open Code. Okay, so now you have Open Code running. How do I have Open Code actually use the Olama server that I have running on my computer right now with the Olama serve command I just showed you earlier? Well, you can type /models while you're in Open Code, and that will allow you to choose between different models that you might like. Now, here's the thing. Open code comes pre-baked with this model called Big Pickle. Never heard of it. And another one called Grocode Fast 1. But you can see here, we actually don't have our models that we installed in Olama. How do we set this up? Well, it's actually pretty simple. You see, open code has its own configuration file inconfig open code opencode.json. You can open that up. And you can see right now that it's actually blank. Now, I'm going to go ahead and copy and paste a configuration into this configuration file. Now, if you're confused, don't worry. Open code actually has plenty of documentation. It'll show you all about its configuration file, how to set this up for your local models, but I'm just going to show this off really quick. Now, if I hit paste right now, we can see I already have a configuration file already fleshed out. It's pretty straightforward. Again, on the docs on Open Code, they can explain this in more detail, but for me, I'm setting up a new provider. I'm calling it Olama. I'm giving it a name. I'm giving it the base URL, which is localhost and the port that Olama runs on /v1. And I have a couple of models here that are in Lama right now that I want to interact with. Actually, I'm noticing right now I don't have my GBT OSS120B. So, I'm going to change this line here to actually point to GBTOSS 120B. Pretty straightforward. So, now if I open open code again and type /models, I can see I have my Olama models right here. I can choose GBT OSS120B and I can say something like, "Hey, GBT OSS, how are you doing?" And there we go. Now we're actually interacting with our Olama server running GPTO OSS. Pretty cool. And there we go. It responded. Pretty nice. So this is great if you want to use the local AI you just downloaded on this machine. But what if you want to use the local AI you downloaded on this machine on different computers in your house or wherever you may be? Well, you're going to want to host this so that you can connect to it from different computers. Let's show off how that works. So for demonstration purposes, I'm going to do this the manual way. I'm just going to run Lama serve again, but I'm going to add a couple ENV variables to it. Check this out. Now, all this does is it says we want the Olama host to be this local machine, and we want to allow any origin to connect to this running Olama server. Now, of course, if you wanted to set this up in a better way, you might want to use something like tail scale and only allow certain origins within your tail scale sort of setup. But for me, for right now, just for demonstration purposes, I'm going to allow any origin here. So I call llama serve and then in another pane I'm going to call enrock and enro will create a tunnel that allows me to connect to this Alama server from anywhere. Again this is wide open. You wouldn't want to do this yourself if you're hosting this locally. You probably want to get tail scale and set that all up. But again this is just for demonstration purposes. Okay. So I run enrock and here we go. We have Olama set up at this website right here. Let me just uh change my view here a little bit. Okay, here's the website right here. This address is actually forwarding our traffic to our local running service. We can see it right here. This HTTP address is forwarded to our local server. Cool. Okay, so now I am on my laptop, which is a framework laptop by the way. And I'm also running Omari on this laptop as well. But we want to now connect to our locally running server of Olama on my desktop which you can see right here is running the server and also running Enro. So I already have Open Code installed on this laptop. How do we get Open Code to now connect to a network instead of locally? Well, it's actually fairly simple. I can open my configuration file for Open Code. And I already have it filled out here. There's only one real main difference. Uh, I named this Olama network because I'm connecting to it over the network. And my options have a base URL of the Enro instance that's running on my desktop. You can see on my desktop is running Enro. Now the difference is that Enro is on a different address. So I'm going to change that right now on my laptop here to match what's on my desktop. So it is 7 9 F78 CE. This is for demonstration purposes of course. Once again, you would want a more sophisticated tail scale setup or something like that if you want this to work a little bit better, but 877 A. Okay, so that is now Enrok running the local Olama server and I'm connecting to it on the base URL of the Enro HTTPS endpoint/v1. Now we can see already down here I have all my models that I've installed. And if I just write and quit this, now all I have to do is run open code after I've edited my configuration file. And if I type slashmodels, I can see under my recently used, I have all of these Olama network models. Now I'm going to select GBOSS120B. I'm gonna type hey. And we can see on my desktop now at the top there, this top pane actually got a request and it's processing it and it's doing all its stuff. So that's how you would connect to this desktop over the network running your local AI models. So, this would be great if you have a household and you want some specific model setup for your kids or something like that. This is a a really cool way to do that. And because the Framework Desktop has this AMD Ryzen AI 395 chipset and all this RAM, it performs really really well with running local AI models. Really cool. Okay, so now we've explored running local AI models on the Framework desktop. Let's get to the fun stuff, which is of course gaming. You see, the desktop is actually amazing at gaming. You can see right here I have the uh Radeon 860S graphics integrated graphics card, but I also have all of this RAM. And because we're running the AMD Ryzen AI Max 300 series chipset, you see the graphics card can actually use all of this RAM for gaming, and that results in some pretty incredible performance. I was actually very surprised at how well this machine performs. Okay, let's show it off. Now, one game I've been playing a lot lately, and I've been losing a lot of hours to it is Path of Exile 2. It's crazy addicting and super fun. Now, thankfully, Steam, which Path of Exile 2 is distributed on, runs really, really well on Linux machines. Now, all you have to do to install Steam on Arge Linux is you have to edit one file, which is etspacman.com, your password, and you want to uncomment these two lines right here. Multilib includes etsy Pac-Man d mirror list. This will allow you to install Steam. So now if I type a-s steam, it's available and I can download it. Now I've already downloaded Steam on this machine. So I'll just control C out of this. And once it's installed, you can just launch it like any other program. And there you go. Just like that, Steam is running. And I have Path of Exile right here. I'm actually going to update it right now so I can play it for you guys. Now, when you install Steam for the first time, you're actually going to be prompted to install different graphics drivers depending on your graphics card. For me, for this graphics card, which is the Radeon 860S, I had to install LIB 32 Vulcan Radeon. And that installed the driver that enabled my machine to run Steam and to actually run this game. And now once you have that driver installed, and you have Steam installed, all that's left to do is, well, hit play. And here I am actually playing Path of Exile 2. And the frame rate is amazing. And it's actually unbelievable the performance. It's buttery smooth. I have no issues playing this game. And this is on my Arch Linux PC. It's incredible. I love it. And you know what? I'm not too proud to say that I've been playing this a lot lately. It's actually kind of ruining my life. Okay, let me just quit this game now that I'm ahead and uh I don't want to lose any more time to it today. But there you have it. The Framework Desktop. It's not only an amazing Linux development machine, and it's not only amazing at AI, but it's also great at gaming. this chipset, the integrated uh RAM, like everything is unbelievable and it works flawlessly for so many tasks. So, subscribe for more Linux, Vim, and maybe gaming videos. Anyways, thanks nerds.
Video description
LEARN: https://learn.typecraft.dev/ X: https://x.com/typecraft_dev This little computer is an absolute powerhouse, seriously, this thing is amazing. The new Framework desktop is not only an amazing linux development maching, which it is btw. But also an amazing with AI, AND with gaming. But you might be asking yourself, how is this tiny computer good at AI, and Gaming, without some massive GPU inside? I mean, I can’t fit any modern graphics card in this thing, how is it so powerful? Well, its got a little bit of a trick to it. And in this video I’ll show you how this works so well. I’ll also show you how to enable a great gaming experience, and hosting LLMs over your network with this computer.