We can't find the internet
Attempting to reconnect
Something went wrong!
Attempting to reconnect
Analysis Summary
Worth Noting
Positive elements
- This video provides a practical, hands-on look at the installation and UI of a niche open-source project, including an honest critique of its 'Pro' paywall.
Be Aware
Cautionary elements
- The transition from discussing open-source software to a paid privacy subscription (Incogni) uses a manufactured 'crisis' narrative common in tech sponsorships.
Influence Dimensions
How are these scored?About this analysis
Knowing about these techniques makes them visible, not powerless. The ones that work best on you are the ones that match beliefs you already hold.
This analysis is a tool for your own thinking — what you do with it is up to you.
Related content covering similar topics.
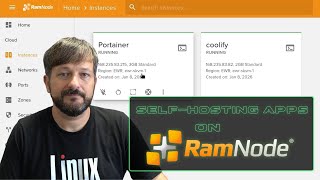
How to Deploy Self-Hosted Apps on a RamNode VPS
Learn Linux TV
MUST HAVE Home Server Companion Apps (mobile)
TechHut
You need to DITCH Overseerr and Migrate to Seerr
TechHut
if you're running Docker you NEED to checkout Dockhand!
TechHut
the BEST Home Server Backup App I've Used - ZeroByte
TechHut
Transcript
In this video, what we're going to be doing is checking out Cloud Rave, a application that I've been meaning to check out for quite a while. And at least this seems to be a very beautiful, very featurerich way to have a file management server in your home lab. I am one here who's definitely very partial to NexCloud. It is my preference, but that doesn't mean that my preferences can't change. Granted, this platform is specifically for files only. And admittedly for me this might be good as I've been switching some of the other things like I don't use Nexcloud deck as much anymore. I use my uh very own project management system. Instead of using Nexcloud news I'm using a self-hosted like nan automation for a newsletter. I love Nexcloud but I am slowly replacing a lot of these services in that big application to a bunch of different really specific things with any really nice open source project like that. How are they making money? Let's go over here. go to pricing and then we have the free community edition here and then right here under pro it looks like some of the share features are locked down. So granular permissions uh prices for share links modify delete via a share link. We have storage management policies, user and authentication, which it looks like they lock down OIDC, which kind of sucks because uh implementation like DEX is real easy to do and it would be nice if I could just use like Pocket ID with this, but that is locked down. So, there are some cons here. Uh they have a service where you can self-host your own and charge people for it. And then they have some extensions that seem to be locked down under pro, including activity logs, which kind of sucks. Site announcements, node selection, iOS licenses, and that's another thing to note. If we go over to products, go to their iOS application. This is going to cost you. I'm not sure how much that is in dollars. I think it's about a buck a month, but they do also have a desktop application, which they don't charge you for. And it looks like it's only a Windows client, which I mean, the lack of a Mac OS application might be a dealbreaker for me, but we're still gonna we're still going to try it out. And deploying it is actually pretty simple. Here we have a simple Docker Compose file stack, which we are going to pull and get into right after. I thank the sponsor of today's video, Incogn. So, here's something that's kind of unsettling. There are hundreds of data brokers out there that have your personal information, your name, your address, your phone number, email, and they're just selling it to whoever wants it. This is how you end up getting scam calls, fishing emails, and in worst case scenarios, how data gets used for identity theft. This is why I use Incogn. What Incogn does is it contacts these data brokers on your behalf and sends them legal requests to remove your information. And they don't just do it once. to keep monitoring and sending removal requests because these brokers have a habit of readding your data over time. What's really cool is their custom removal feature. So, you can actually search for specific brokers and see if they have your data and then target those services directly. It puts you in control of exactly who has your information and who doesn't. The way I see it, you shouldn't have to be findable by anyone with an internet connection. They can't harm you if they can't find you. So, if you're interested in taking back your personal data with Incogn, use the code tech at incogn.comut to get 60% off your annual plan. And the link, of course, will be down below. So, definitely good service. You can see I've only had this spun up for about 4 days and they've already gotten rid of my data on 119 different places. So, that is super sweet. Let's get out of there. We have Proxmox here. I've spun up a temp temporary LXC to go and test this out. Generally, if you're running Docker, I do recommend you do it in a VM or on actual hardware. But what I need to do real quick is install Docker on this machine. I have a nice little guide here on techut.tv if you want to learn how to use Docker and get it spun up for yourself. So, we'll just go ahead and give that some time. I am on a root account, so I won't need to do it, but generally after you install Docker, you're going to want to add your user to that Docker group. And then here we're going to grab this get clone. So let's give this a copy. Head back over here and then drop it on in. And then from there we can cd right on into it. And we can see the files that we have there. We have a couple different Docker composes. This one is what we're probably going to use. This one is for if we are running Pro. And then this one right here is for the uh file search functionality. It says all that info right here. Full text search add-on which I'm not really going to test. We're going to copy and paste the environmental variable example to just AENV file. And then real quick, let's check out what we got going on in here. So, docker compose YAML. This is the one we're going to run. Looks like we're running a few different things. We have the actual service here with all the ports. We have some default information for Postgress cuz we are running a Postgress database and uh Reddus for uh onmemory database stuff. And then let's check out that env file. see if there's anything we need to change, which it looks like this is just for the pro license key. So, we don't even need it. Let's spin it up, shall we? Let's do it. So, docker compose up-d. Actually, let's just go up so we can see if there's a failure right out of the gate. And it looks like we are going to be on port 5212. So, wait for all this to finish pulling here. I really wish they had a Mac OS desktop client or at least a Linux client. That would be snazzy. There it is. So, I don't see any major errors or anything. So, we can go ahead and hit D to get out of there. And then let's figure out what our IP address is with an IPA. And we are going to be running on the port 179 at 5212. So, we'll just go ahead and use this 5212. Enter. And here we are. All right. So, here we are. Now, uh let's just upload something real quick. I have a NetBird assets folder. So, if I drag and drop that in there. Look at that. Super quick. Everything automatically uploaded this. But it looks like if I double click on it, we have the option to open it with a couple different things. Looks like we have a built-in image viewer. So, let's go always for that one. Hey, look at that. Even loads in the GIF. Nice. If I go over here to Netbird assets, look at that. It's loading all of the images. Nice and easy. A single click doesn't open it. A double click does. Let's do always again. Must be by the file type. So there we go. Now it's all opening. If I hover over it, we get little slightly bigger previews or at least the full aspect ratio of those previews. So that is very nice. If I go over to files, go new. Uh, of course, we have upload options. We have a new remote download, which is cool. So you can paste and download links. So that would work something like let's go grab something. If I wanted to download Proxmox directly to it, I could probably copy this link. Head back over here and then paste that on in. Click okay. There we go. Task created. Let's view the task, shall we? It's processing. Processing unknown. Let's give it a click. Ah, there we go. If we click on it, looks like it's downloading. There we go. Now it knows what it's doing. So, that's really cool. Uh, real nice way to put in big files. Just download them directly to this server if you would like to. It doesn't look like the uh actual progress bar is in real time. It's just kind of updating when it feels like it. And the download is complete. So now it's going to transfer. And it looks like we have a seating option too. So that you might be able to use this as a torrent client. And there we go. It's done. So if I go to my files, we will then have the Proxmox ISO right here. If I double click on something like this, it can't open it. So it's just going to give me the option to download it. Now let's say I wanted to share this Proxmox. If I click on this share button, uh we do have the option to password protect it. Um expire after download. So in this case, we'd want to put like our instance behind a reverse proxy if we wanted to actually properly share this. Give this a copy and then just head on over here. Drop that in. Look at that. We have one file being shared to me. So you can kind of get an idea of what that that would look like if we put it behind a reverse proxy. So, let's get out of there and hide bankank over here. And we have this on this side. So, it's going to organize all of our files and everything by the type. We don't have any documents. But if I go to my files, I go new. Let's say we want a new markdown file. We can just call this test. And look at that. We have a full-fledged markdown editor. So, this is a test doc and it's markdown. So, I should be able to just do something like that. Save it. Close it out. And now we have that test and it should appear in my documents. There it is. Double click markdown editor. Always very nice. Let's close that out. Okay. We have other stuff like shared with me. We have trash. Shared by me. If I go to connect and mount. This is where we can add webdav accounts, the iPad or iOS app and the Windows client. We have our background tasks, which we were running one earlier, which happen to be a remote download. Actually, before we dive into the admin settings, let's check out our personal settings. So, we can change our display name if we would like to. So, save that. Change our profile picture. Sweet deal. And then we have some preferences. So, you could go and change all that. Pretty basic stuff. We have our theme color here. So, just a real nice switch between blue and purple. View settings, sync to server. And then we have our folder click action, which is cool that you could select that there as well. Now here we do have uh two-factor authentication and pass key. So apparently enabling uh o ocid providers is specifically what's blocked off in their uh premium version. So if like if I add a pass key. Oh, we need a uh probably https to enable this. I'm going to go to netbird proxy. We recently released a proxy feature, but I am working or going to release a full video on getting all this spun up. So real quick, I added cloud.hopkins.sh. You can see if I click configure, I just have this domain pointing to this resource res resource on my local network from my subnet. It's real easy to set up. I'll link uh to Net Bird's video on this if you're interested. So, if I go to it through here, you can see cloud.mmy domain. We have everything still here ready to go. And here, if I go to the settings, I might be able to enable Pasi. Ah, it's just not wanting to do it. Sad day. But you can enable two-factor authentication here if you see fit. Now from there, let's dive into the admin settings. So if I go down over here, go to dashboard. Oh, look at that. Confirm site URL. Uh, do you want this to be the primary site? Sure. Let's do it. So here we have our trend. So just a little bit has happened. We have one user in 63 files. So you get some nice status or analytics for your actual instance right here. Link to their homepage, some version changes, which is nice. But here going through some of the settings, we have our basic settings. So you could change the site name and all that. We have our URL with what looks to be our secondary and or two secondary URLs and our primary, which is the URL I just put behind a proxy announcement, which is a pro feature. Looks like you could change all the branding and everything like that, which that's cool that they don't lock that down. So you could kind of brand it with like your own company or whatever you want it to be. And some mobile application settings. for the file system. You could see the max size for edible documents. Just a bunch of pretty basic settings you'd expect out of a file server like this. One thing that's worth noting is if I go over here, for example, says we have a terabyte available. The LXC I set up only has like 200 gigs of space. So, there's probably somewhere to change that. Not here, but it's cool. Right. Here's how you change the uh actual file path names and all that. how the files are actually stored on the system. So you can add nodes. We have our main master node right here with all of these specific settings for the node. And then we have groups and user stuff. So groups here. Oh, this is where the storage quota is. So I would want to probably change this to better resemble how much storage I actually have on the system. So probably like 200. And then if we go back over here and give it a refresh. Look at that. Looking a little better there. Users. So you can add your users here. If I create a user, pretty simple email, password and user group. It would be cool here if you could um send like an invite link or something so people can set their own password. Then we have files. So it looks like bulk file editing from the admin side of things which is cool. So you can see other people's files. You can see right now it's only my files because I'm the only user but assuming you'd be able to see and manipulate other people's files as the admin. File blobs shares that you can manage. So you can see me as this one user has created this share a little bit ago. And then background tasks. You can see what is done, what's finished. We have a couple different pro things that I'm not going to get into. Ooth apps. I mean, can we do it? Add a new OOTH app. Why does it say on their site that it's not allowed? I don't feel like testing this now, but yeah, we got the redirects. So yeah, you might be able to actually do this for free, which is cool. Yeah, see there it is. It's weird that they have this under the pro edition. Oh well. And then from there, of course, we could go back to the homepage and go and manipulate and do what we need to do. Now, real quick, like I'm going to go to my Proxmox and here under Windows, let's fire her up, shall we? We're going to check out this Windows app again. really hope they make one for Mac OS and Linux because then this might be something I can actually use because I am not a fan of using Windows. I prefer my good old Unix backend. So, here it is. I'm going to resize this window a bit so we can see it better. Really, the only reason why I have Windows on here is specifically for using Rufus. You can see I got Rufus there ready to go and that that's about it. Every once in a while I need a uh Windows installation to test something like in my last video when I tested that uh the GPU. My dedicated Windows instance is specifically for making temporary Windows instances. All right, add drive. I mean, it looks pretty. Do my little Netbird proxy domain there. And looks like we're going to authenticate it right through here. So, we got some permissions. Let's let's authorize the app. So, mount the desktop client. Just going to mount directly to my files and we'll hit open here. So now we could browse for a local path. Yeah, let's let's do something in home. Let's make a new folder called cloud. Reve enter. Select that folder. Finish. And now it should should be looking good. So if I open my files. Hey, very nice. So then for like the NetBird assets, I should be able to rightclick and then view online sync selected now. So that should sync up and we will have a little application down here. Buttons not wanting to work. Let's dive into the settings here. So we have our drive with links uh under general. I'm not seeing an option to like automatically keep everything synced and downloaded so it's available for offline use which is a setting I would want. So that is cloud rave. Cloud Reeve, Rev something. For me to switch out NexCloud for something like this, they are going to need much more when it comes to client side stuff. Windows and iPhone is definitely a good start, but we're going to need a little bit more out of it, including some more options in the settings to keep everything synced no matter what. But overall, when it comes to simple file management, sharing files, and things like that, the feature set is strong. And this isn't going to be something that I'm going to use right now on a permanent basis, but it is definitely something I'm going to keep my eye on and see if they do add some of those features that I'm looking for. With all that, do check out our sponsor, Incogn. Big thank you to them for sponsoring the video. It's a great service. Get your name off of all those data broker websites. Additionally, I'm making my own little app. It's a vi vibe coded hunk of slop at the moment. I shouldn't be so mean. It's pretty nice. Spent like two weeks just making the plan files for it. But if you're interested in helping me test it out, maybe submit some issues, that would be nice. That will also be linked down below. With all that, I do hope you have an absolutely beautiful day and goodbye.
Video description
Take your personal data back with Incogni! Use code TECHHUT at the link below and get 60% off an annual plan: http://incogni.com/techhut In this video, I check out CloudReve, a beautiful and feature-rich self-hosted file management server. I've been meaning to try this one for a while — it's a slick alternative to Nextcloud if all you really need is files. We'll go through pricing, spin it up with Docker on Proxmox, and dig into features like remote downloads, the built-in markdown editor, file sharing, the Windows desktop client, and more. 📖 RESOURCES https://github.com/cloudreve/Cloudreve 🏆 FOLLOW TECHHUT X (Twitter): https://bit.ly/twitter-techhut MASTODON: https://bit.ly/mastodon-techhut BlueSky: https://bsky.app/profile/techhut.bsky.social INSTAGRAM: https://bit.ly/personal-insta 👏 SUPPORT TECHHUT (all links below this line will earn us commission) BUY A COFFEE: https://buymeacoffee.com/techhut YOUTUBE MEMBER: https://bit.ly/members-techhut —PAID/AFFILIATE LINKS BELOW— 🛎 RECOMMENDED SERVICES VPN I USE: https://airvpn.org/?referred_by=673908 📷 MY GEAR HARD DRIVES: https://serverpartdeals.com/techhut MinisForum Tablet: https://amzn.to/3SeMmds Beelink N200: https://amzn.to/3xZjeQs Raspberry Pi 5: https://amzn.to/4f3yUCN Q1 HE QMK Custom Keyboard: https://www.keychron.com/products/keychron-q1-he-qmk-wireless-custom-keyboar?ref=techhut ASUS ProArt Display: https://amzn.to/4i4cAKz 00:00 - Intro to CloudReve 01:00 - Pricing & Free vs Pro Features 02:11 - Incogni (Sponsor) 03:19 - Installing with Docker on Proxmox 04:36 - Docker Compose Walkthrough 05:44 - First Look at the UI 06:11 - Image Viewer & File Browsing 07:05 - Remote Download Feature 08:13 - Built-in Markdown Editor 08:46 - Sharing Files & Reverse Proxy 09:45 - NetBird Proxy Setup 10:33 - Admin Dashboard & Settings 12:17 - User Management 13:29 - Windows Desktop Client 15:27 - Final Verdict