We can't find the internet
Attempting to reconnect
Something went wrong!
Attempting to reconnect
Analysis Summary
Worth Noting
Positive elements
- This video offers a highly practical, hands-on demonstration of configuring Rclone with Google Drive API, which is a complex task for many home lab enthusiasts.
Be Aware
Cautionary elements
- The creator's affiliation with NetBird is mentioned but the depth of that professional relationship is not fully detailed, which may color the recommendation of tools integrated with that ecosystem.
Influence Dimensions
How are these scored?About this analysis
Knowing about these techniques makes them visible, not powerless. The ones that work best on you are the ones that match beliefs you already hold.
This analysis is a tool for your own thinking — what you do with it is up to you.
Related content covering similar topics.
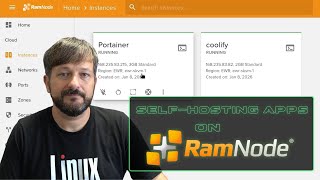
How to Deploy Self-Hosted Apps on a RamNode VPS
Learn Linux TV
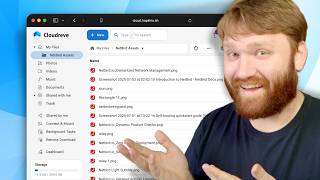
This Nextcloud Alternative Caught Me Off Guard
TechHut
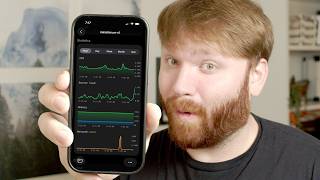
MUST HAVE Home Server Companion Apps (mobile)
TechHut
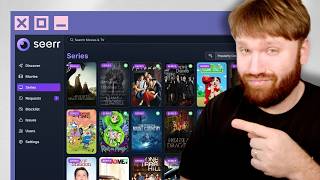
You need to DITCH Overseerr and Migrate to Seerr
TechHut
if you're running Docker you NEED to checkout Dockhand!
TechHut
Transcript
So I recently set up duplicati in a video and there was definitely some feedback and some really good suggestions on alternatives to that. But I want to do you something better. This is zero. It is a very new uh backup solution that you can run in your home lab that can do just about everything that we saw in services like duplicati. Do note it's early version. So do pair this with another backup solution at least until they get out of their uh early development stages. If I go down here to features, you can see we have automated backups, flexible scheduling, end to-end encryption, and multi-protocol support with a lot included by default. But then if I scroll down, they have additional support for items such as Arclone remotes right here. It's a bit more involved to set up, but they do support 40 plus cloud providers via Arclone. And then, of course, some of these just right out of the gate. So, what we're going to be doing in this video is setting all this up, getting some backups going, and showing you how powerful this little tool actually is. But first, we need to thank our sponsor, Floppy Data. If you're somebody who needs a proxy, whether that's residential, data center, mobile, with over 195 locations, Floppy Data is a great option for you. For specific use cases, proxies can solve a lot of issues much better than VPNs, especially for tasks that require multiple IP addresses, such as data scraping, account management, or accessing georestricted content without getting flagged. For example, if you're trying to do something like self-host Firebase without some of their proprietary technology, just doing it with your single residential IP address, you're probably going to run into some problems. Floppy Data has you covered again with millions of global IP addresses, flexible proxy options, including rotating or static IP addresses, and it's cost effective with data center proxies starting at 60 cents with a dollar per gigabyte, giving you some of the best prices on the market. They have top tier security and easy team management, so you can manage team access from one place and they do integrate with go login, the anti-detect web browser. So with that, I do highly recommend floppy data. It is a fast, performant, reliable proxy solution. So, if you're interested in floppy data, do go ahead and check out the first link down in the video description. So, first what I'm going to do is I'm going to get this set up on a or that Fedora machine that I set up in my previous video. So, we are just going to grab this compose file right here. Now, I already did a video on this on the Net Bird channel if you're interested in like hooking it up to off-site resources such as VPS's. So on this one, I really dive into the REST server setup, but on this one, we're going to more focus on backing up to like a cloud provider, but REST server is really cool. I do recommend you check this out and subscribe to the Net Bird channel if you haven't already. And I am going to be doing this on Fedora server, the same server we set up in the previous video, but I already gave up on Podman and switched it out for Docker. So sorry. And what I'm going to do is I'm just going to make a new directory called zero byte cd into that directory and then make a new compose yaml just like that. And then I'm going to drop in this compose. Now I have better luck with privileged true being on but you shouldn't need that variable. Basically what we have going on we have the container name. I enabled that. We're cap adding the CIS admin and that and the fuse is mostly for like SMB file shares things like that. This is going to be running on the port 4096. We will quickly change the time zone to America, Los Angeles, and we want the local time. We have the location, or at least the default location for our local directory, which is going to be right here. And then we can add more locations if we'd like to. For example, in that previous video, we made a backups folder. So, if I go data backups, I think it might be backup. And we did zero byte. Just like that. I'll just put this in a data folder within the container. And I'm going to make sure real quick that the uh folder is correct. So it is backups just like that. Output that. And then all I'm going to do is a docker compose up. Uh just to make sure I just want to jump right into the log and see it boot up. So like make sure there's no issues or anything like that. Which it does look like it's good to go. So I'm going to hit D to detach myself from that instance. And then we have welcome to zero bytes. Let's go ahead and full screen this guy and give ourselves a username and then a password. And then we'll create the admin user. Type in our password once again and then download our recovery key. Save that. Back it up somewhere. And here we are. We're in. This is zero bite. One thing that you'll first notice it is a absolutely beautiful piece of software. I do like the uh kind of design philosophy of it. And basically what we have going on here is first the volumes. So this is going to be the data that you want to get backed up. And they do support a couple different protocols here including uh NFS, SMB, webdev, and rclone. And then we have repositories, which this one they support a little bit more. This is local, S3, Cloudflare, SFTP, REST, which again I cover in the Netbird video, and our clone. We have our backups here. Nothing set up yet. We have some notification settings and then our settings settings. Now the first thing that I'm going to do is just create a backup of my image directory that's currently on my unrade machine. I'm going to make a secondary copy of it here on this machine that has zero byte on it. So kind of step two in the one 123 backup methodology in which I have two copies on two different platforms at least locally. So under volumes we're going to create a volume and this is going to be an SMB share. This I'm going to call image and then punch in our server IP address. So mine's 17310.10. Share is going to be images. And then our credentials here. And if I test the connection, you could see the connection is successful. Of course, you're going to need to have shares and all that set up, but we are good to create this volume. So now we could see my capacity, how much space I'm using. We're good to go. So from there, we're going to create a repository. Okay, this one's going to be a local repository. So, I'm just going to call it local. And for here, we'll go local. And you can see it filled in the var lib zero byte repositories, but that will put it on the uh SD card, which isn't too big on my system. So, I'm going to go ahead and change this. And I understand I already have something mounted specifically under data here. That is the directory I mounted earlier, which points to the repositories and the backup directory of my uh spinning disc drives. So I can hit done and that looks good. So let's create our repository and then we could see all the settings. We could see existing snapshots. We don't have any yet. So we'll run our first backup job. So if I create a new backup job first, we're going to select the volume which I only have image here. We just call this image local backup. And for our repository, we'll select local backup frequency. Uh maybe daily. Daily should be fine. execution time, let's say 1 a.m. And then for our backup path, we can see within that uh image share or the image share that I added. We have a bunch of stuff for image itself, I really only need to back up the library folder cuz that's kind of like the raw data that's actually kind of neatly organized. So from there, everything else looks good. You can see you do have a ton of other options that you could go ahead and pick from, including our retention policy. The examples here are pretty good. So, keep daily. I'll keep seven days a week and then four for weekly, six for monthly. And that should really be good. And this works just how like snapshots would work with ZFS where it's not going to store like copies of data. It's really only going to store the changes. So, it's really efficient when it comes to actual storage capacity and how much it uses. So, let's go ahead and click on create. And there we go. We're good. We're good to go. It's enabled. And just to go ahead and start it, we can run a backup now. And there is a lot of data. So it's actually running. This might not have been the best idea, but you can see it's going. It's got a lot of files, a lot of storage. But it is going relatively quick. It's going about as quick as a one gig nick is going to do, at least on my network. But I'll go ahead and stop that backup and we'll dive more into those after we set up our clone. And at least this step of the process is going to be kind of new territory for me. I haven't personally set this up yet. So, now we're going to be doing this together. Hopefully, it works. If you're watching this video, it did. Right here, using our clone for storage. I did mention in my previous uh duplicate video that I have the disfortune of paying for a uh Google Workspace subscription. I never use the uh drive functionality because I don't like to have my data there. But if it's encrypted and broken up and the providers really don't actually have control of the data or can use it for their own purposes, I don't mind uploading some things to the cloud, especially things that are really important as long as they're encrypted. What we're going to want to do is install our clone. We have a little curl script here. So, let's just run it. Actually, let's go do this in my home directory and drop it on in. And I'm going to get rid of pseudo bash. You just kind of want to skim the sh file, which I highly recommend because it's never a good idea just to run a random sh script that you copy paste from the internet. And this one looks pretty good. So I'm going to paste that in again and actually run it. There we go. Wasn't really cooperating. So I had to run a pseudo sh and point it to the downloaded file after I ran wget. So do note that. From there, we're going to go to the rclone config. Drop that on in. And now we're going to set up a new remote. So let's hit N. Continue. Uh I could call this G drive. Enter. And now look at that. We got a bunch of different options. So we're going to find Google Drive somewhere. Ah, there it is. Number 22. So let's hit enter. I am going to go to the Google Cloud Console and under APIs and services, you can see I'm already in a project here called automations. just so I go through the entire thing. I could do a new project, call it G Drive backup and create that. There we go. Make sure we have the right project selected. And then under clients, we could click get started here. Application type, this is going to be web our clone web, something like that. So from there, let's go ahead and make sure we have the uh drive API. So Google Drive API within G Drive backup. We'll enable it. There we go. And now let's go over to I believe it's credentials. So credentials right here. Let's create a credential and we're going to need the OOTH client ID. So here we're going to select desktop app and this will just be my um Arclone client and then hit create. And then there we go. We got some stuff. So I'm going to grab my client ID. Uh under OOTH we'll go audience. I'm going to publish the app. Confirm. And then drop that in right here. Hit enter and then we'll grab the client secret. Drop that in right here and hit enter. I am going to give it full access. And now here I think we could just leave this empty. And we are not going to edit the advanced config for this option right here. I can't really access my browser. So we are going to say no. I'm going to copy this string here. So let's give that a copy. Um and let's open a new tab. And I'm just going to do brew install rclone. See if that's just already in there for us. So we're going to need to run this on a local machine. Good. And from there, we'll paste this on in. And look at that. It opened up the web browser for us. So if I click on this, theoretically, everything should work. Success. You're done. Please go back to our clone, paste the following on the remote machine. So I'm going to grab this, copy, and then drop her on in here. So, hit enter. Uh, this is not a shared drive. And yes, we'll keep it. And there we go. I think we're rocking and rolling. So, let's go ahead and quit out of there. Now, if we go back to zero here and let's see if we just create a new repository. Oh, it's still not showing. We need to add the rclone configuration to zero. So, we're going to cd into zero. Nano that compose file and drop her on into the volumes. Just like that. Looking good. loop. So let's control O to output that and then restart the container. So let's docker compose down and then compose up. And now if I go in here, let's give this a refresh. If I select my back end, well, what do we have there? We have our clone. And we should have G drive right there. And within drive, you can see I have my duplicate folder, but I'm going to make a new folder. Let's go folder. I'm going to call this one zero byte and click on create. So now I should be able to just go zero byte right here. And all of this looks good. I'm going to call this um Google Drive and then create that repo. And hopefully hopefully it works. It's thinking about it. Hey, repository successfully created. Let's uh let's test this out, shall we? So for that, let's go ahead and create a new backup. And I'm going to call this um image offsite. We'll select Google Drive as our repository. and might as well have it do it daily with kind of some of the same stuff. I'll go a little little later on this one. Select our library and then change some of the retention policy stuff. So, let's do seven 4 6 and then we can create. So, there we go. It's created. Let's start the backup and see if it works. And it looks like it's in progress. It's got some things moving. If I go over here and open up my zero byte folder. Yay, it worked. And now what I'm going to do is show you how to actually restore some of this data. So we have our backups right here. We see image local and the offsite. So I'm going to open up this local one because it is completed or completed the first backup. And I could actually go down and view the snapshot just by clicking on it. And then I could go right into the file browser here if I would like to and skim and see what's actually in there. Or if I go ahead and click on restore, I can do this. So if I go like library for example, admin and let's just say this picture right here. And then what we would do is change the location. So you can back up directly to the original location or if I picked custom location, we can change this and we could throw it somewhere else if we would like to. And then that backup will be dropped in. Now we do have some notifications and mirrored repositories here. First for notifications. If I add a notification, you can see I've already added a a way to get notifications with Slack. So that's under here, notifications. We have the notification types or locations. For this Slack one, all you need really is a web hook URL. Give it a username and you're good to go. Most people use Discord and all that, of course. But you can see here I tested it out. Test notification. It's working completely fine. And if I go back to notifications, create a destination, you could see the type. So you have email, Slack, Discord, um, Telegram, and some others right there. So if I went to backups to this image local one, let's add a notification for Slack, and we will do success and start. Actually, I don't care if it starts. I just care if it succeeds. So I would save that and then I would get notified in that regard. And just to give an example, if I did backup now, starting the backup process, and then you can see the backup has completed successfully right there on Slack or whatever notification platform that you want to use. I'm not a fan of Slack. I just have to use it for a couple different things. So, I already have it open all the time. Might as well set things up there. And then down here, we have mirror repositories. This is really cool. This will kind of help you do the uh 321 situation, which actually if I have image local backup and image offsite with mirrors, I shouldn't even really need to have two separate backup jobs cuz I could just drop it in local. And yeah, so that's really cool. I didn't notice that before. So this might be a new feature since last time I uh tried around it and played with this in the Netbird video. So, I'm definitely going to rethink or redo how I do this. But anyways, this is a phenomenal tool. I do recommend you go and check it out. So far, it's working so good, or at least everything's working for me. Now, again, this is incredibly early development software, so I wouldn't count on using this as your sole and only backup solution, at least as of now. This application is definitely going places. the developer seems like he's passionate, loves the project, it's open source, so I think as time goes on, this will get more and more reliable as more and more features are added. I am looking forward to it. And really with all that, I do hope you have an absolutely beautiful day. Please subscribe so you don't miss my future videos. N goodbye.
Video description
Powerful proxies with the lowest prices on the market (from $0.6) – Floppydata: https://bit.ly/floppydata_techhut Use promo code EXTRA50 to get +50% extra traffic with your purchase! 20% OFF with promo-code YTGL20 on the top multi-accounting browser – GoLogin: https://bit.ly/gologin_techhut Zerobyte: Powerful backup automation for your remote storage. Encrypt, compress, and protect your data with ease. Zerobyte is a backup automation tool that helps you save your data across multiple storage backends. Built on top of Restic, it provides a modern web interface to schedule, manage, and monitor encrypted backups of your remote storage. ZeroByte: https://github.com/nicotsx/zerobyte REST Server: https://netbird.io/knowledge-hub/zerobyte-rest-server 🏆 FOLLOW TECHHUT X (Twitter): https://bit.ly/twitter-techhut MASTODON: https://bit.ly/mastodon-techhut BlueSky: https://bsky.app/profile/techhut.bsky.social INSTAGRAM: https://bit.ly/personal-insta 👏 SUPPORT TECHHUT (all links below this line will earn us commission) BUY A COFFEE: https://buymeacoffee.com/techhut YOUTUBE MEMBER: https://bit.ly/members-techhut —PAID/AFFILIATE LINKS BELOW— 🛎 RECOMMENDED SERVICES VPN I USE: https://airvpn.org/?referred_by=673908 📷 MY GEAR HARD DRIVES: https://serverpartdeals.com/techhut MinisForum Tablet: https://amzn.to/3SeMmds Beelink N200: https://amzn.to/3xZjeQs Raspberry Pi 5: https://amzn.to/4f3yUCN Q1 HE QMK Custom Keyboard: https://www.keychron.com/products/keychron-q1-he-qmk-wireless-custom-keyboar?ref=techhut ASUS ProArt Display: https://amzn.to/4i4cAKz 00:00 - Start 00:59 - FlobbyData (Sponsor) 02:07 - ZeroByte Setup 04:11 - ZeroByte Tour 05:07 - Local Backup 08:08 - Cloud Backups with Rclone 09:47 - Google Drive API